
Overview
Back In Stock Notifier for WooCommerce shows an email subscription form on out-of-stock products. When a product comes back in stock, the plugin emails everyone who subscribed. It is for WooCommerce store owners who want to keep in touch with shoppers who found a product sold out.
The form works for guests and logged-in customers. It supports simple and variable products (at product and variation level), grouped products, simple and variable subscriptions (WooCommerce Subscriptions) and product bundles (WooCommerce Product Bundles). Restock emails go out through a background process. The subscription confirmation email and the back in stock email use the WooCommerce email system, so you edit them under WooCommerce > Settings > Emails.
You manage everything from the Instock Notifier admin menu. There you can view and filter subscribers, change the form text and visibility, set up bot protection, optional auto coupons, sending limits and auto-delete rules, and check the plugin status.
Requirements
- WordPress 4.7 or later
- PHP 7.4 or later
- MySQL 5.6 or later
- WooCommerce 3.0 or later (WooCommerce must be installed and active)
Installation
Back In Stock Notifier for WooCommerce is a free plugin on WordPress.org. It needs WooCommerce, so install and activate WooCommerce first.
In your WordPress dashboard, go to Plugins > Add New.
In the search field, type
Back In Stock Notifierand press Enter.Find Back In Stock Notifier for WooCommerce and click Install Now.
When the installation finishes, click Activate.
A new Instock Notifier menu appears in the admin sidebar. The subscribe form now shows on your out-of-stock products.
Quick start
- Check the form on an out-of-stock product
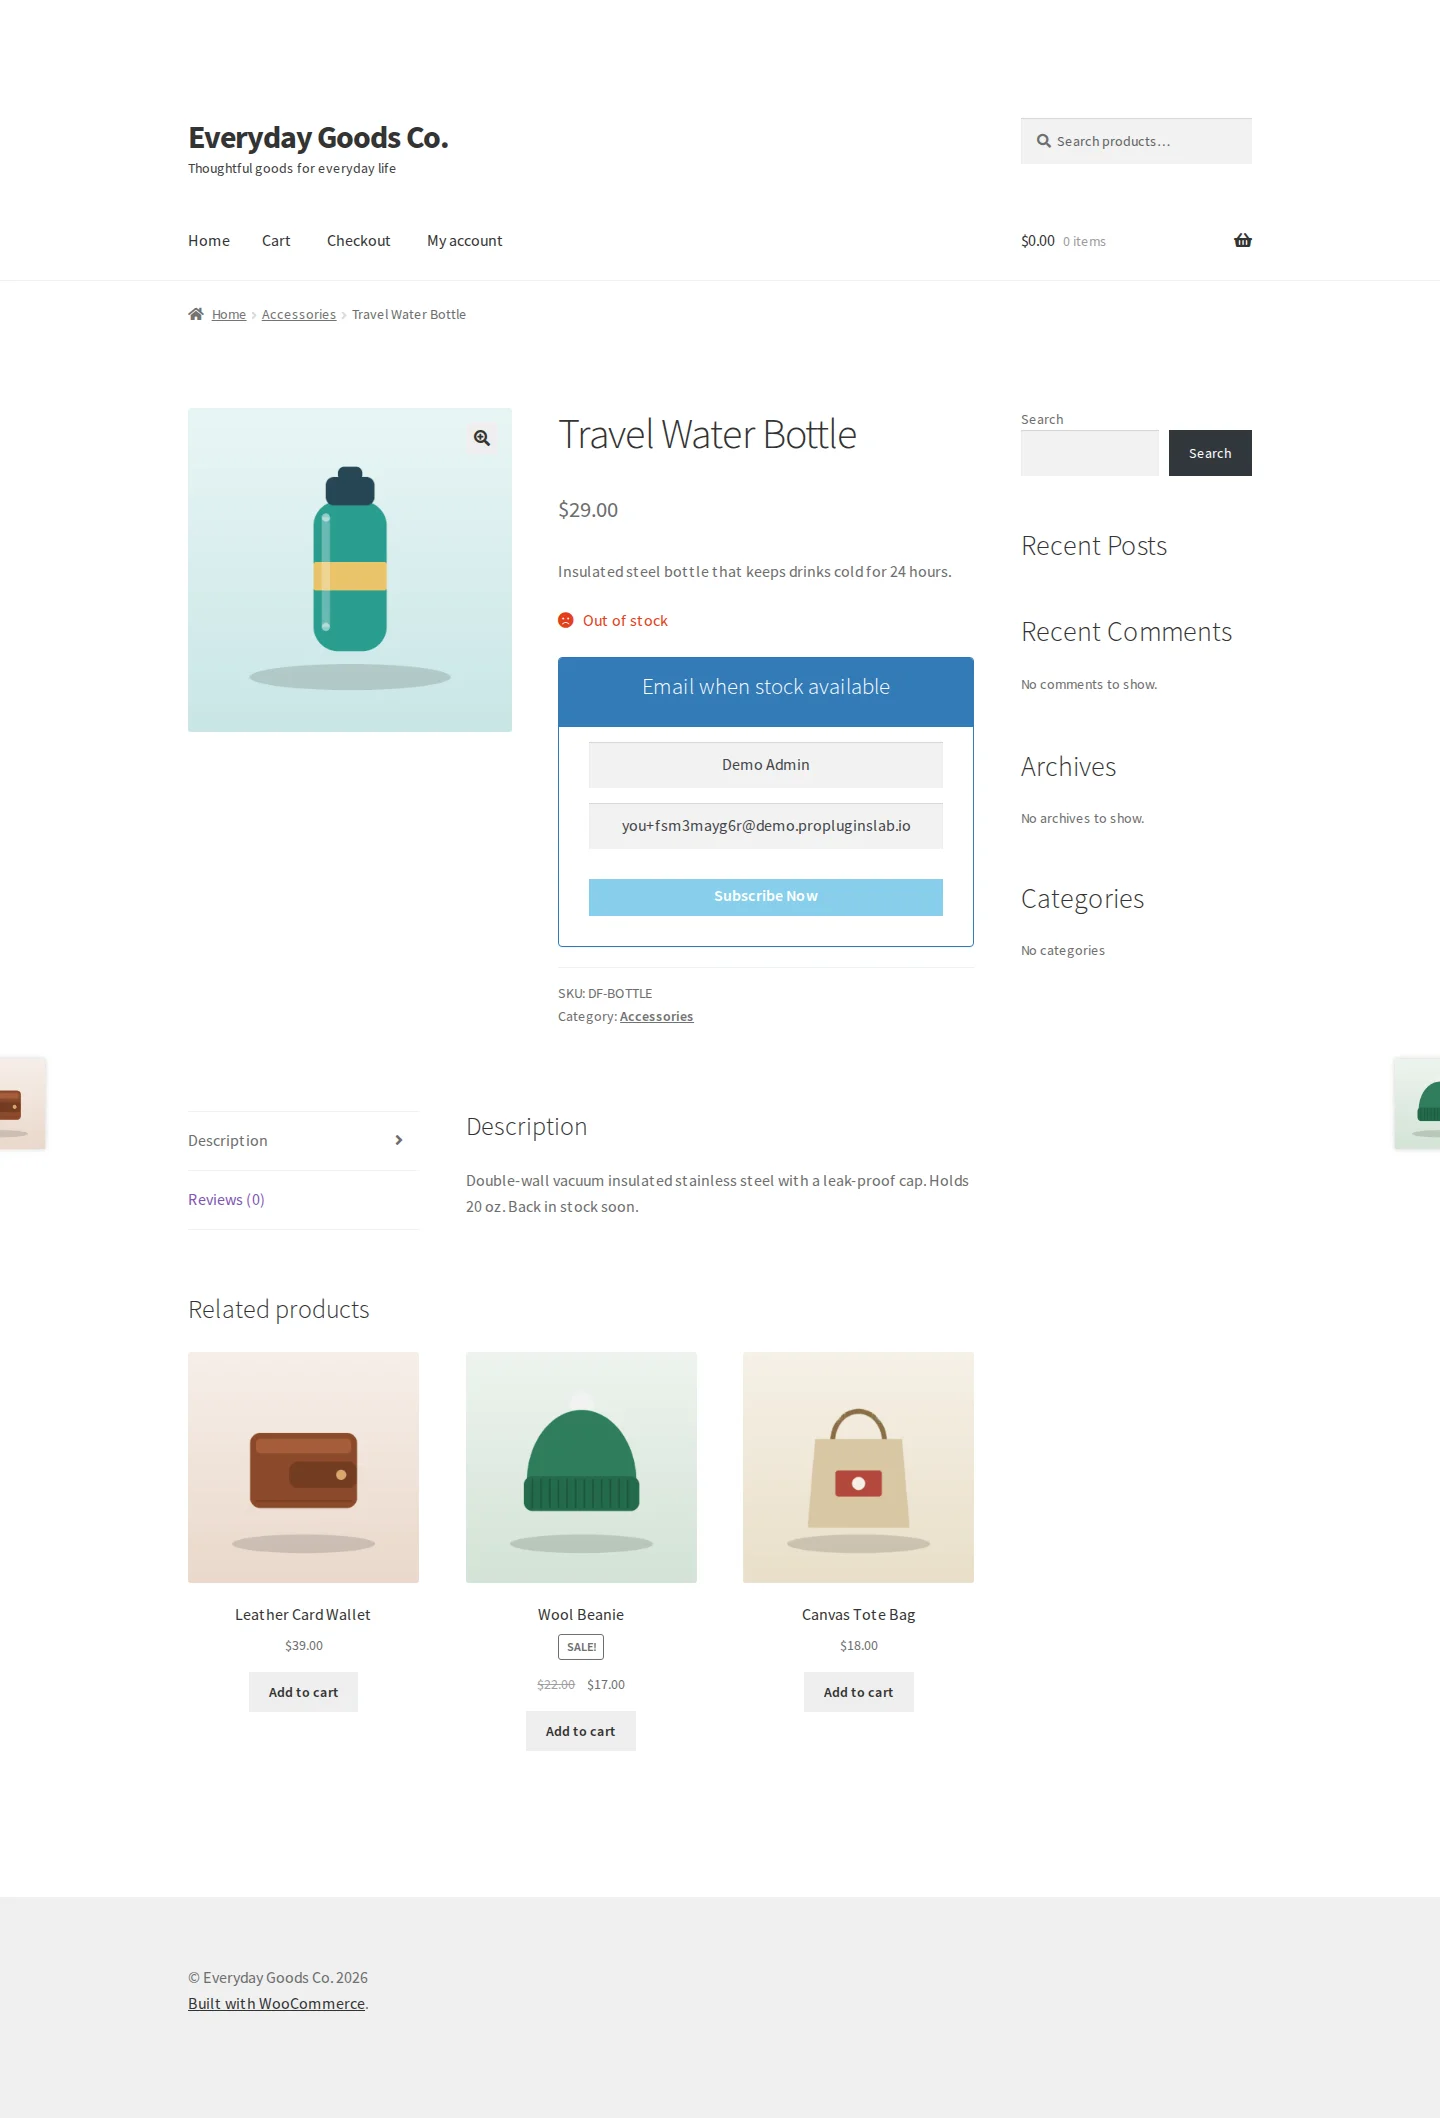
Open any out-of-stock product on your store. Under the Out of stock notice you will see a box titled Email when stock available with name and email fields and a Subscribe Now button. You do not have to set anything up first.
- Adjust the form text
Go to Instock Notifier > Settings and open the Frontend Form tab. Change the title, placeholders and button label, choose between an inline form and a pop-up, and pick a form design. Click Save Changes.
- Set the sender details
Open the Mail Settings tab. Enter the From Name, From Email and, if you need one, a Reply To Email. Click Save Changes.
- Review the two emails
On the Mail Settings tab, click Customize Subscription Confirmation Email or Customize Back In Stock Email. You can also go to WooCommerce > Settings > Emails. Edit the subject, heading and content, and check the Email preview.
- Send a test email
Go to Instock Notifier > Status and click Test Email. The page shows which address the test goes to. This confirms that your site can send email.
- Watch your waitlist grow
Go to Instock Notifier > All Subscribers to see who subscribed, the product they are waiting for, their status and when the email was sent.
#Subscribers
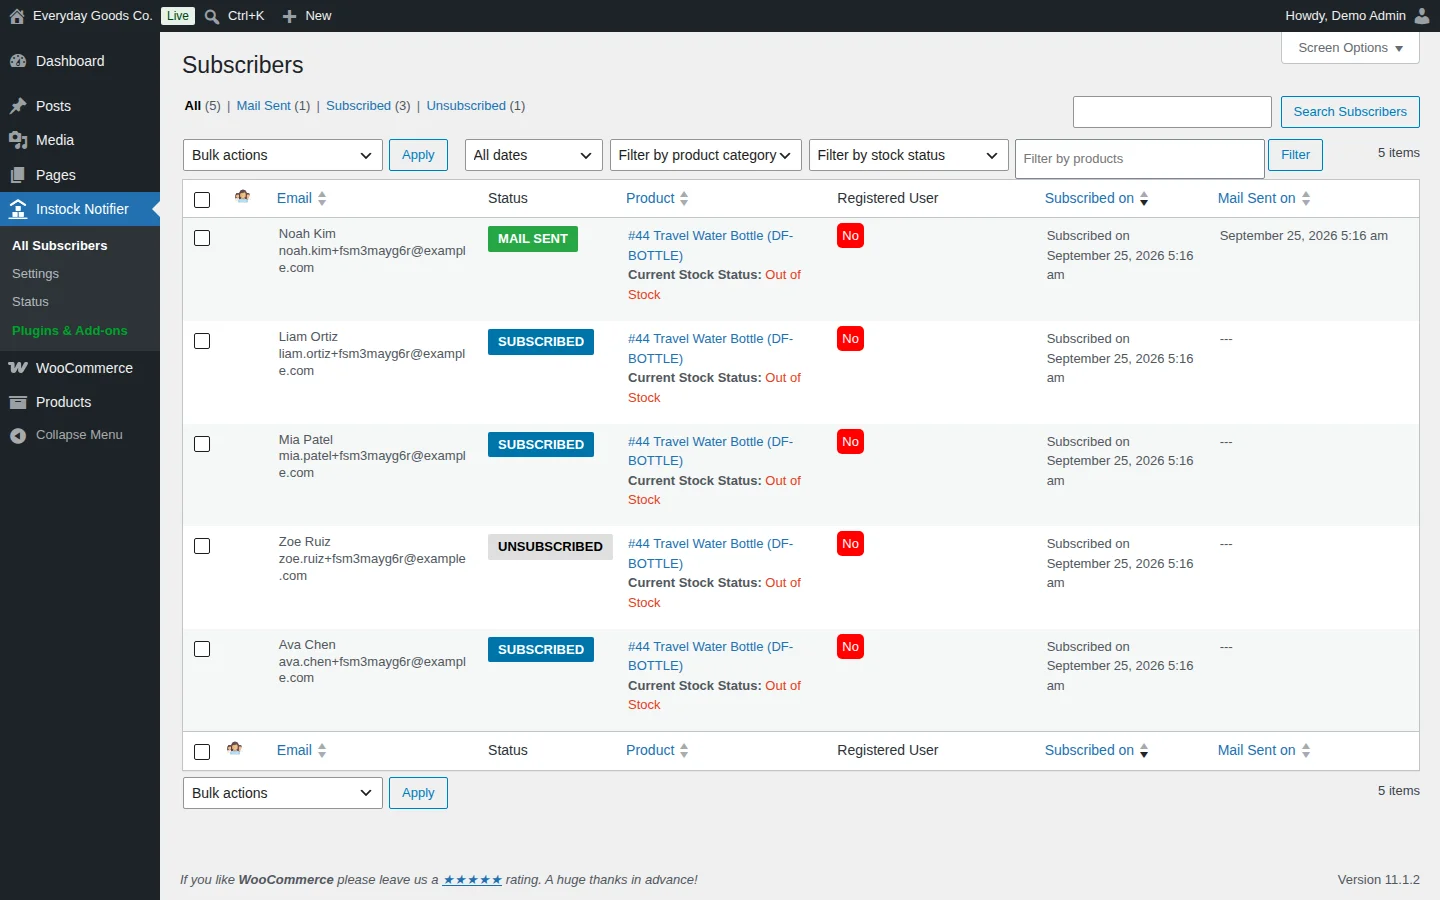
Instock Notifier > All Subscribers lists every waitlist entry. Use it to see who is waiting for which product and whether they have been notified.
The table has these columns:
- Email: the subscriber's name and email address.
- Status: for example Subscribed, Mail Sent or Unsubscribed.
- Product: the product (with SKU) and its Current Stock Status.
- Registered User: whether the subscriber has an account on your site.
- Subscribed on and Mail Sent on: when the entry was created and when the back in stock email went out.
At the top you can switch between status views (All, Mail Sent, Subscribed, Unsubscribed) and search subscribers. You can also filter by date, by product category, by stock status and by product. The stock status filter includes "In stock but below notification threshold". It helps you find subscribers who were skipped by the automatic sender so you can notify them by hand. Use Bulk actions to act on several entries at once, including sending the back in stock email manually.
The Instock Notifier menu shows a badge with new subscribers since your last visit. The badge clears when you open this list.
#Frontend Form settings
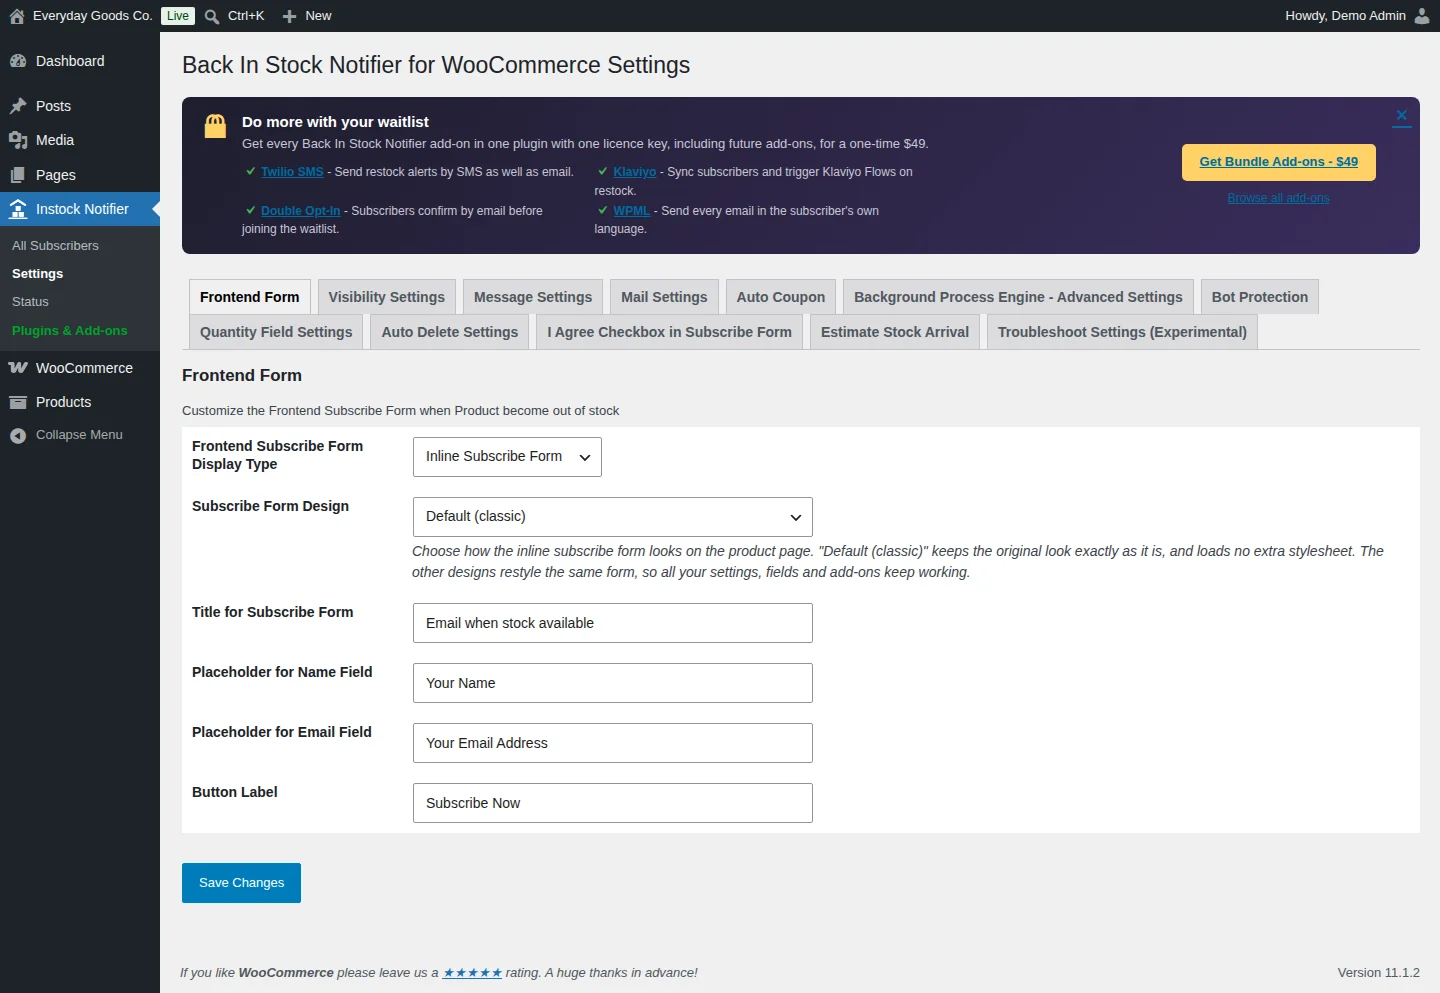
Go to Instock Notifier > Settings. The settings page is split into tabs. The first tab, Frontend Form, controls how the subscribe form looks when a product is out of stock.
- Frontend Subscribe Form Display Type: show the form inline on the product page, or as a pop-up (Pop-Up Subscribe Form). A popup design setting appears only when you choose the pop-up option.
- Subscribe Form Design: choose Default (classic), Card, Minimal, Compact (single row), Bold or Outline. "Default (classic)" keeps the original look and loads no extra stylesheet. The other designs restyle the same form, so your fields and settings keep working.
- Title for Subscribe Form, Placeholder for Name Field, Placeholder for Email Field and Button Label set the text shoppers see.
Click Save Changes after each tab.
#Visibility Settings
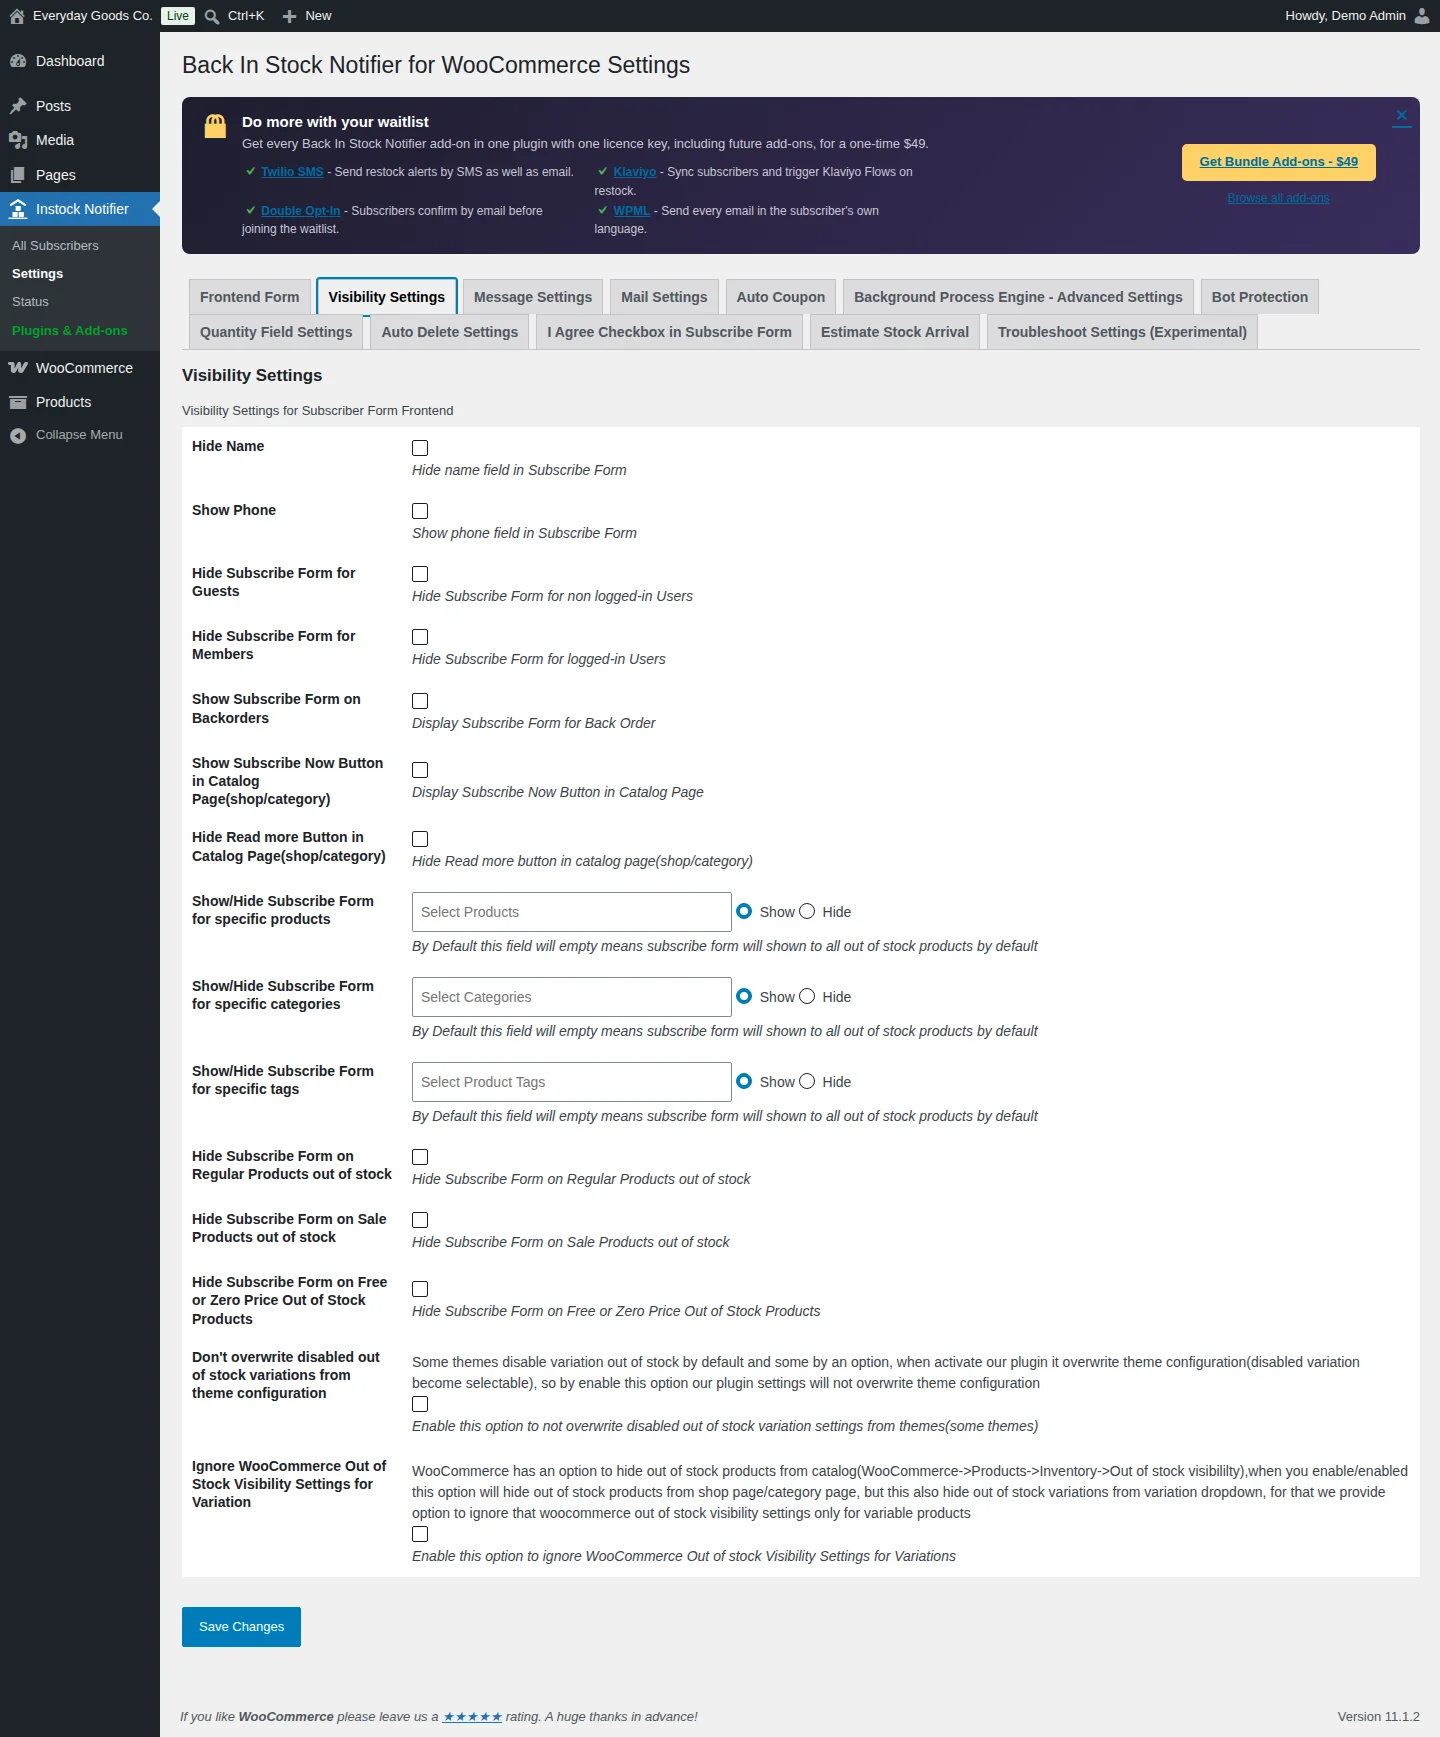
The Visibility Settings tab decides where the form appears and which fields it contains.
- Hide Name removes the name field. Show Phone adds a phone field.
- Hide Subscribe Form for Guests and Hide Subscribe Form for Members hide the form for visitors who are not logged in, or for logged-in users.
- Show Subscribe Form on Backorders also shows the form on products that allow backorders.
- Show Subscribe Now Button in Catalog Page(shop/category) adds a Subscribe Now button to shop and category pages. Hide Read more Button in Catalog Page(shop/category) hides the Read more button there.
- Show/Hide Subscribe Form for specific products, categories and tags: pick items and choose Show or Hide. When these fields are empty, the form shows on all out-of-stock products.
- You can hide the form on regular, sale, or free/zero price products that are out of stock.
- Don't overwrite disabled out of stock variations from theme configuration: some themes disable out-of-stock variations. By default the plugin makes them selectable. Enable this to keep your theme's behavior.
- Ignore WooCommerce Out of Stock Visibility Settings for Variation: WooCommerce can hide out-of-stock products from the catalog (WooCommerce > Products > Inventory > Out of stock visibility). That also hides out-of-stock variations from the variation dropdown. Enable this so variable products ignore that setting.
#Message Settings
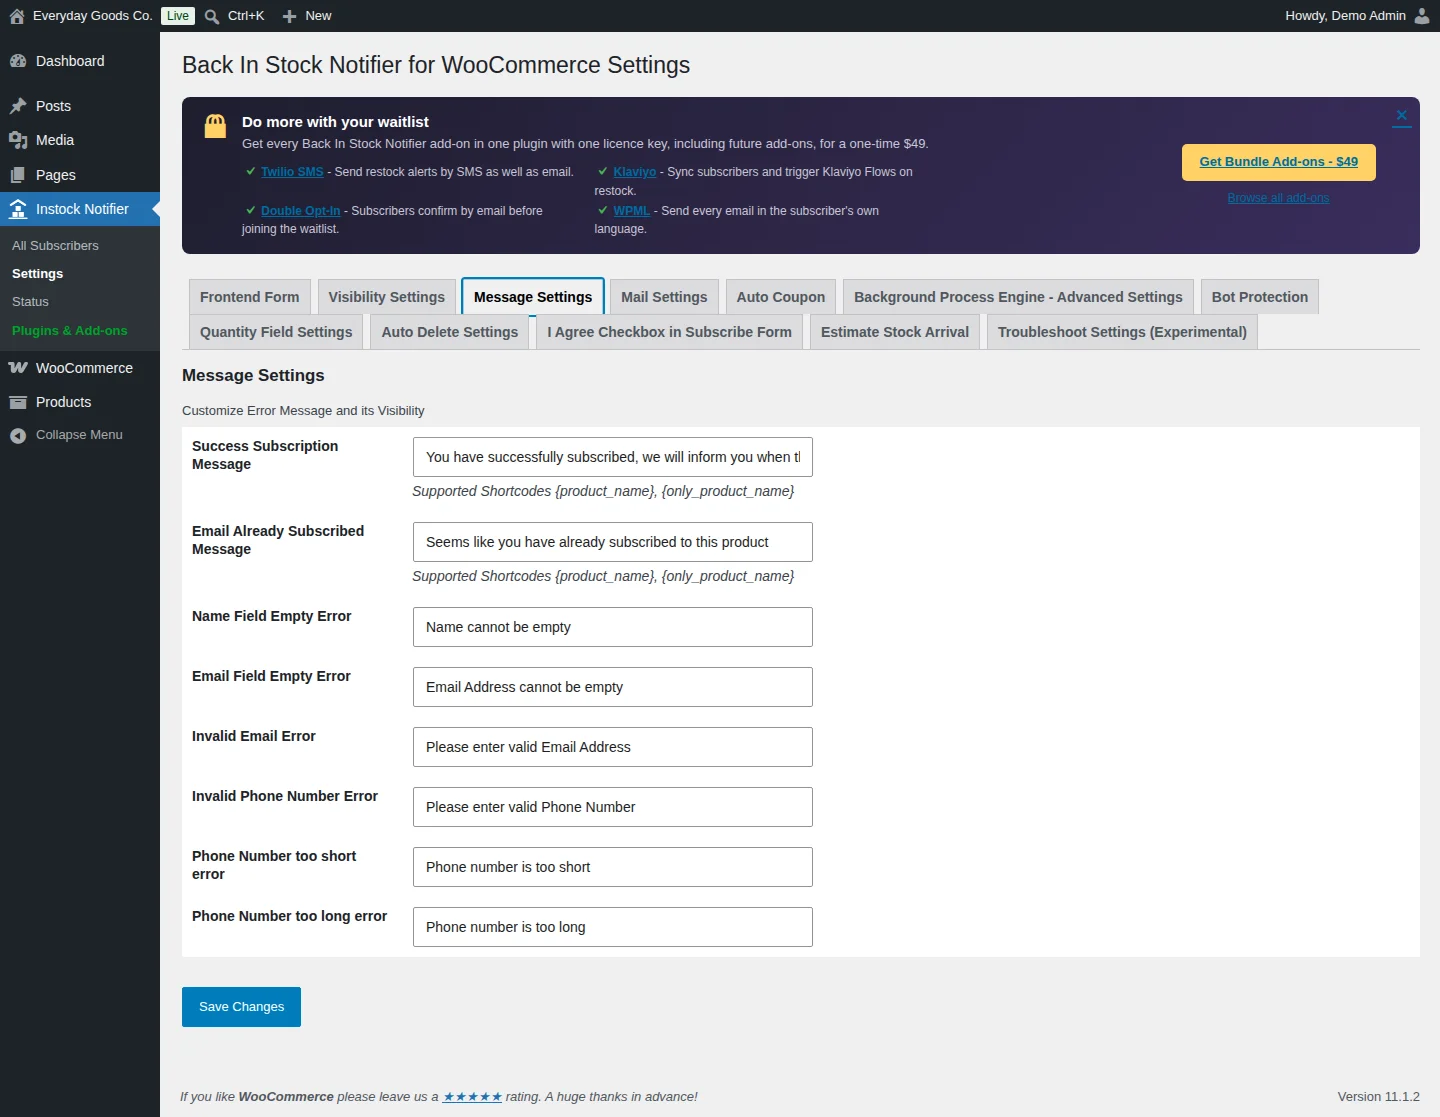
The Message Settings tab holds the messages shoppers see after they submit the form. It covers the success message, the "already subscribed" message and the error texts for empty or invalid name, email and phone fields.
The Success Subscription Message and Email Already Subscribed Message support the {product_name} and {only_product_name} placeholders.
#Mail Settings
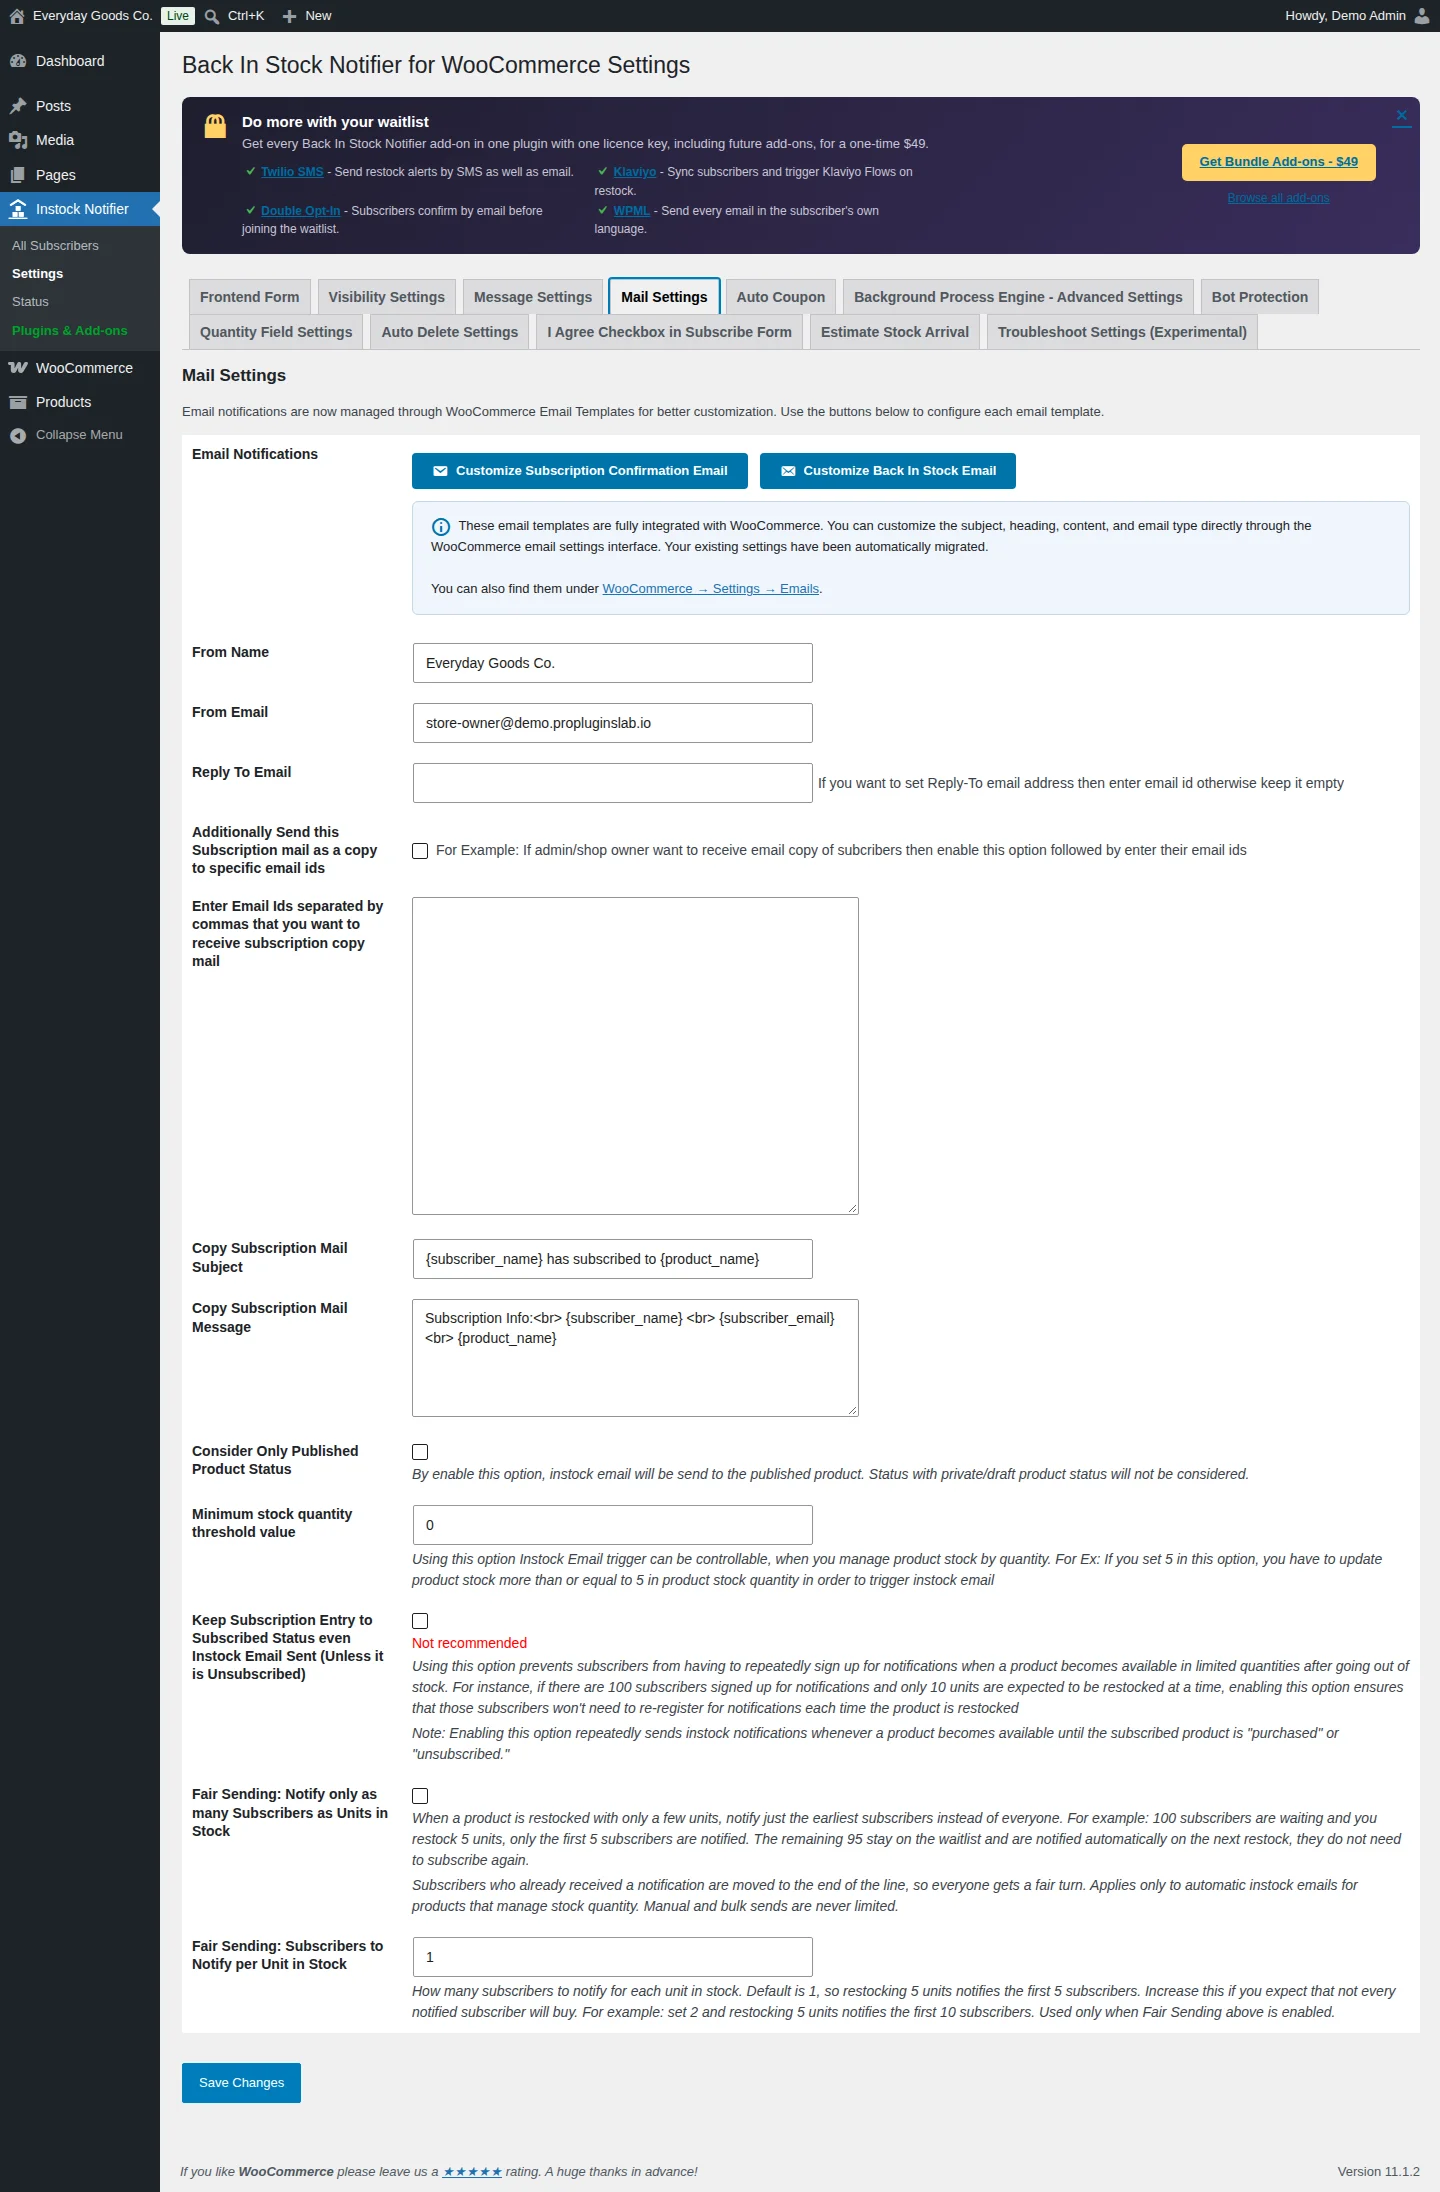
The Mail Settings tab controls who the emails come from and when back in stock emails are sent.
Email Notifications: the two emails are WooCommerce email templates. Use Customize Subscription Confirmation Email and Customize Back In Stock Email to open them (see the next section).
Sender: set From Name, From Email and an optional Reply To Email.
Copy of subscriptions: enable Additionally Send this Subscription mail as a copy to specific email ids to get an email each time someone subscribes. Enter the addresses separated by commas and edit the copy's subject and message. You can use {subscriber_name}, {subscriber_email} and {product_name}.
Sending rules:
- Consider Only Published Product Status: only published products trigger the back in stock email. Private and draft products are skipped.
- Minimum stock quantity threshold value: when you manage stock by quantity, the email is only sent once stock reaches this number. For example, with
5you must set the stock to 5 or more. - Keep Subscription Entry to Subscribed Status even Instock Email Sent (Unless it is Unsubscribed): marked Not recommended. Subscribers stay subscribed after the email. They are notified again on each restock until they purchase or unsubscribe.
- Fair Sending: Notify only as many Subscribers as Units in Stock: on a small restock, only the earliest subscribers are notified. The rest stay on the waitlist for the next restock. This applies only to automatic emails for products that manage stock quantity. Manual and bulk sends are not limited.
- Fair Sending: Subscribers to Notify per Unit in Stock: how many subscribers to notify for each unit. With
2, restocking 5 units notifies the first 10 subscribers.
#Email templates in WooCommerce
The plugin adds two emails under WooCommerce > Settings > Emails:
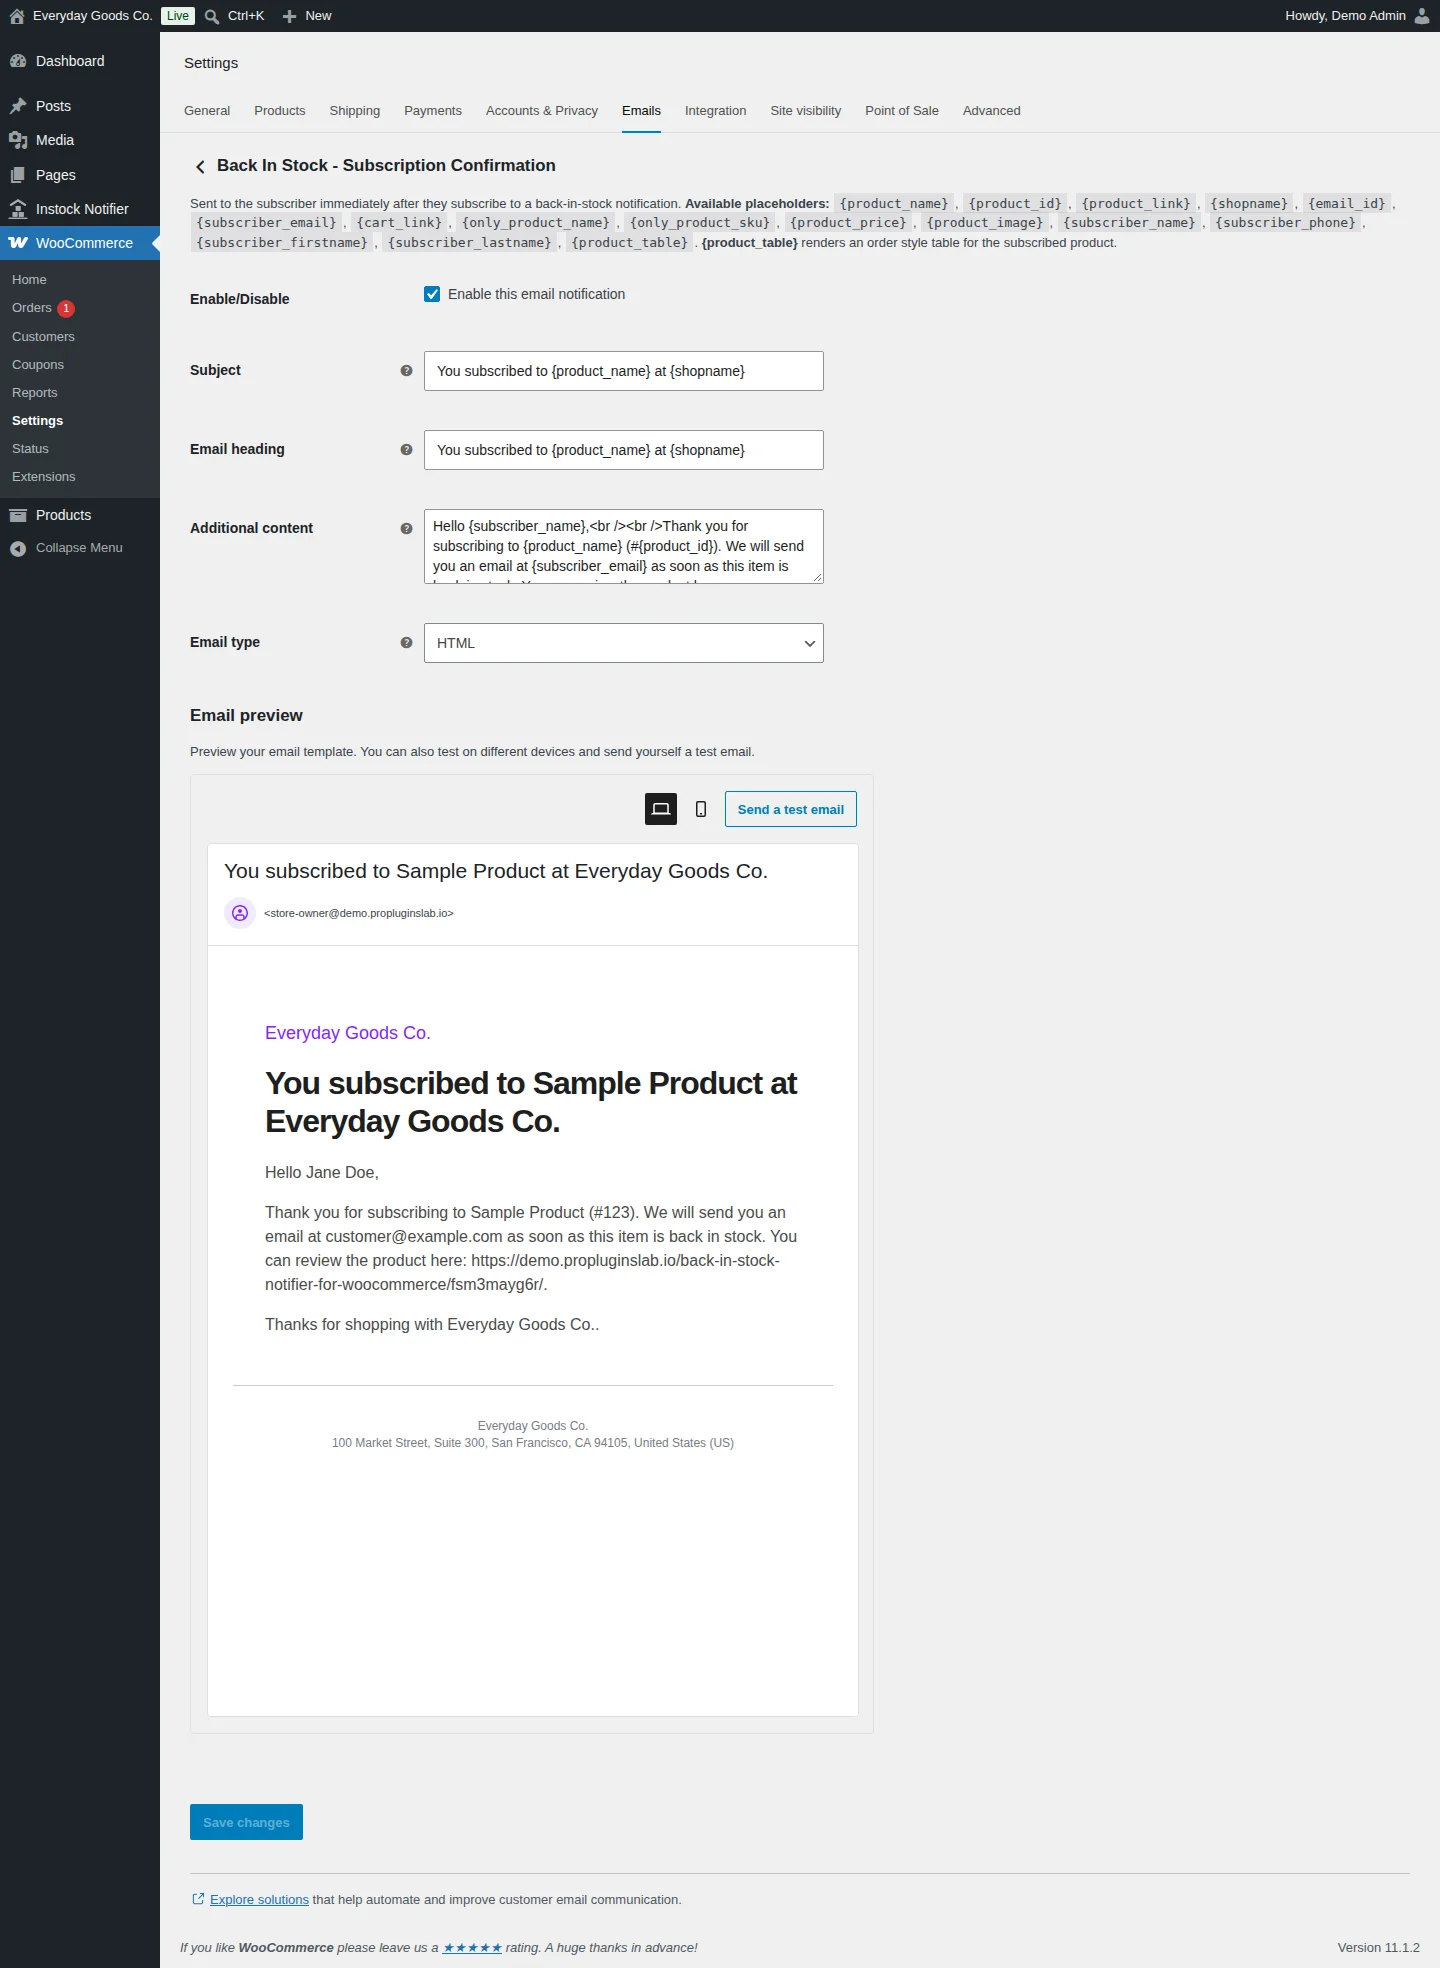
- Back In Stock - Subscription Confirmation: sent to the subscriber right after they subscribe.
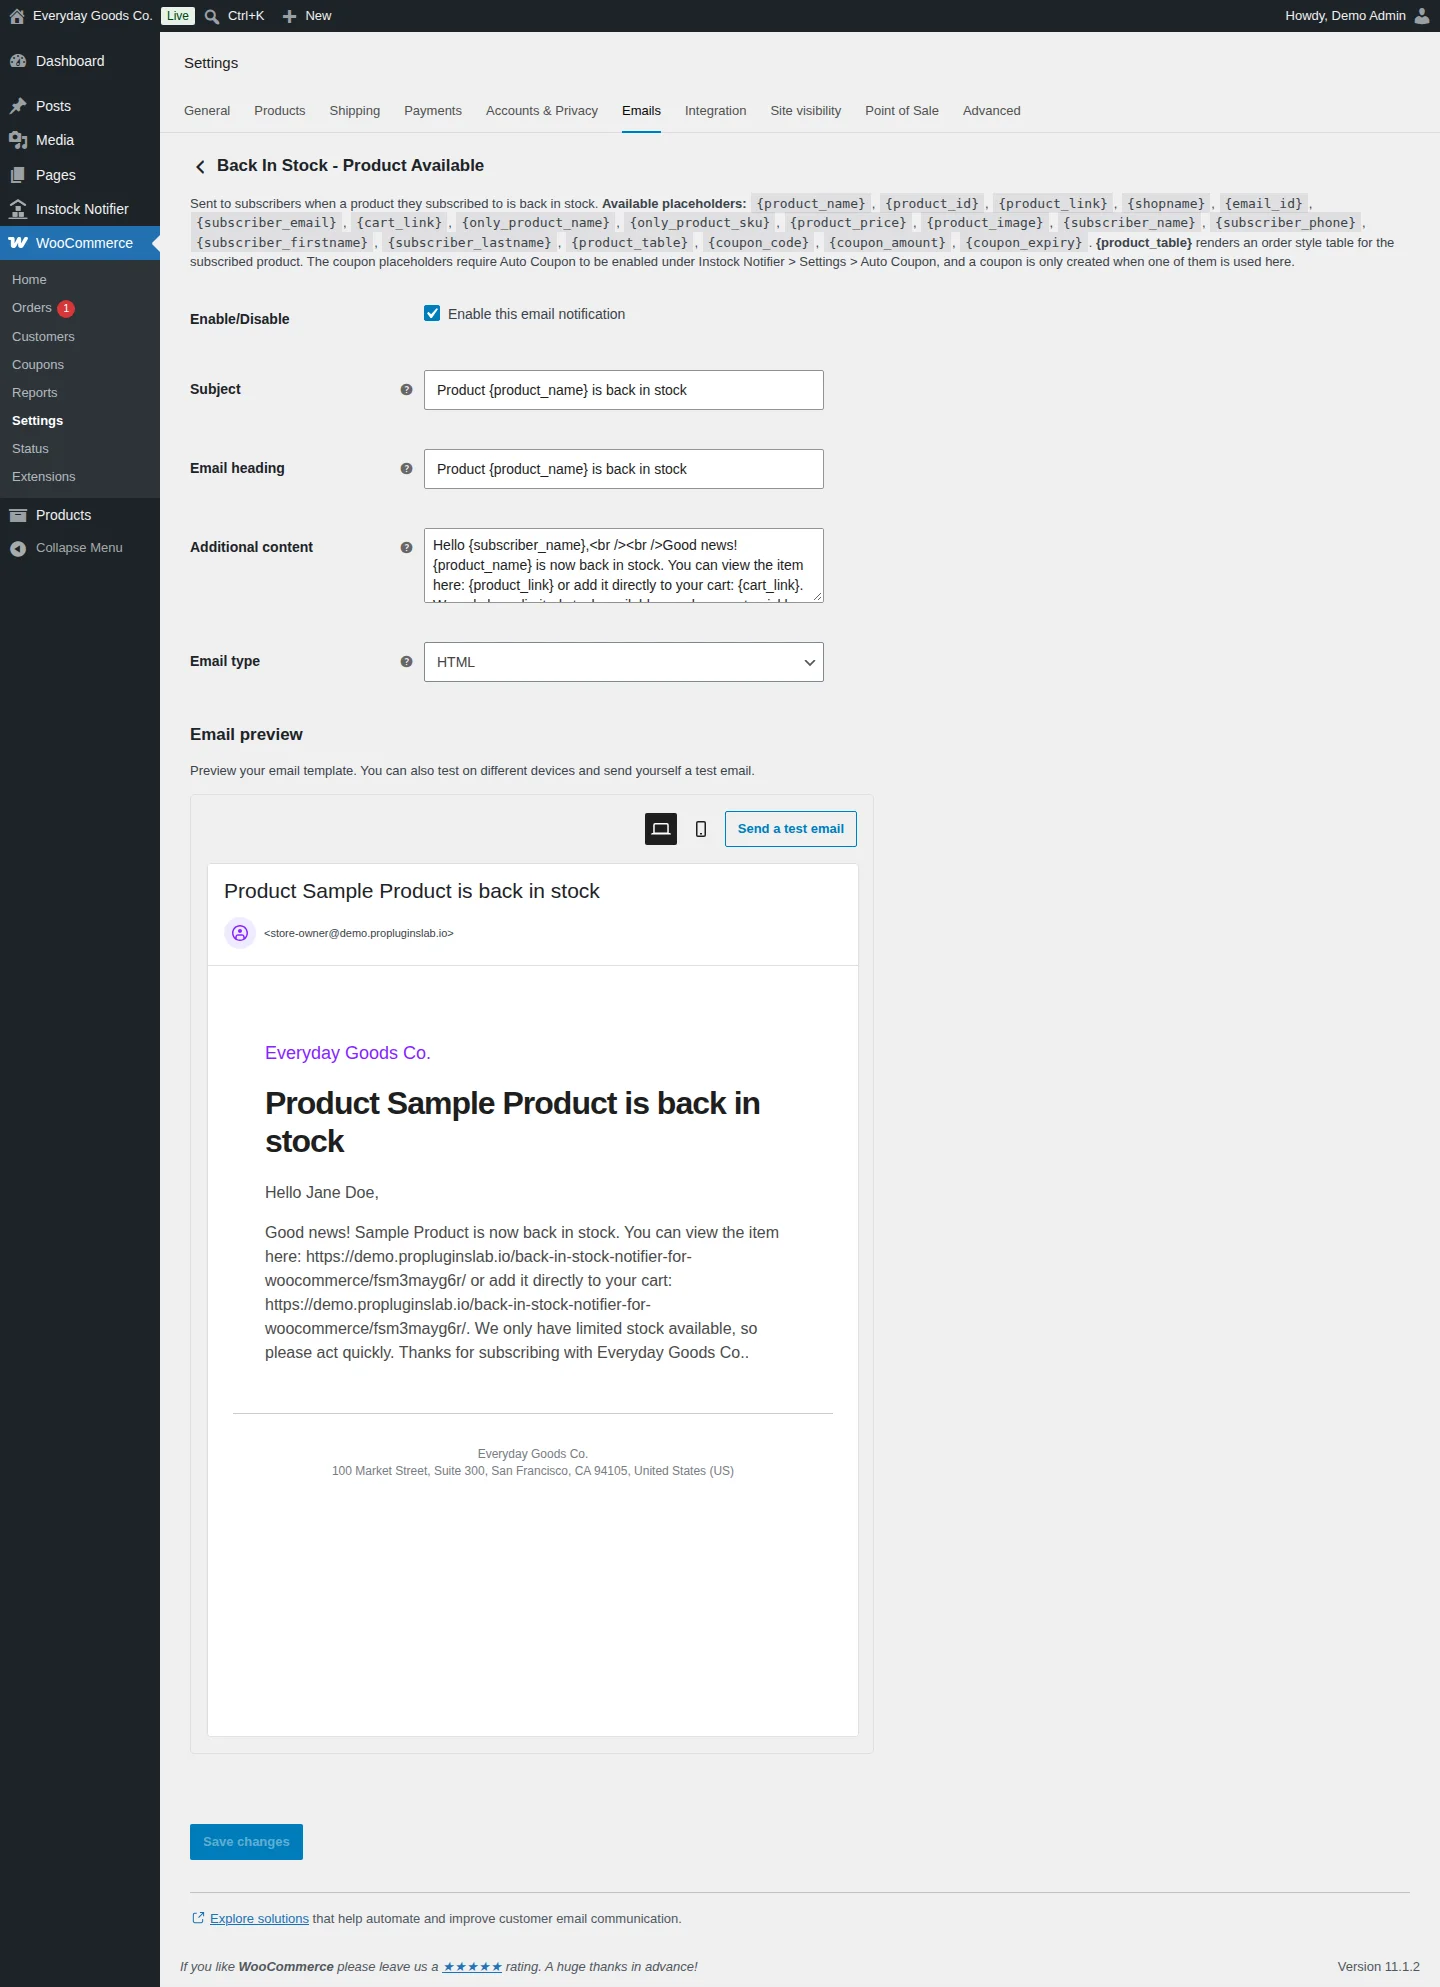
- Back In Stock - Product Available: sent to subscribers when the product is back in stock.
Each one has Enable/Disable, Subject, Email heading, Additional content and Email type (Plain text, HTML or Multipart). The Email preview shows the email with sample content, and Send a test email sends it to you.
Both emails support these placeholders: {product_name}, {product_id}, {product_link}, {shopname}, {email_id}, {subscriber_email}, {cart_link}, {only_product_name}, {only_product_sku}, {product_price}, {product_image}, {subscriber_name}, {subscriber_phone}, {subscriber_firstname}, {subscriber_lastname} and {product_table}. {product_table} shows the subscribed product in an order style table.
The Product Available email also supports {coupon_code}, {coupon_amount} and {coupon_expiry}. They only work when Auto Coupon is enabled.
If you turn off one of these emails, subscribers keep the Subscribed status until you turn it back on.
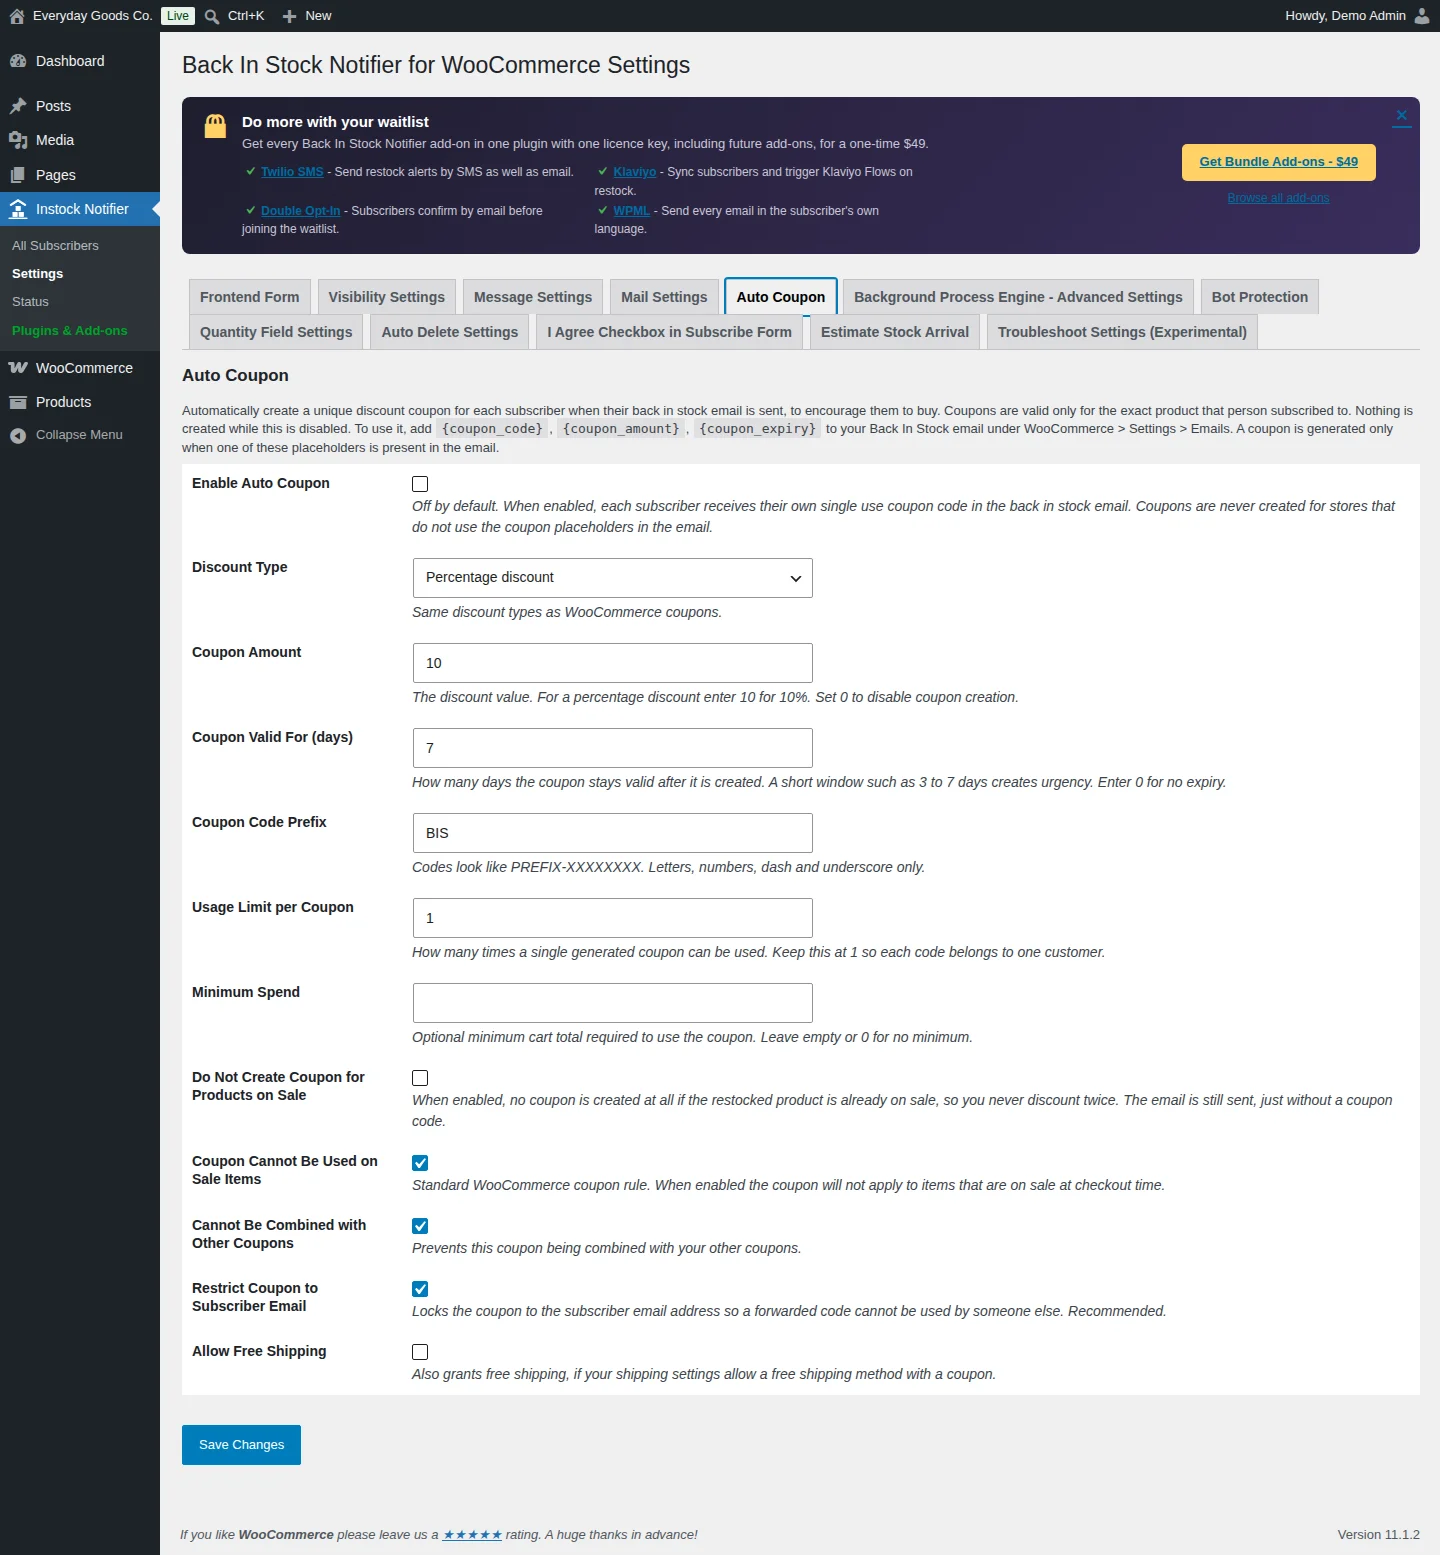
#Auto Coupon
The Auto Coupon tab can create a unique discount coupon for each subscriber when their back in stock email is sent. A coupon only works for the exact product or variation the person subscribed to.
To use it:
- Tick Enable Auto Coupon (it is off by default).
- Choose the Discount Type (Percentage discount, Fixed product discount or Fixed cart discount) and the Coupon Amount. Set the amount to
0to disable coupon creation. - Set Coupon Valid For (days) (
0means no expiry), the Coupon Code Prefix (codes look likePREFIX-XXXXXXXX), the Usage Limit per Coupon and an optional Minimum Spend. - Choose the sale and usage rules: Do Not Create Coupon for Products on Sale, Coupon Cannot Be Used on Sale Items, Cannot Be Combined with Other Coupons, Restrict Coupon to Subscriber Email and Allow Free Shipping.
- Add
{coupon_code},{coupon_amount}or{coupon_expiry}to the Back In Stock - Product Available email under WooCommerce > Settings > Emails.
A coupon is only created when one of these placeholders is in the email.
#Background Process Engine - Advanced Settings
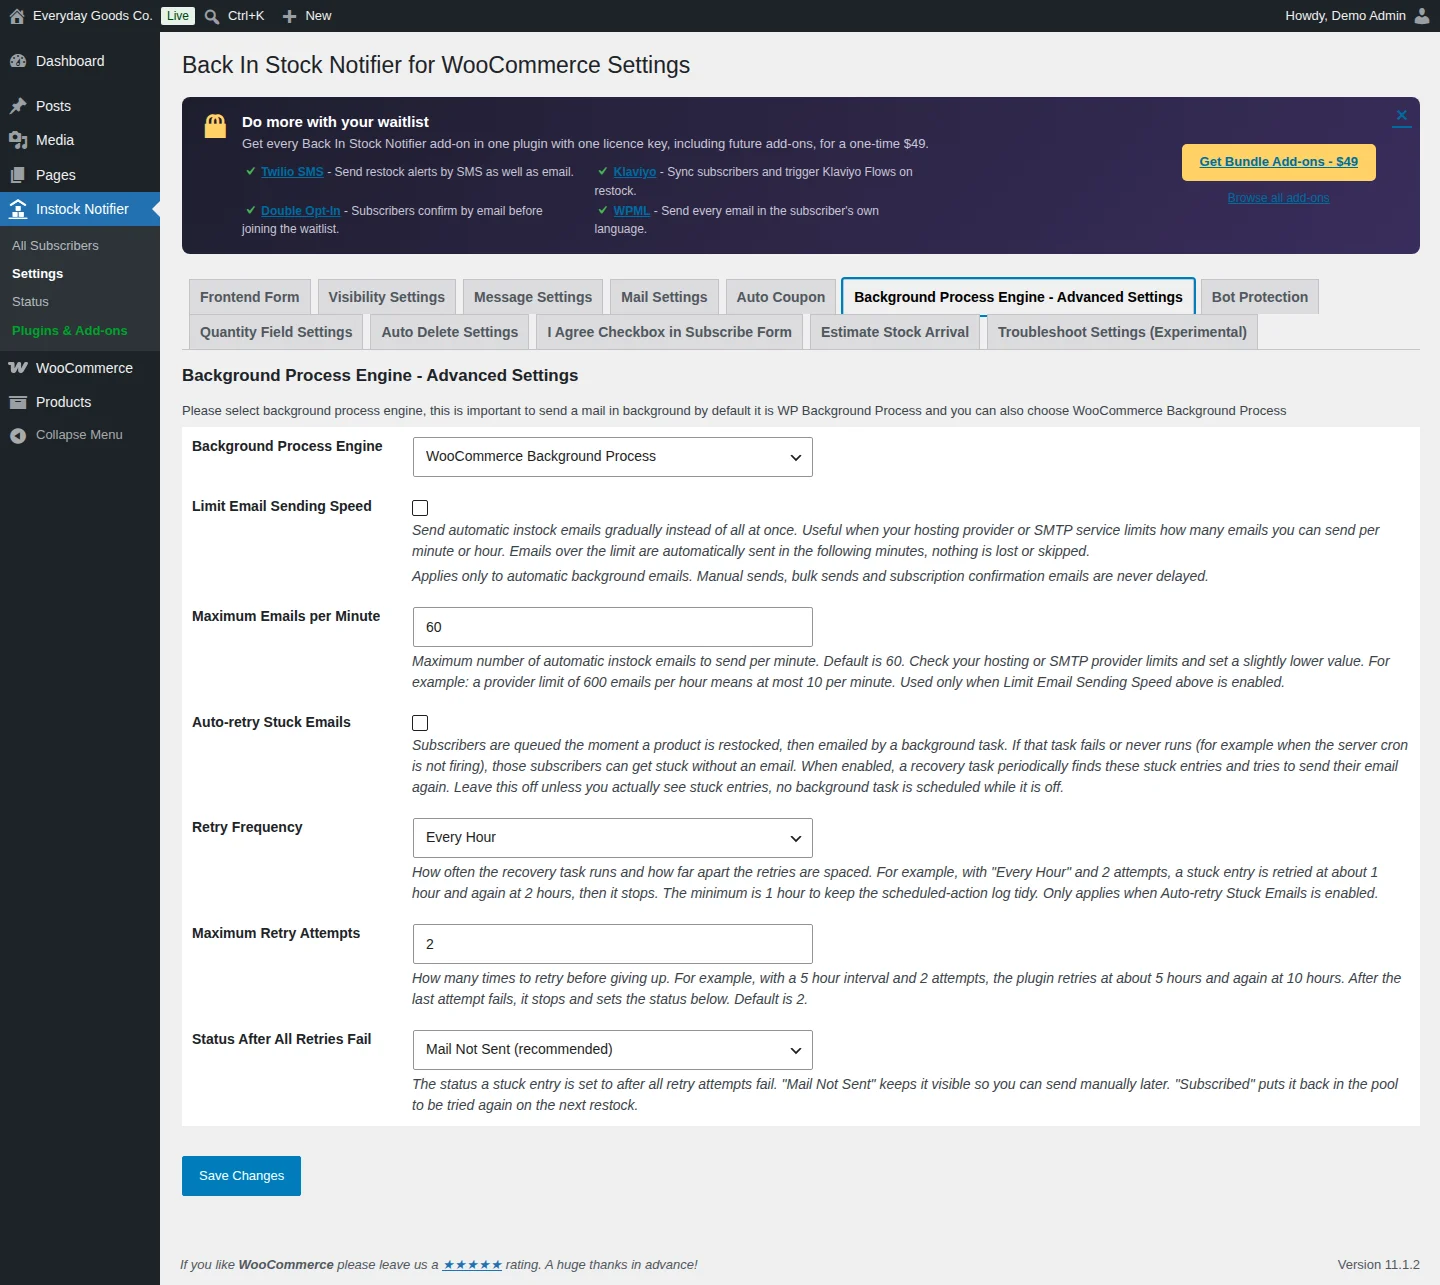
Back in stock emails are sent in the background. This tab lets you choose how that works.
- Background Process Engine: choose WooCommerce Background Process or Default Background Process.
- Limit Email Sending Speed and Maximum Emails per Minute: send automatic emails gradually if your host or SMTP service limits how many emails you can send. Emails over the limit go out in the following minutes. Nothing is skipped. Manual sends, bulk sends and confirmation emails are never delayed. For example, a provider limit of 600 emails per hour means at most 10 per minute.
- Auto-retry Stuck Emails: if a background task fails or never runs (for example when the server cron is not firing), subscribers can be left without an email. When you enable this, a recovery task finds those entries and tries again. No task is scheduled while it is off.
- Retry Frequency, Maximum Retry Attempts and Status After All Retries Fail control the retries. "Mail Not Sent" keeps the entry visible so you can send it manually. "Subscribed" puts it back in the pool for the next restock.
#Bot Protection
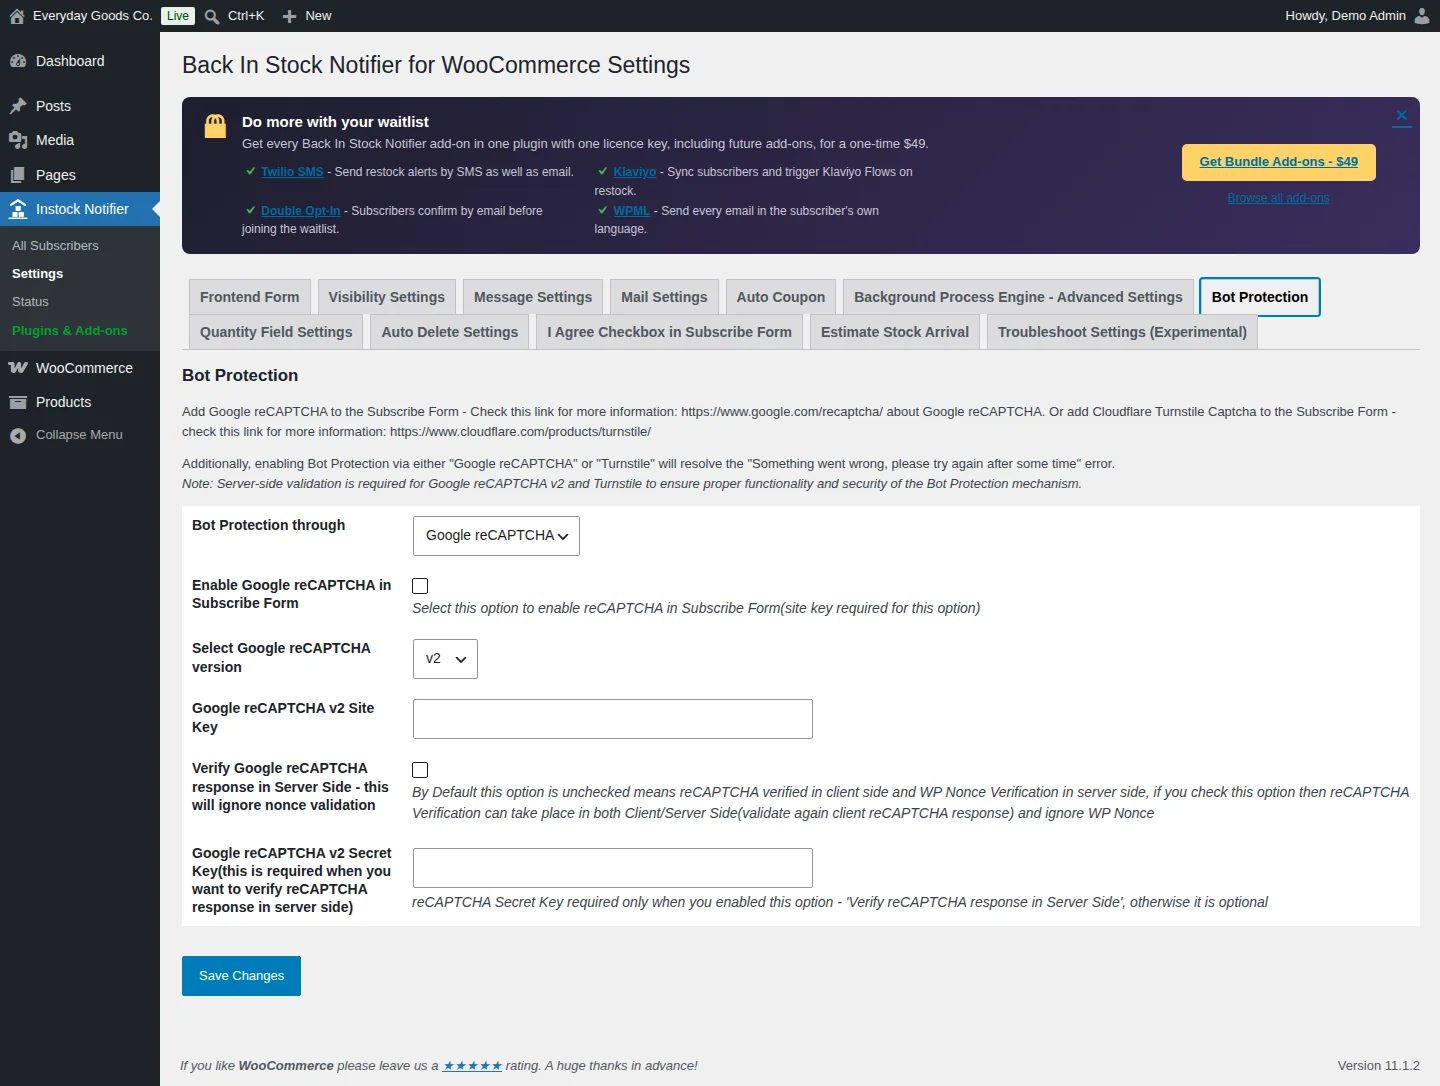
The Bot Protection tab adds Google reCAPTCHA or Cloudflare Turnstile to the subscribe form. Turning on either one also fixes the "Something went wrong, please try again after some time" error.
Google reCAPTCHA
- Set Bot Protection through to Google reCAPTCHA.
- Tick Enable Google reCAPTCHA in Subscribe Form.
- Choose v2 or v3 in Select Google reCAPTCHA version and enter the site key.
- To also check the response on the server, tick Verify Google reCAPTCHA response in Server Side - this will ignore nonce validation and enter the secret key.
Turnstile
Set Bot Protection through to Turnstile, enable Turnstile in the subscribe form, then enter your Turnstile site key and secret key.
Server-side validation is required for Google reCAPTCHA v2 and Turnstile to work properly and securely.
#Quantity Field Settings
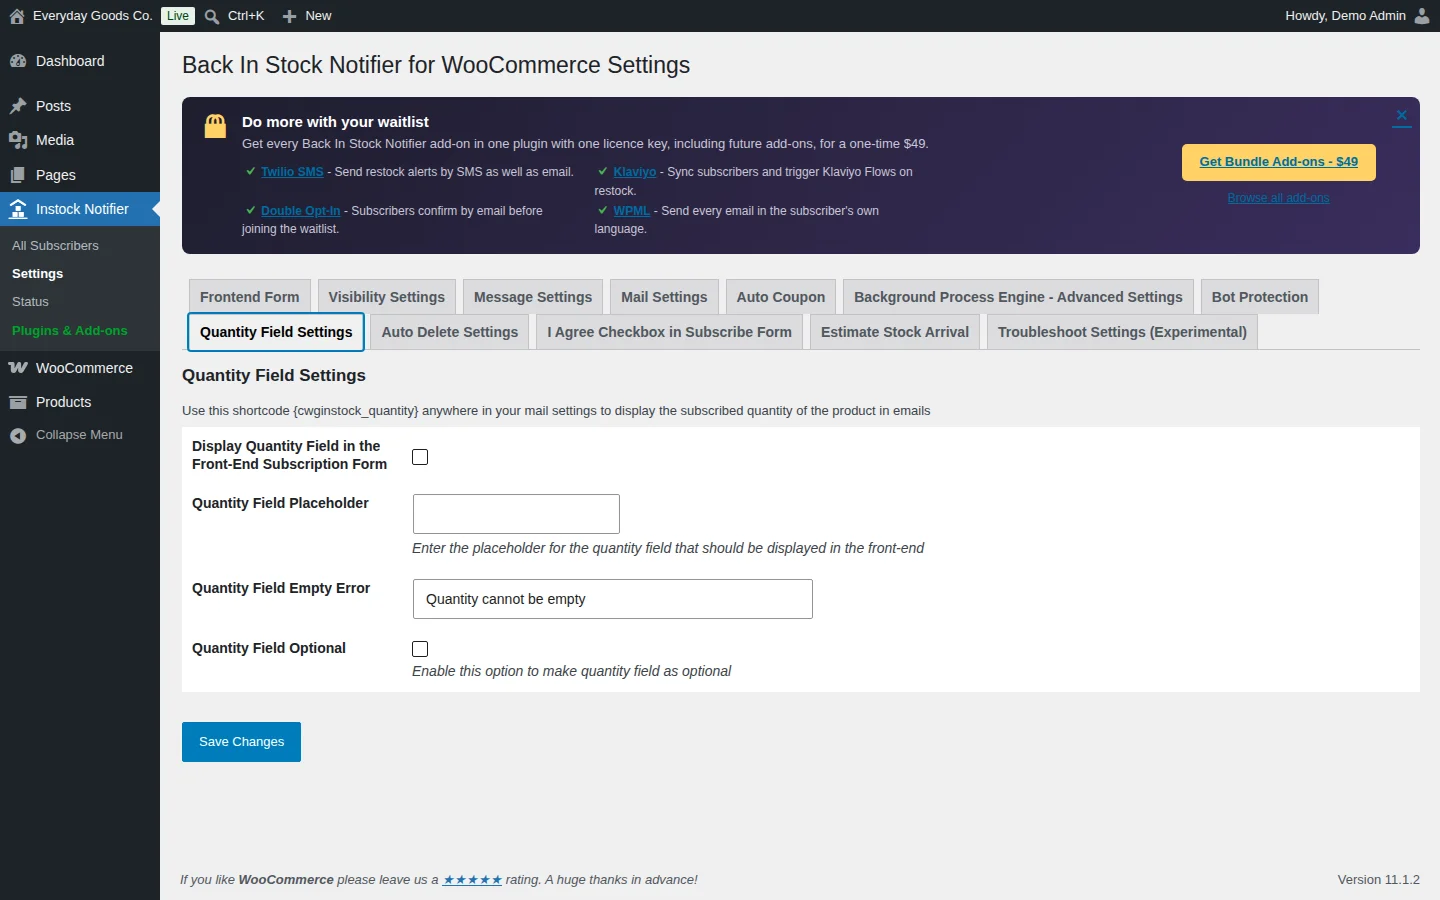
Tick Display Quantity Field in the Front-End Subscription Form to let subscribers say how many units they want. You can set a Quantity Field Placeholder, the Quantity Field Empty Error message, and make the field optional with Quantity Field Optional.
To show the requested quantity in your emails, add {cwginstock_quantity} to the email content.
#Auto Delete Settings
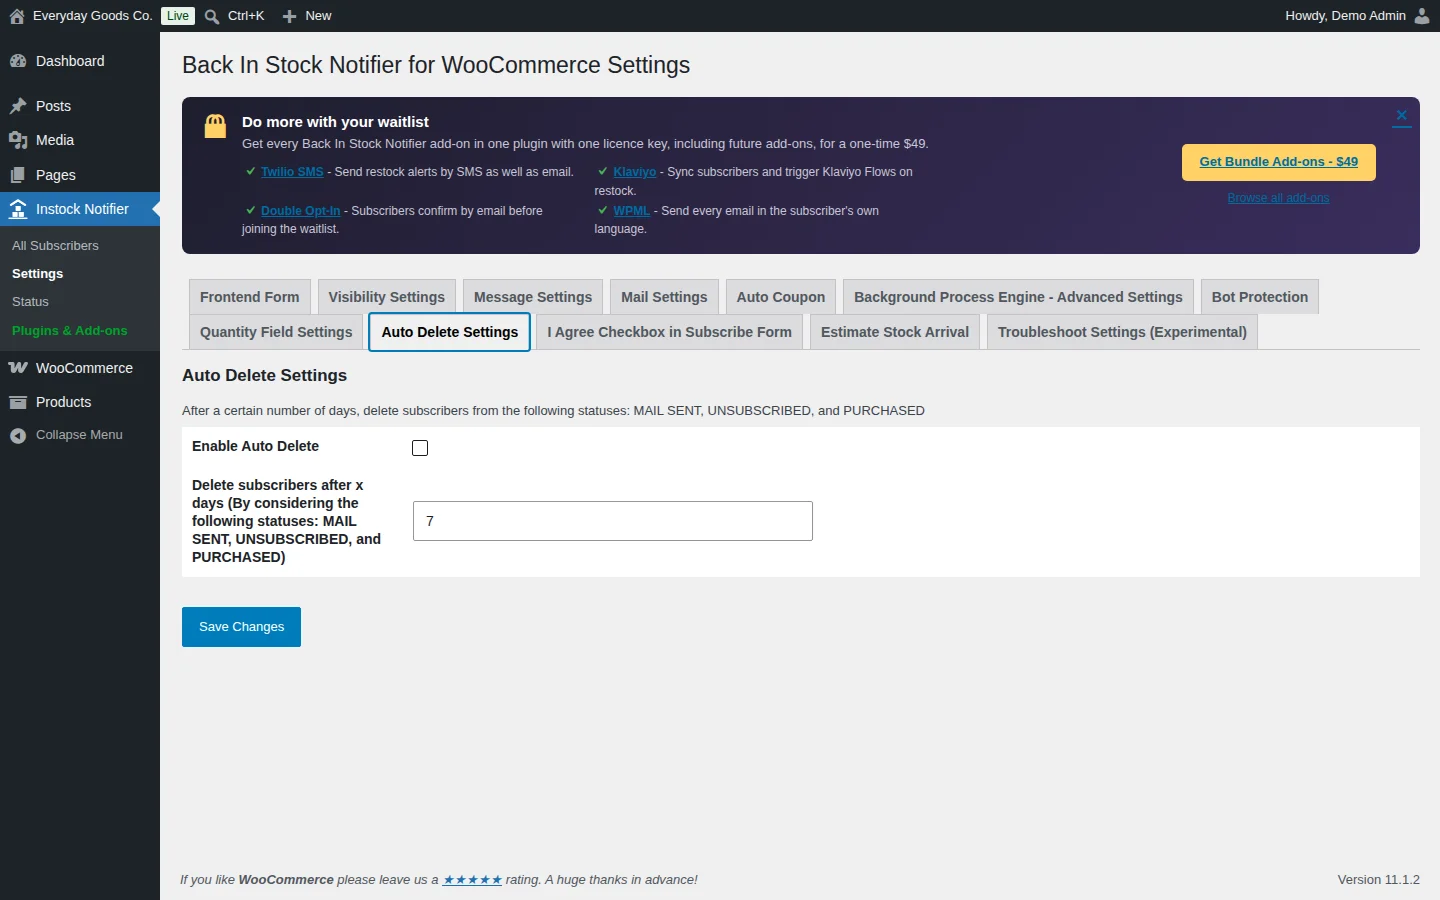
Keep your subscriber list tidy by deleting old entries automatically. Tick Enable Auto Delete and enter the number of days. Only entries with the status MAIL SENT, UNSUBSCRIBED or PURCHASED are deleted.
You can change how often this cleanup runs with Delete Subscriber Cron Recurrence on the Troubleshoot Settings (Experimental) tab.
#I Agree Checkbox in Subscribe Form
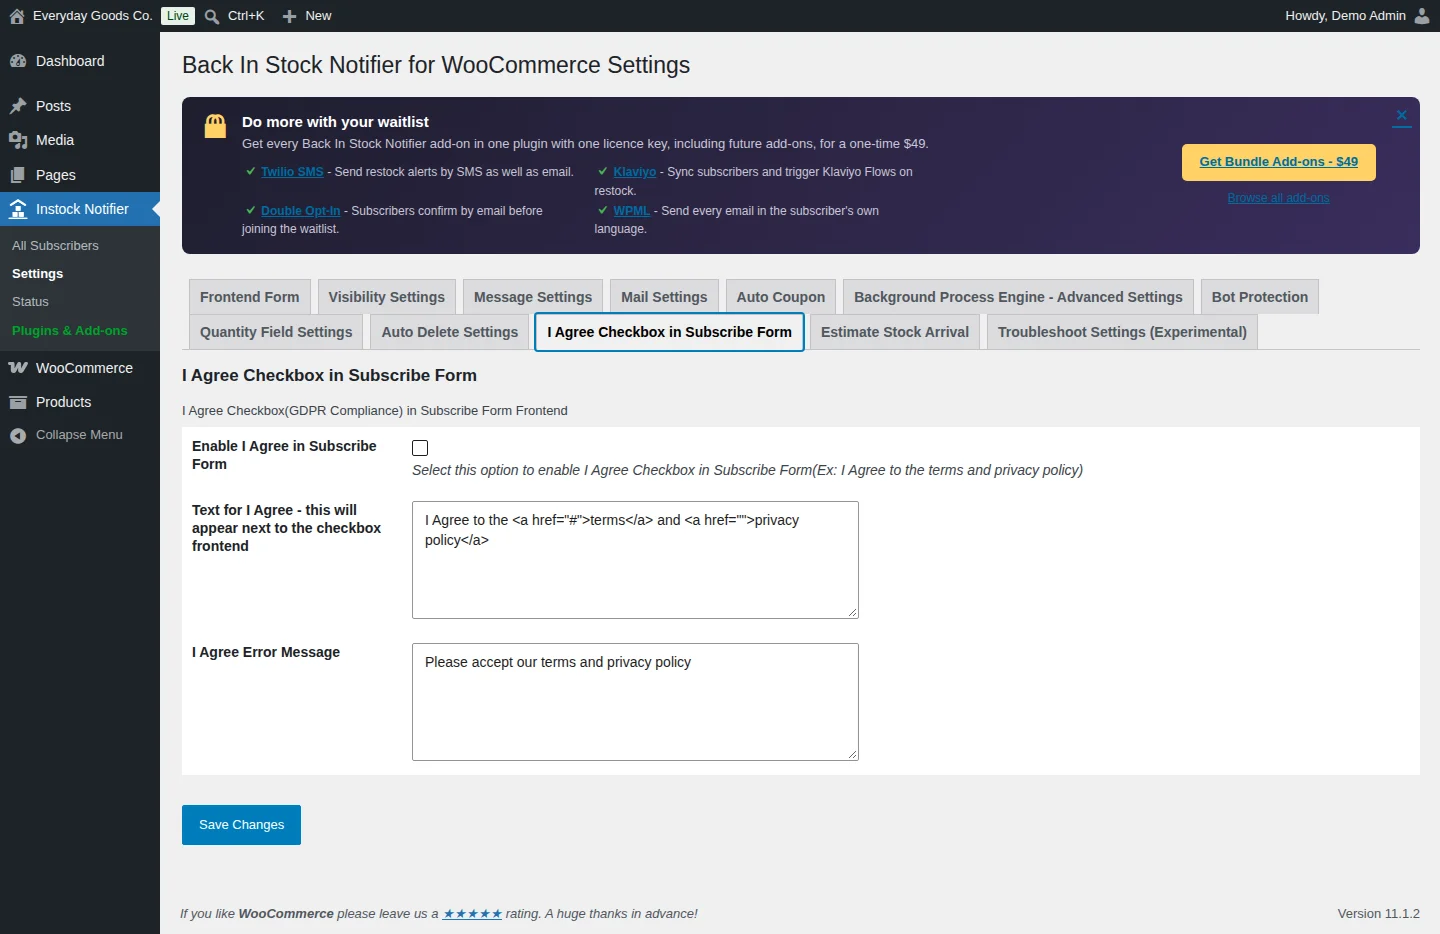
Add a consent checkbox (for GDPR compliance) to the subscribe form. Tick Enable I Agree in Subscribe Form and edit the text shown next to the checkbox. The text accepts HTML links, so you can link to your terms and privacy policy. Set the I Agree Error Message that appears when a shopper submits without ticking the box.
#Estimate Stock Arrival
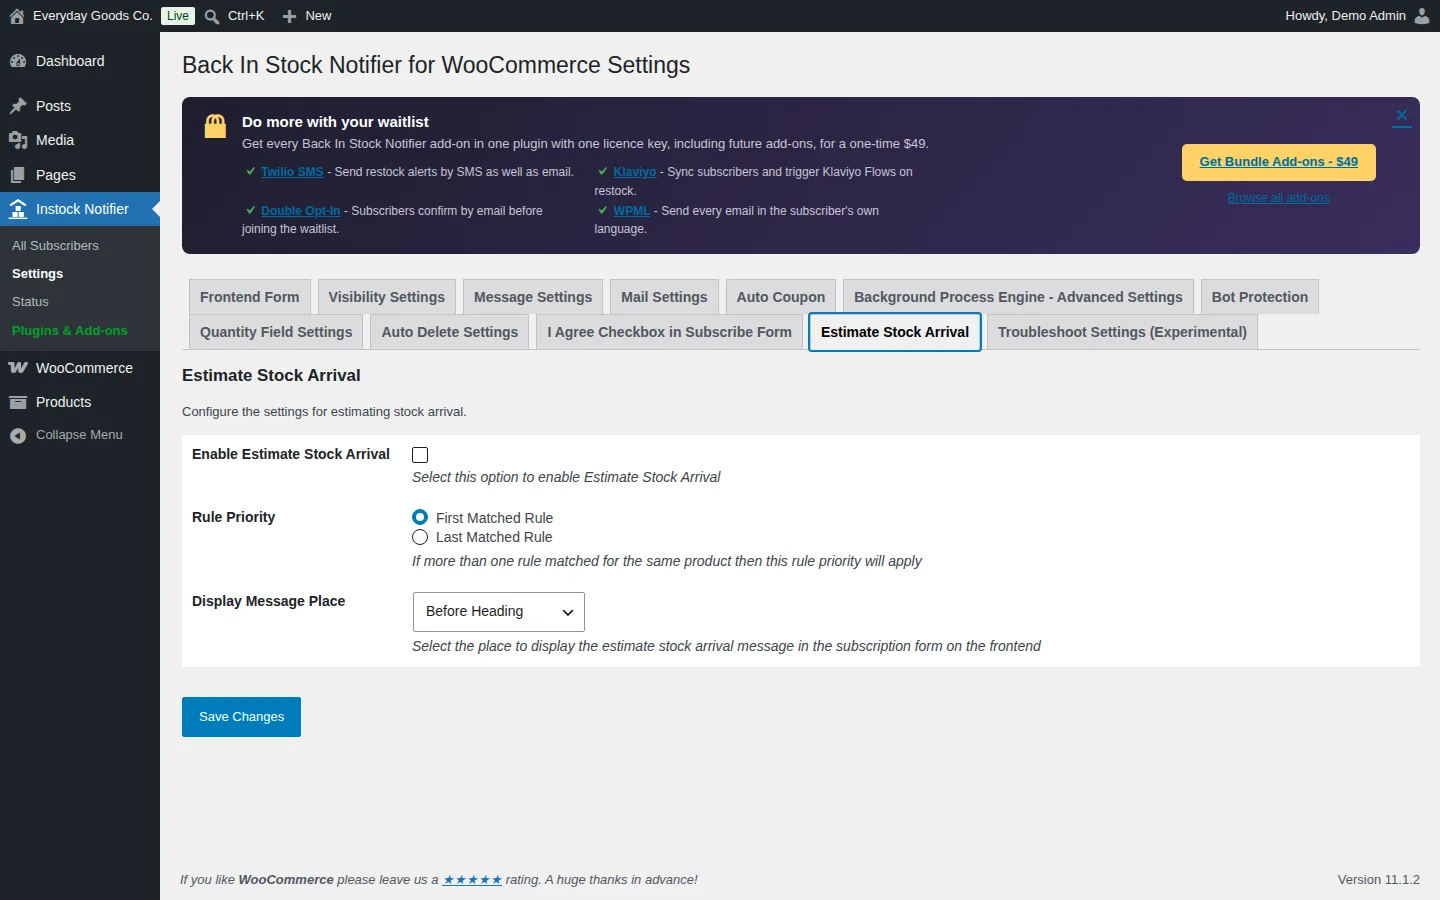
Estimate Stock Arrival shows a message on the subscribe form telling shoppers when you expect the product back. You create the rules under Instock Notifier > Estimate Stock Arrival. This tab turns the feature on and controls how the message is shown.
- Enable Estimate Stock Arrival turns the feature on.
- Rule Priority decides which rule applies when more than one rule matches the same product: First Matched Rule or Last Matched Rule.
- Display Message Place sets where the message appears in the form: before or after the heading, the input field or the submit button.
#Troubleshoot Settings (Experimental)
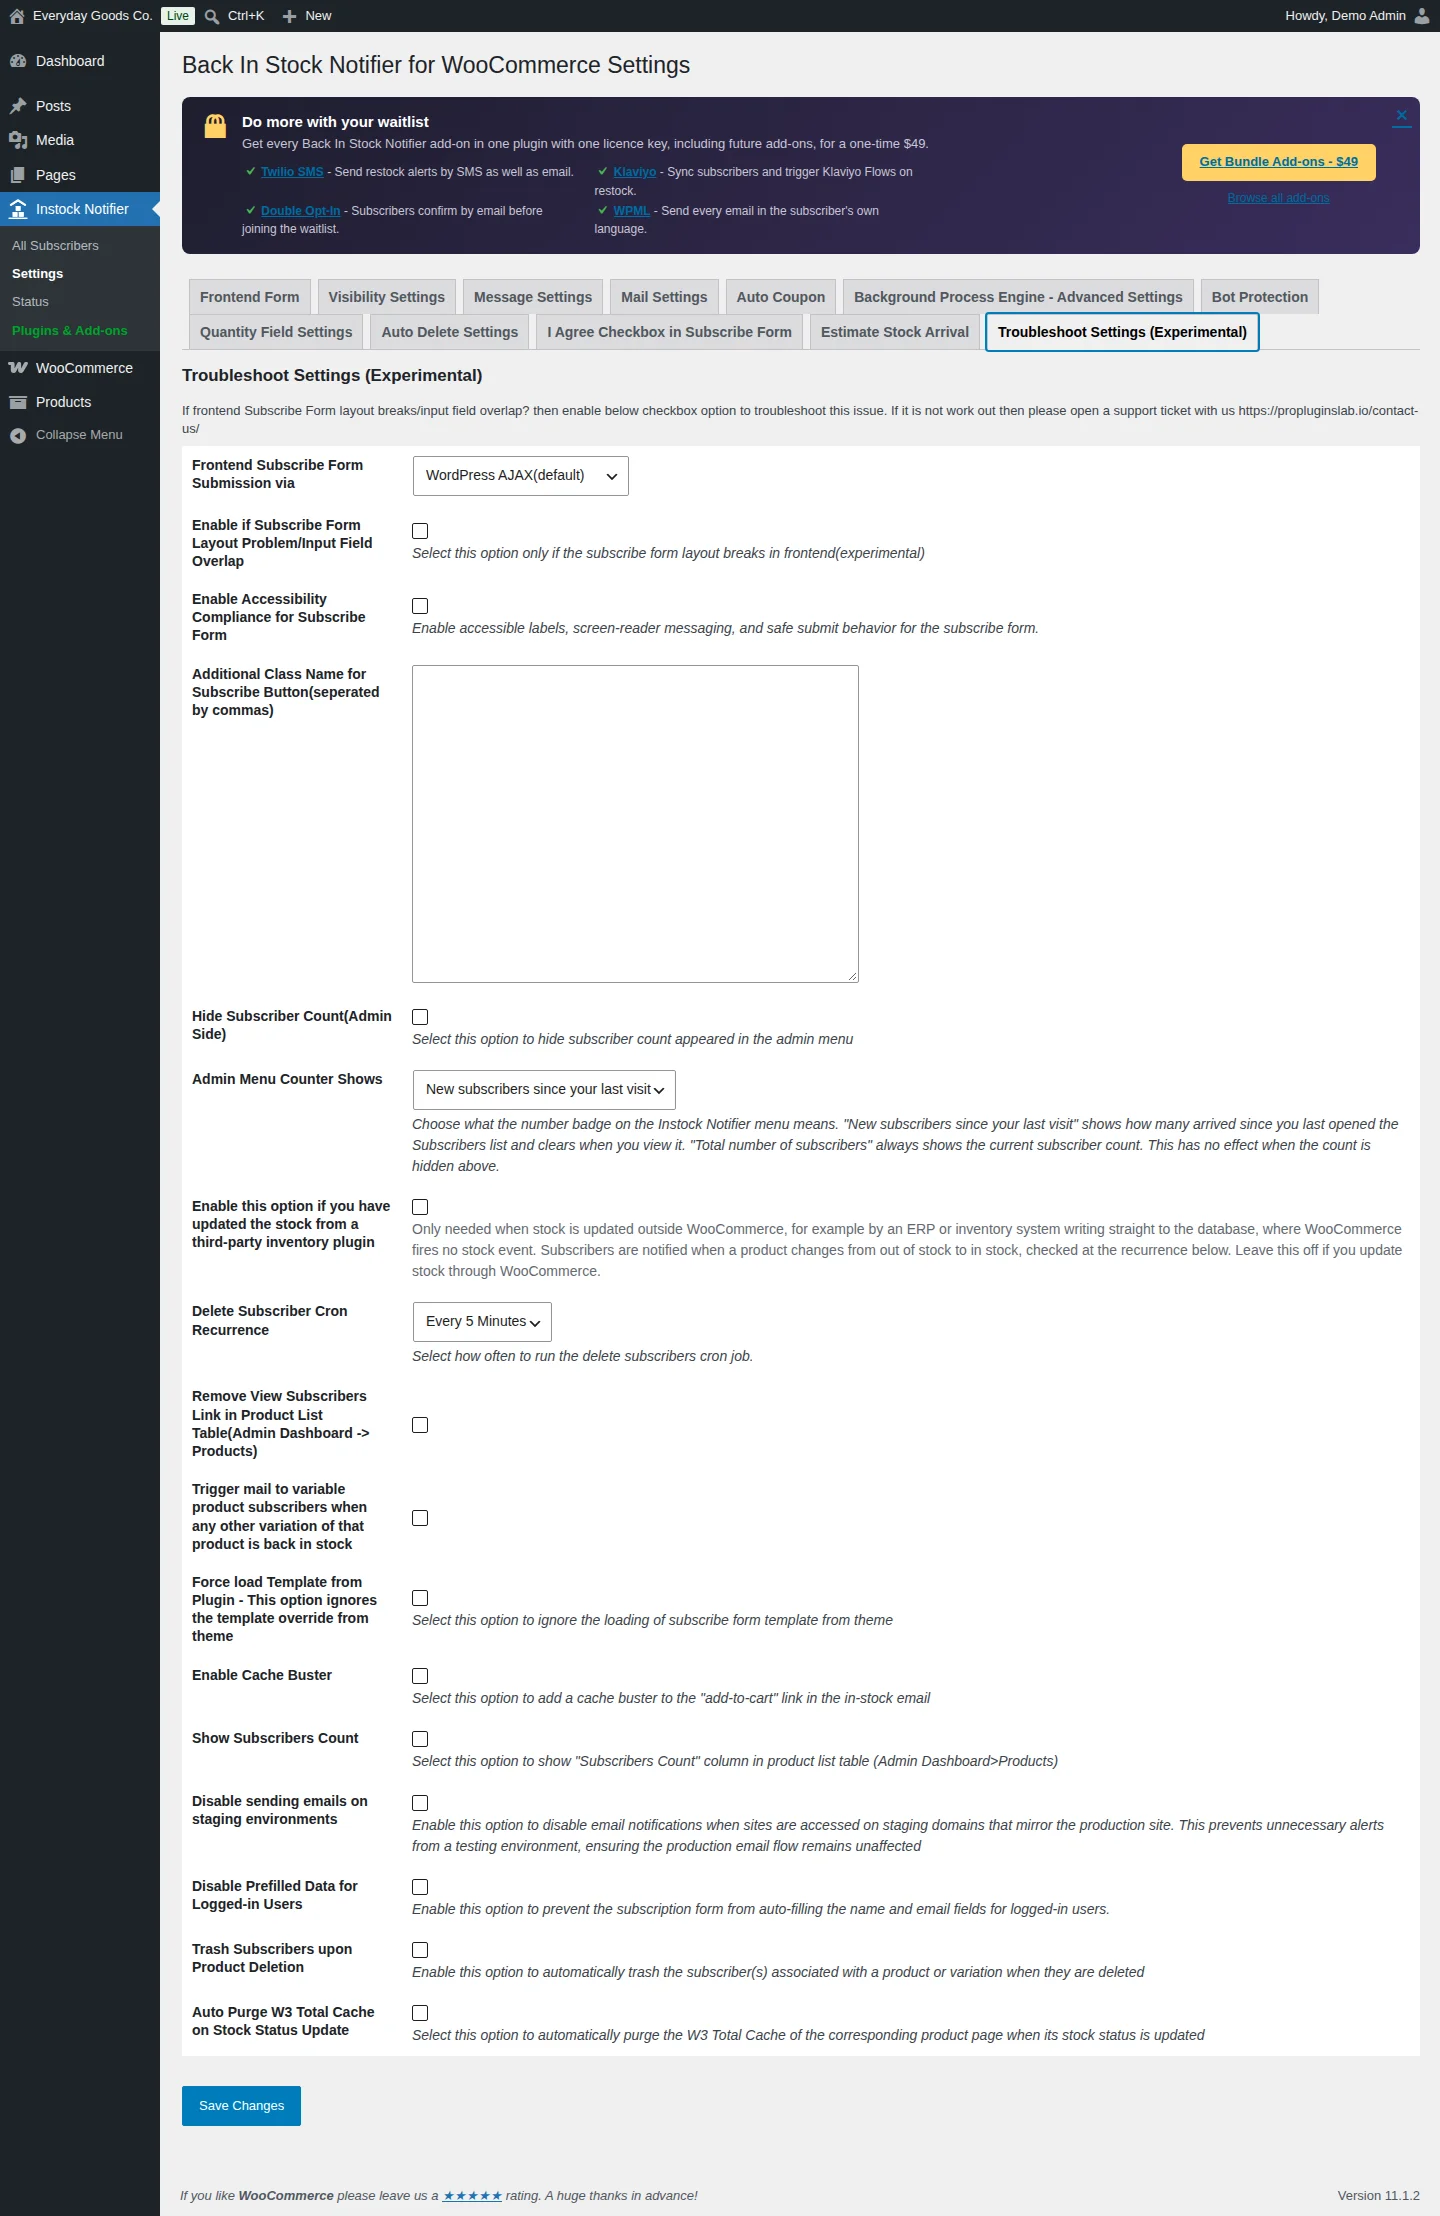
This tab collects options that fix specific problems. Most stores can leave them alone.
- Frontend Subscribe Form Submission via: switch from WordPress AJAX(default) to WordPress REST API Route if shoppers see "Something went wrong" when subscribing.
- Enable if Subscribe Form Layout Problem/Input Field Overlap: use only if the form layout breaks on your theme.
- Enable Accessibility Compliance for Subscribe Form: adds accessible labels, screen-reader messages and safe submit behavior.
- Additional Class Name for Subscribe Button(seperated by commas): adds CSS classes to the button.
- Hide Subscriber Count(Admin Side) and Admin Menu Counter Shows: control the badge on the Instock Notifier menu (new subscribers since your last visit, or the total).
- Enable this option if you have updated the stock from a third-party inventory plugin: only needed when stock is updated outside WooCommerce, for example by an ERP writing straight to the database. Subscribers are then notified when a product changes from out of stock to in stock, checked on a schedule. Leave it off if you update stock through WooCommerce.
- Delete Subscriber Cron Recurrence: how often the delete subscribers job runs.
- Remove View Subscribers Link in Product List Table(Admin Dashboard -> Products) and Show Subscribers Count control what appears in the Products list.
- Trigger mail to variable product subscribers when any other variation of that product is back in stock.
- Force load Template from Plugin - This option ignores the template override from theme.
- Enable Cache Buster: adds a cache buster to the add-to-cart link in the back in stock email.
- Disable sending emails on staging environments, Disable Prefilled Data for Logged-in Users, Trash Subscribers upon Product Deletion and Auto Purge W3 Total Cache on Stock Status Update.
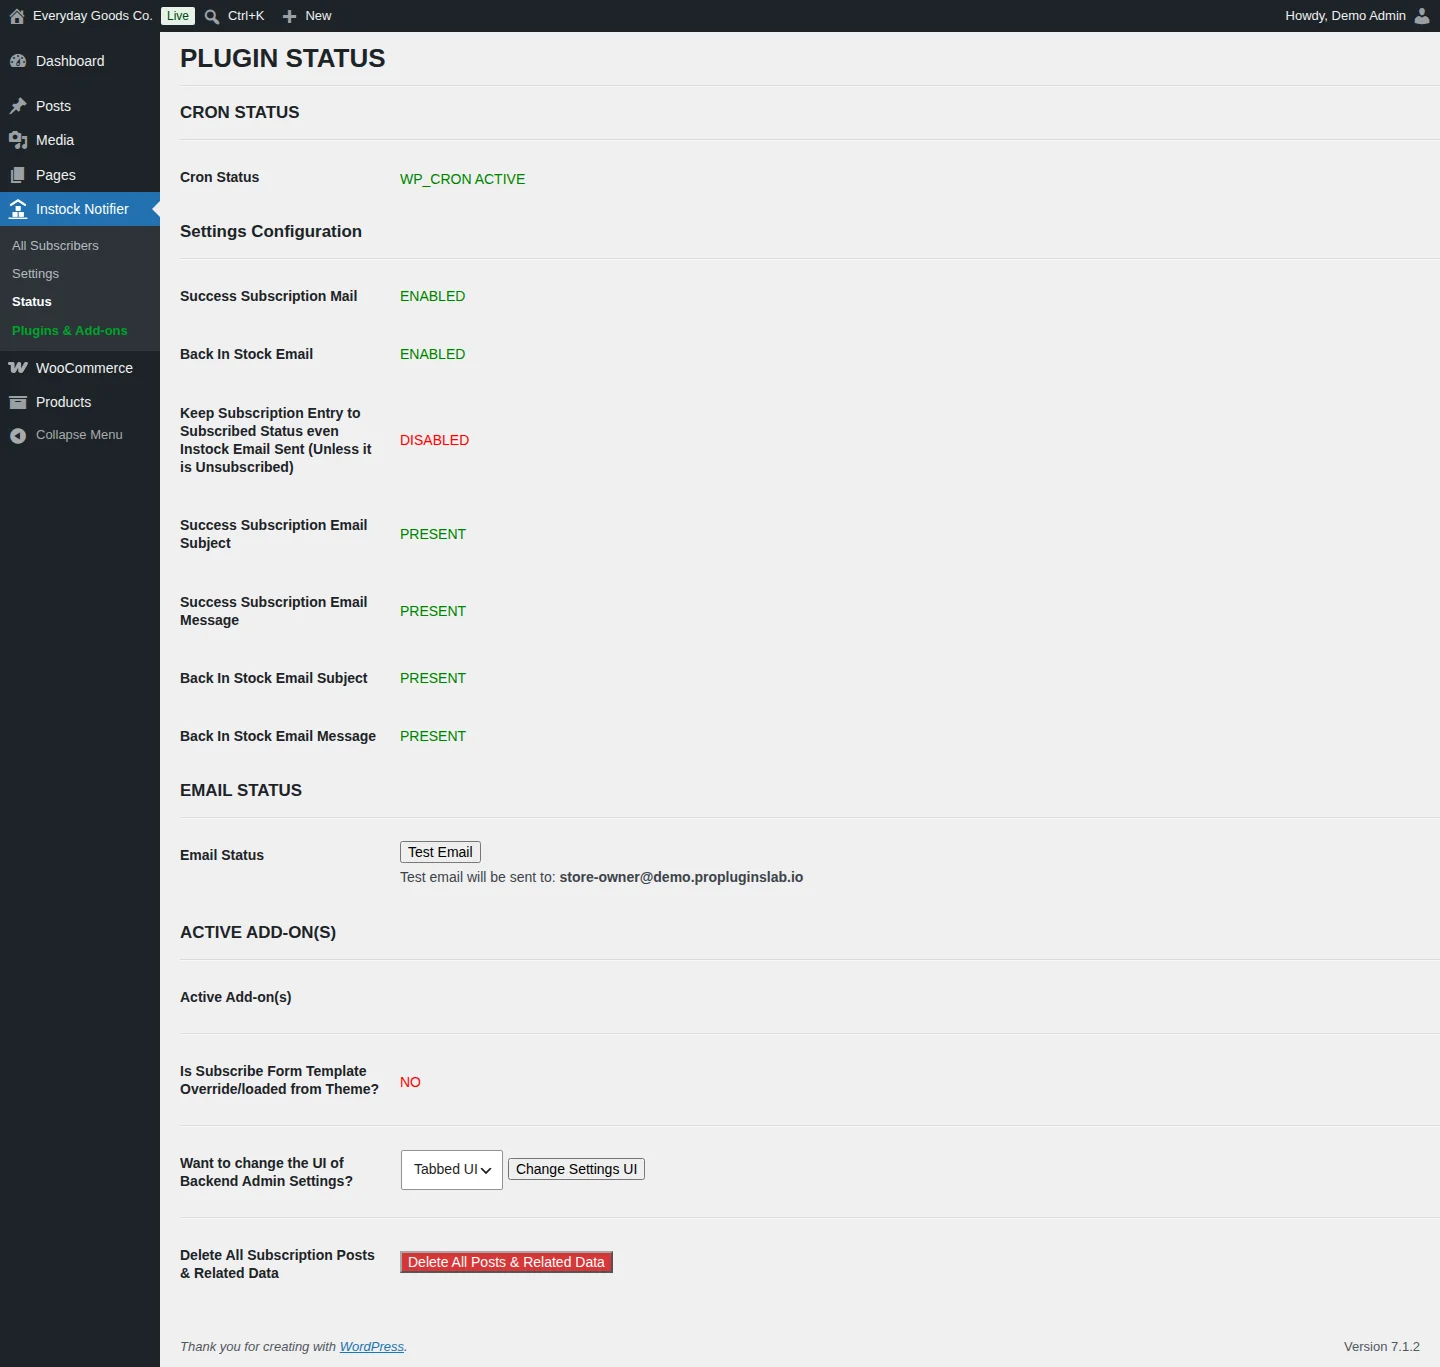
#Status
Instock Notifier > Status is a health check for the plugin.
- CRON STATUS shows whether WP-Cron is active. Background sending depends on it.
- Settings Configuration shows whether the two emails are enabled, whether their subjects and messages are present, and whether "Keep Subscription Entry to Subscribed Status" is on.
- EMAIL STATUS has a Test Email button and shows the address the test is sent to.
- ACTIVE ADD-ON(S) lists active add-ons and tells you if the subscribe form template is loaded from your theme.
- Want to change the UI of Backend Admin Settings? switches the settings page between Default UI and Tabbed UI. Click Change Settings UI to apply.
- Delete All Posts & Related Data removes all subscription entries and their data. You are asked to confirm first. This cannot be undone, so export your subscribers first if you might need them.
#Plugins & Add-ons
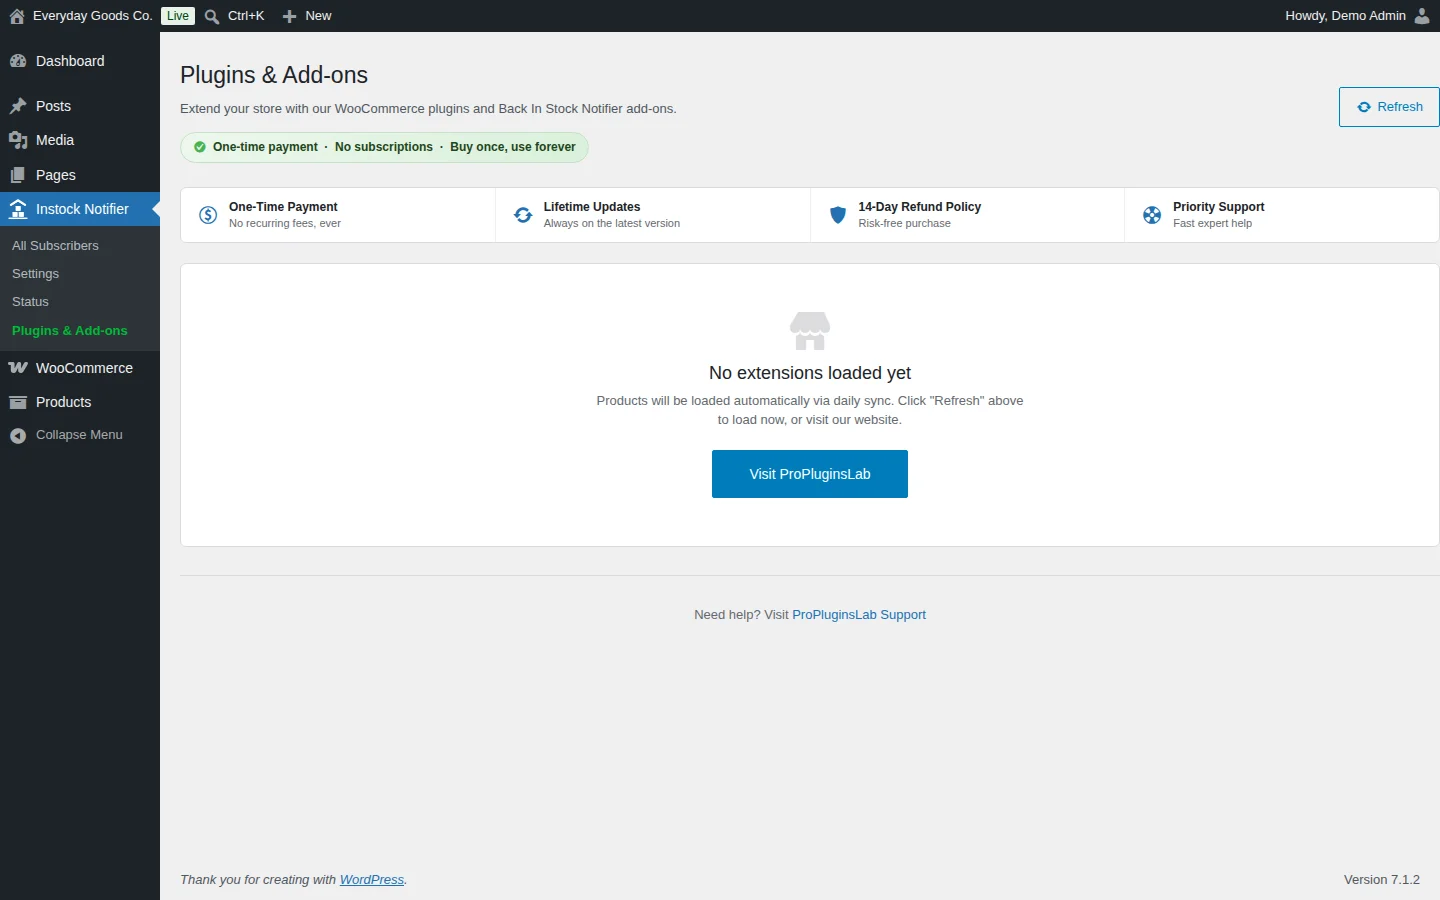
Instock Notifier > Plugins & Add-ons lists ProPluginsLab WooCommerce plugins and Back In Stock Notifier add-ons. The list loads automatically through a daily sync. Click Refresh to load it now, or Visit ProPluginsLab to browse the website.
The plugin's own admin screens also show a banner about Bundle Add-ons. You can dismiss it for 30 days, and it is hidden when Bundle Add-ons is active.
Settings reference
Instock Notifier > Settings > Frontend Form
| Setting | Type | Default | What it does |
|---|---|---|---|
| Frontend Subscribe Form Display Type | select | Inline Subscribe Form |
Show the form inline on the product page or as a pop-up (Inline Subscribe Form, Pop-Up Subscribe Form). |
| Subscribe Form Design | select | Default (classic) |
Look of the inline form: Default (classic), Card, Minimal, Compact (single row), Bold or Outline. |
| Title for Subscribe Form | text | Email when stock available |
Heading shown at the top of the form. |
| Placeholder for Name Field | text | Your Name |
Placeholder text in the name field. |
| Placeholder for Email Field | text | Your Email Address |
Placeholder text in the email field. |
| Button Label | text | Subscribe Now |
Text on the subscribe button. |
Instock Notifier > Settings > Visibility Settings
| Setting | Type | Default | What it does |
|---|---|---|---|
| Hide Name | checkbox | Off |
Hide the name field in the subscribe form. |
| Show Phone | checkbox | Off |
Show a phone field in the subscribe form. |
| Hide Subscribe Form for Guests | checkbox | Off |
Hide the form for visitors who are not logged in. |
| Hide Subscribe Form for Members | checkbox | Off |
Hide the form for logged-in users. |
| Show Subscribe Form on Backorders | checkbox | Off |
Also show the form on backorder products. |
| Show Subscribe Now Button in Catalog Page(shop/category) | checkbox | Off |
Show a Subscribe Now button on shop and category pages. |
| Hide Read more Button in Catalog Page(shop/category) | checkbox | Off |
Hide the Read more button on shop and category pages. |
| Show/Hide Subscribe Form for specific products | select | - | Products to show or hide the form on. Leave empty to show the form on all out-of-stock products. |
| Show/Hide Subscribe Form for specific products | radio | Show |
Whether the selected products show (Show) or hide (Hide) the form. |
| Show/Hide Subscribe Form for specific categories | select | - | Categories to show or hide the form on. Leave empty to show the form on all out-of-stock products. |
| Show/Hide Subscribe Form for specific categories | radio | Show |
Whether the selected categories show (Show) or hide (Hide) the form. |
| Show/Hide Subscribe Form for specific tags | select | - | Product tags to show or hide the form on. Leave empty to show the form on all out-of-stock products. |
| Show/Hide Subscribe Form for specific tags | radio | Show |
Whether the selected tags show (Show) or hide (Hide) the form. |
| Hide Subscribe Form on Regular Products out of stock | checkbox | Off |
Hide the form on regular (not on sale) out-of-stock products. |
| Hide Subscribe Form on Sale Products out of stock | checkbox | Off |
Hide the form on out-of-stock products that are on sale. |
| Hide Subscribe Form on Free or Zero Price Out of Stock Products | checkbox | Off |
Hide the form on free or zero price out-of-stock products. |
| Don't overwrite disabled out of stock variations from theme configuration | checkbox | Off |
Keep your theme's setting that disables out-of-stock variations instead of making them selectable. |
| Ignore WooCommerce Out of Stock Visibility Settings for Variation | checkbox | Off |
Let variable products ignore the WooCommerce option that hides out-of-stock items, so out-of-stock variations stay in the dropdown. |
Instock Notifier > Settings > Message Settings
| Setting | Type | Default | What it does |
|---|---|---|---|
| Success Subscription Message | text | You have successfully subscribed, we will inform you when this product back in stock |
Shown after a successful subscription. Supports {product_name} and {only_product_name}. |
| Email Already Subscribed Message | text | Seems like you have already subscribed to this product |
Shown when the email is already on the waitlist for this product. Supports {product_name} and {only_product_name}. |
| Name Field Empty Error | text | Name cannot be empty |
Error when the name field is empty. |
| Email Field Empty Error | text | Email Address cannot be empty |
Error when the email field is empty. |
| Invalid Email Error | text | Please enter valid Email Address |
Error when the email address is not valid. |
| Invalid Phone Number Error | text | Please enter valid Phone Number |
Error when the phone number is not valid. |
| Phone Number too short error | text | Phone number is too short |
Error when the phone number is too short. |
| Phone Number too long error | text | Phone number is too long |
Error when the phone number is too long. |
Instock Notifier > Settings > Mail Settings
| Setting | Type | Default | What it does |
|---|---|---|---|
| From Name | text | - | Sender name for the plugin's emails. |
| From Email | text | - | Sender email address for the plugin's emails. |
| Reply To Email | text | - | Optional Reply-To address. Leave empty if you do not need one. |
| Additionally Send this Subscription mail as a copy to specific email ids | checkbox | Off |
Send a copy of each new subscription to the addresses below. |
| Enter Email Ids separated by commas that you want to receive subscription copy mail | textarea | - | Addresses that receive the subscription copy, separated by commas. |
| Copy Subscription Mail Subject | text | {subscriber_name} has subscribed to {product_name} |
Subject of the copy email. |
| Copy Subscription Mail Message | textarea | Subscription Info:<br> {subscriber_name} <br> {subscriber_email} <br> {product_name} |
Body of the copy email. |
| Consider Only Published Product Status | checkbox | Off |
Only published products trigger the back in stock email. Private and draft products are skipped. |
| Minimum stock quantity threshold value | number | 0 |
Stock quantity a product must reach before the back in stock email is sent. |
| Keep Subscription Entry to Subscribed Status even Instock Email Sent (Unless it is Unsubscribed) | checkbox | Off |
Not recommended. Keeps subscribers subscribed after the email, so they are notified on every restock until they purchase or unsubscribe. |
| Fair Sending: Notify only as many Subscribers as Units in Stock | checkbox | Off |
On a limited restock, notify only the earliest subscribers. The rest wait for the next restock. Automatic emails only. |
| Fair Sending: Subscribers to Notify per Unit in Stock | number | 1 |
How many subscribers to notify per unit in stock. Used only when Fair Sending is enabled. |
Instock Notifier > Settings > Auto Coupon
| Setting | Type | Default | What it does |
|---|---|---|---|
| Enable Auto Coupon | checkbox | Off |
Give each subscriber a single-use coupon code in the back in stock email. |
| Discount Type | select | Percentage discount |
Percentage discount, Fixed product discount or Fixed cart discount. |
| Coupon Amount | number | 10 |
Discount value. For a percentage discount, 10 means 10%. Set 0 to disable coupon creation. |
| Coupon Valid For (days) | number | 7 |
Days the coupon stays valid after it is created. 0 means no expiry. |
| Coupon Code Prefix | text | BIS |
Prefix for coupon codes (PREFIX-XXXXXXXX). Letters, numbers, dash and underscore only. |
| Usage Limit per Coupon | number | 1 |
How many times one coupon can be used. |
| Minimum Spend | number | - | Optional minimum cart total. Leave empty or 0 for no minimum. |
| Do Not Create Coupon for Products on Sale | checkbox | Off |
Skip the coupon when the restocked product is already on sale. The email is still sent. |
| Coupon Cannot Be Used on Sale Items | checkbox | On |
The coupon does not apply to items on sale at checkout. |
| Cannot Be Combined with Other Coupons | checkbox | On |
Stops the coupon from being combined with other coupons. |
| Restrict Coupon to Subscriber Email | checkbox | On |
Locks the coupon to the subscriber's email address. |
| Allow Free Shipping | checkbox | Off |
Also grants free shipping, if your shipping settings allow a free shipping method with a coupon. |
Instock Notifier > Settings > Background Process Engine - Advanced Settings
| Setting | Type | Default | What it does |
|---|---|---|---|
| Background Process Engine | select | - | Engine used to send emails in the background: WooCommerce Background Process or Default Background Process. |
| Limit Email Sending Speed | checkbox | Off |
Send automatic back in stock emails gradually instead of all at once. |
| Maximum Emails per Minute | number | 60 |
Maximum automatic emails per minute when the speed limit is enabled. |
| Auto-retry Stuck Emails | checkbox | Off |
Run a recovery task that resends emails for entries stuck without an email. |
| Retry Frequency | select | Every Hour |
How often the recovery task runs: Every Hour, Every 6 Hours, Every 12 Hours or Every Day. |
| Maximum Retry Attempts | number | 2 |
How many times to retry before giving up. |
| Status After All Retries Fail | select | Mail Not Sent (recommended) |
Status set after all retries fail: Mail Not Sent (recommended), Subscribed (retry on next restock) or Unsubscribed. |
Instock Notifier > Settings > Bot Protection
| Setting | Type | Default | What it does |
|---|---|---|---|
| Bot Protection through | select | Google reCAPTCHA |
Choose Google reCAPTCHA or Turnstile. |
| Enable Google reCAPTCHA in Subscribe Form | checkbox | Off |
Add reCAPTCHA to the subscribe form. A site key is required. |
| Select Google reCAPTCHA version | select | v2 |
reCAPTCHA version: v2 or v3. |
| Google reCAPTCHA v2 Site Key | text | - | Your reCAPTCHA site key. |
| Verify Google reCAPTCHA response in Server Side - this will ignore nonce validation | checkbox | Off |
Verify the reCAPTCHA response on the server as well as in the browser, instead of the WP nonce check. |
| Google reCAPTCHA v2 Secret Key(this is required when you want to verify reCAPTCHA response in server side) | text | - | Your reCAPTCHA secret key. Required only when server-side verification is enabled. |
Instock Notifier > Settings > Quantity Field Settings
| Setting | Type | Default | What it does |
|---|---|---|---|
| Display Quantity Field in the Front-End Subscription Form | checkbox | Off |
Add a quantity field to the subscribe form. |
| Quantity Field Placeholder | text | - | Placeholder shown in the quantity field. |
| Quantity Field Empty Error | text | Quantity cannot be empty |
Error when the quantity field is empty. |
| Quantity Field Optional | checkbox | Off |
Make the quantity field optional. |
Instock Notifier > Settings > Auto Delete Settings
| Setting | Type | Default | What it does |
|---|---|---|---|
| Enable Auto Delete | checkbox | Off |
Delete old subscriber entries automatically. |
| Delete subscribers after x days (By considering the following statuses: MAIL SENT, UNSUBSCRIBED, and PURCHASED) | number | 7 |
Number of days after which entries with these statuses are deleted. |
Instock Notifier > Settings > I Agree Checkbox in Subscribe Form
| Setting | Type | Default | What it does |
|---|---|---|---|
| Enable I Agree in Subscribe Form | checkbox | Off |
Add a consent checkbox to the subscribe form. |
| Text for I Agree - this will appear next to the checkbox frontend | textarea | I Agree to the <a href="#">terms</a> and <a href="">privacy policy</a> |
Text shown next to the checkbox. HTML links are allowed. |
| I Agree Error Message | textarea | Please accept our terms and privacy policy |
Error shown when the checkbox is not ticked. |
Instock Notifier > Settings > Estimate Stock Arrival
| Setting | Type | Default | What it does |
|---|---|---|---|
| Enable Estimate Stock Arrival | checkbox | Off |
Show estimated stock arrival messages on the subscribe form. |
| Rule Priority | radio | First Matched Rule |
Which rule applies when several match the same product: First Matched Rule or Last Matched Rule. |
| Display Message Place | select | Before Heading |
Where the message appears: before or after the heading, the input field or the submit button. |
Instock Notifier > Settings > Troubleshoot Settings (Experimental)
| Setting | Type | Default | What it does |
|---|---|---|---|
| Frontend Subscribe Form Submission via | select | WordPress AJAX(default) |
How the form is submitted: WordPress AJAX(default) or WordPress REST API Route. |
| Enable if Subscribe Form Layout Problem/Input Field Overlap | checkbox | Off |
Use only if the form layout breaks on the frontend. |
| Enable Accessibility Compliance for Subscribe Form | checkbox | Off |
Adds accessible labels, screen-reader messages and safe submit behavior. |
| Additional Class Name for Subscribe Button(seperated by commas) | textarea | - | Extra CSS classes for the subscribe button. |
| Hide Subscriber Count(Admin Side) | checkbox | Off |
Hide the subscriber count badge in the admin menu. |
| Admin Menu Counter Shows | select | New subscribers since your last visit |
What the menu badge counts: New subscribers since your last visit, or Total number of subscribers. |
| Enable this option if you have updated the stock from a third-party inventory plugin | checkbox | Off |
Only needed when stock is updated outside WooCommerce. Subscribers are notified when a product changes from out of stock to in stock. |
| Delete Subscriber Cron Recurrence | select | Every 5 Minutes |
How often the delete subscribers cron job runs: Every 5 Minutes, Every 12 Hours or Every Day. |
| Remove View Subscribers Link in Product List Table(Admin Dashboard -> Products) | checkbox | Off |
Remove the View Subscribers link from the Products list. |
| Trigger mail to variable product subscribers when any other variation of that product is back in stock | checkbox | Off |
Notify variable product subscribers when any variation of the product is back in stock. |
| Force load Template from Plugin - This option ignores the template override from theme | checkbox | Off |
Ignore a subscribe form template override in your theme. |
| Enable Cache Buster | checkbox | Off |
Add a cache buster to the add-to-cart link in the back in stock email. |
| Show Subscribers Count | checkbox | Off |
Show a Subscribers Count column in the Products list. |
| Disable sending emails on staging environments | checkbox | Off |
Stop email notifications when the site is accessed on a staging domain that mirrors production. |
| Disable Prefilled Data for Logged-in Users | checkbox | Off |
Stop the form from filling in name and email for logged-in users. |
| Trash Subscribers upon Product Deletion | checkbox | Off |
Trash the subscribers of a product or variation when it is deleted. |
| Auto Purge W3 Total Cache on Stock Status Update | checkbox | Off |
Purge the W3 Total Cache of a product page when its stock status changes. |
Instock Notifier > Status
| Setting | Type | Default | What it does |
|---|---|---|---|
| Want to change the UI of Backend Admin Settings? | select | - | Layout of the settings page: Default UI or Tabbed UI. Click Change Settings UI to apply. |
WooCommerce > Settings > Emails > Back In Stock - Subscription Confirmation
| Setting | Type | Default | What it does |
|---|---|---|---|
| Enable/Disable | checkbox | On |
Send this email to subscribers right after they subscribe. |
| Subject | text | You subscribed to {product_name} at {shopname} |
Email subject. Placeholders are allowed. |
| Email heading | text | You subscribed to {product_name} at {shopname} |
Heading shown at the top of the email. |
| Additional content | textarea | - | Main text of the email. Placeholders such as {subscriber_name} and {product_name} are allowed. |
| Email type | select | HTML |
Plain text, HTML or Multipart. |
WooCommerce > Settings > Emails > Back In Stock - Product Available
| Setting | Type | Default | What it does |
|---|---|---|---|
| Enable/Disable | checkbox | On |
Send this email to subscribers when the product is back in stock. |
| Subject | text | Product {product_name} is back in stock |
Email subject. Placeholders are allowed. |
| Email heading | text | Product {product_name} is back in stock |
Heading shown at the top of the email. |
| Additional content | textarea | - | Main text of the email. Supports {product_link}, {cart_link} and the coupon placeholders. |
| Email type | select | HTML |
Plain text, HTML or Multipart. |
Shortcodes
[cwginstock_subscribe_form]
Displays the back in stock subscribe form.
[cwginstock_subscribe_form]On your site
When a product is out of stock, shoppers see a subscribe box below the Out of stock notice on the product page. By default it has the title Email when stock available, a name field, an email field and a Subscribe Now button. For logged-in customers, the name and email are filled in for them.
After the shopper submits, they see your success message. If they are already on the waitlist for that product, they see the "already subscribed" message instead, because the same email is never added twice to one waitlist.
What else appears depends on your settings:
- A pop-up form instead of the inline box (Frontend Form).
- A phone field, a quantity field or an I Agree consent checkbox.
- A reCAPTCHA or Turnstile check (Bot Protection).
- An estimated stock arrival message (Estimate Stock Arrival).
- A Subscribe Now button on shop and category pages (Visibility Settings).
The subscriber then receives the subscription confirmation email, and later the back in stock email when the product is restocked.
Frequently asked questions
Do I need to configure anything before the form appears?
No. After you activate the plugin, the subscribe form appears on out-of-stock products. You can then change its text, design and visibility under Instock Notifier > Settings.
Which product types are supported?
Simple and variable products (at product and variation level), grouped products, simple and variable subscriptions from WooCommerce Subscriptions, and product bundles from WooCommerce Product Bundles.
Where do I edit the emails subscribers receive?
Go to WooCommerce > Settings > Emails and open Back In Stock - Subscription Confirmation or Back In Stock - Product Available. You can also reach them from the buttons on the Mail Settings tab. Each email has a subject, heading, additional content, email type and a live preview.
Can I show the form on products that allow backorders?
Yes. Tick Show Subscribe Form on Backorders on the Visibility Settings tab and save.
How do I move my subscribers to a new site?
Use the WordPress export tool. Go to Tools > Export, choose Subscribers and download the export file. On the new site, go to Tools > Import, upload that file and finish the import.
Can I change the subscribe form template?
Yes. Create a folder named back-in-stock-notifier-for-woocommerce in your theme. Copy default-form.php from the plugin's templates folder into it, then edit the copy. The Status page shows whether the template is loaded from your theme. Enabling Force load Template from Plugin ignores your theme copy.
Does the plugin have a REST API?
Yes. You can create, read, update and delete subscribers through the REST API. Authentication uses a WooCommerce consumer key and secret, which you create under WooCommerce > Settings > Advanced > REST API with read/write permissions. The endpoints are documented at https://documenter.getpostman.com/view/15423262/TzJrDfTe
Can I limit how many subscribers are emailed when only a few units come back?
Yes. On the Mail Settings tab, enable Fair Sending: Notify only as many Subscribers as Units in Stock. You can change how many subscribers are notified per unit with Fair Sending: Subscribers to Notify per Unit in Stock. Subscribers who are not notified stay on the waitlist for the next restock.
Troubleshooting
- Shoppers see "Something went wrong, please try again after some time" when they subscribe
Caching can store the security nonce used by the form. Try these steps:
- Go to Instock Notifier > Settings > Troubleshoot Settings (Experimental) and set Frontend Subscribe Form Submission via to WordPress REST API Route. Save, purge your cache and test again.
- If the error continues, turn on Google reCAPTCHA or Turnstile on the Bot Protection tab and enter the keys for your chosen provider.
- A subscriber's status says Mail Sent, but the email never arrives
Without an SMTP plugin, WordPress sends email through the server's PHP mail() function. The server accepts the message, but it may not deliver it, or it may land in spam. Install and configure an SMTP plugin such as WP Mail SMTP or FluentSMTP. Then go to Instock Notifier > Status and click Test Email to check delivery.
- A product is back in stock but subscribers did not get an email
- On Instock Notifier > Status, check that Cron Status is active and that Back In Stock Email shows as enabled.
- Make sure the Back In Stock - Product Available email is enabled under WooCommerce > Settings > Emails.
- On Mail Settings, check Minimum stock quantity threshold value. The stock must reach this number. Also check Consider Only Published Product Status if the product is private or a draft.
- Use the In stock but below notification threshold stock status filter on All Subscribers to find skipped subscribers, then send the email manually.
- If emails get stuck, enable Auto-retry Stuck Emails on the Background Process Engine - Advanced Settings tab.
- Stock is updated by an ERP or external inventory system and no emails go out
When stock is written straight to the database, WooCommerce fires no stock event. Go to Troubleshoot Settings (Experimental), tick Enable this option if you have updated the stock from a third-party inventory plugin and save. The plugin then checks on a schedule for products that change from out of stock to in stock. The first check only records current stock and sends nothing.
- The subscribe form does not appear on an out-of-stock product
Review the Visibility Settings tab:
- Check that Hide Subscribe Form for Guests or Hide Subscribe Form for Members is not hiding it for the visitor you are testing with.
- Check the product, category and tag lists and their Show/Hide choice.
- Check the options that hide the form on regular, sale or free/zero price products.
- For variations hidden from the dropdown, enable Ignore WooCommerce Out of Stock Visibility Settings for Variation.
For backorder products, enable Show Subscribe Form on Backorders.
- The subscribe form layout is broken or fields overlap
On Troubleshoot Settings (Experimental), tick Enable if Subscribe Form Layout Problem/Input Field Overlap and save. If your theme overrides the form template, you can also try Force load Template from Plugin - This option ignores the template override from theme.
Upgrade
Upgrade to Bundle Add-ons - Back In Stock Notifier for WooCommerce
Bundle Add-ons - Back In Stock Notifier for WooCommerce adds more features to this plugin, including email marketing integrations and subscriber management tools. It adds:
- Omnisend
- Track sales
- Ban emails
- Mailerlite
- Active campaign
- Klaviyo