

Overview
Plusero - Extra Fees for WooCommerce Pro adds extra charges to the WooCommerce cart when conditions you choose are met. Common examples are a small order fee, a cash on delivery surcharge, a card processing fee or a handling charge for heavy goods. A fee can also reduce what the customer pays, so a bulk order saving is built the same way as a surcharge.
You build each fee in a guided builder: where it is charged, when it applies, how the amount is worked out, and what the customer sees. Pro includes everything in the free edition. It also adds tiered amounts, fees customers opt into, scheduling, reusable condition sets, a price breakdown on product pages, reports, a change history, and import and export.
The plugin is for WooCommerce store owners who need charges beyond product prices and shipping rates. Fees appear in the cart, the checkout, the order, the confirmation email and the invoice without extra setup. They work on the classic cart and checkout and on the block cart and checkout.
Requirements
- WordPress 6.4 or later (tested up to 7.1)
- PHP 7.4 or later
- WooCommerce 8.0 or later, installed and active
Installation
The plugin needs WooCommerce. Install and activate WooCommerce 8.0 or newer before you install Plusero Pro. Download the Pro plugin as a zip file from your ProPluginsLab account.
Make sure WooCommerce 8.0 or newer is installed and active.
Log in to your ProPluginsLab account, open My Account > Downloads and download the Plusero - Extra Fees for WooCommerce Pro zip file.
In WordPress, go to Plugins > Add New > Upload Plugin, choose the zip file and click Install Now.
Click Activate Plugin.
If the free edition of Plusero is installed, it is switched off automatically. Every fee and setting you built with it is kept.
Open Plusero Fees in the admin menu to build your first fee, or go to Plusero Fees > Ready made fees to start from a template.
Quick start
- Open the builder or pick a template
Go to Plusero Fees > Add Fee to build a fee from scratch. If you prefer a template, go to Plusero Fees > Ready made fees and click Create this fee on the card that fits your store.
- Choose where the fee is charged
In the Where step, pick Product, Cart, Checkout, Shipping or Payment, then click Next. Your choice decides which conditions you can use in the next step.
- Add conditions
In the When step, add the conditions that must match, for example a cart subtotal or a payment method. Choose All of these match or Any of these match. A fee with no conditions is charged on every order.
- Set the amount and the wording
In the Amount step, choose how the amount is worked out, for example a fixed amount or a percentage. In the Wording step, write the fee label your customers will see, plus an optional description and tooltip.
- Review and save
Check everything in the Review step and save. A new fee from the builder is active straight away. Fees created from Ready made fees start switched off, so switch them on in Plusero Fees > All Fees when you are ready.
- Test it in the cart
Add a matching product to the cart and open the cart page. The fee appears in the totals under the subtotal. If it does not, open the fee and check that every condition matches the cart you are testing with.
#All Fees
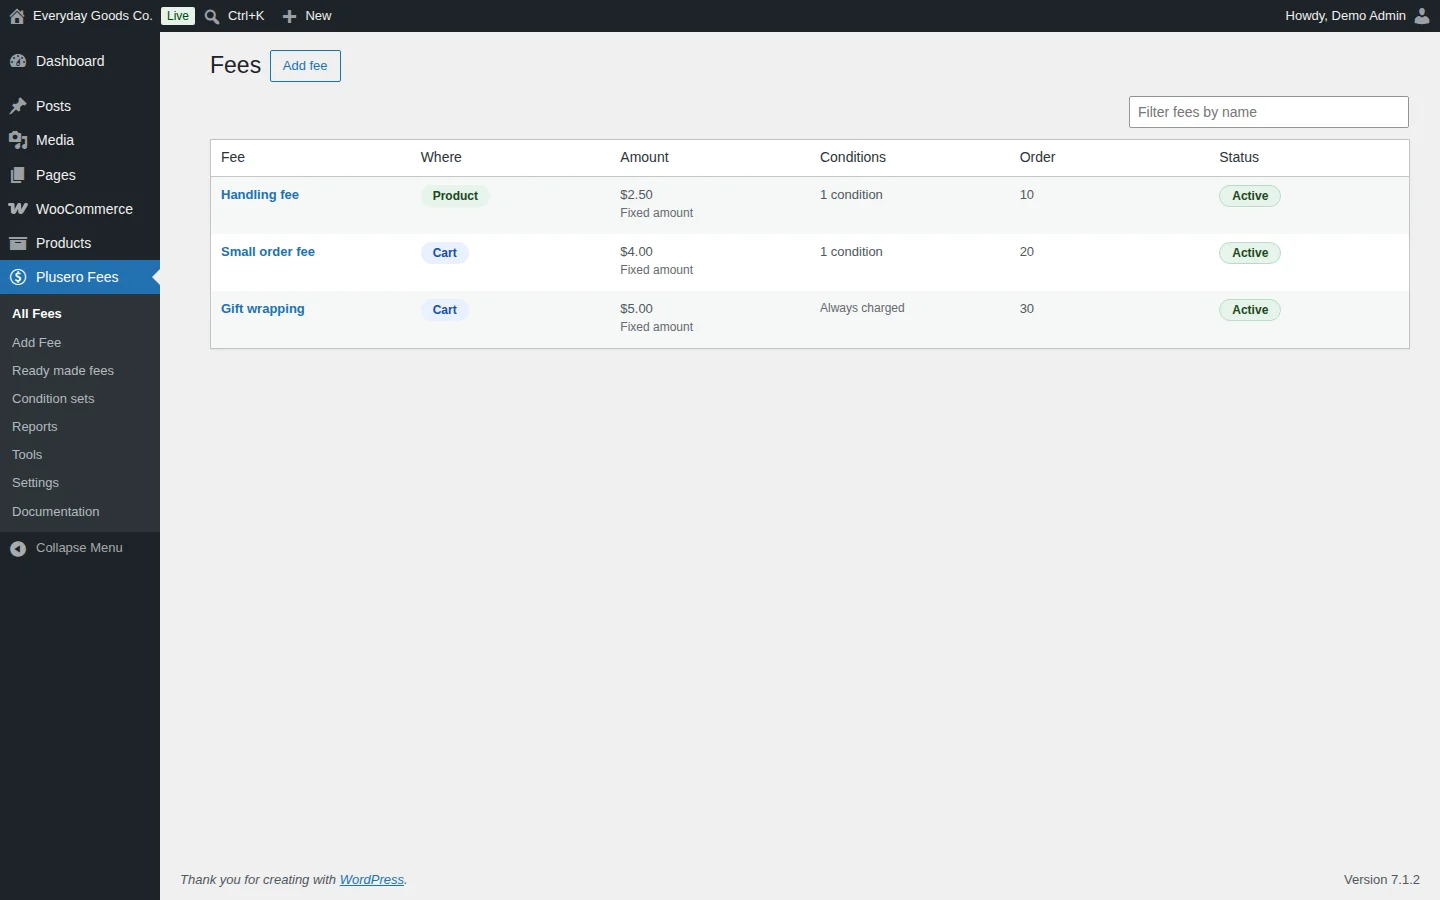
Plusero Fees > All Fees lists every fee in your store. Use it to see what is set up, change the order fees are applied in and switch fees on or off.
The table has these columns:
- Fee: the fee name. Click it to open the fee in the builder.
- Where: where the fee is charged (Product, Cart, Checkout, Shipping or Payment).
- Amount: the amount and how it is worked out, for example Fixed amount.
- Conditions: how many conditions the fee has, or Always charged when it has none.
- Order: the position of the fee. Fees are added in this order, which matters when you set a ceiling or charge only the first fee that matches.
- Status: whether the fee is Active.
Type in the Filter fees by name box to find a fee quickly. Each fee also has Duplicate and Delete actions. Duplicate is handy when you need a second version of a fee with small changes. Click Add fee at the top to open the builder.
#Add Fee (the fee builder)
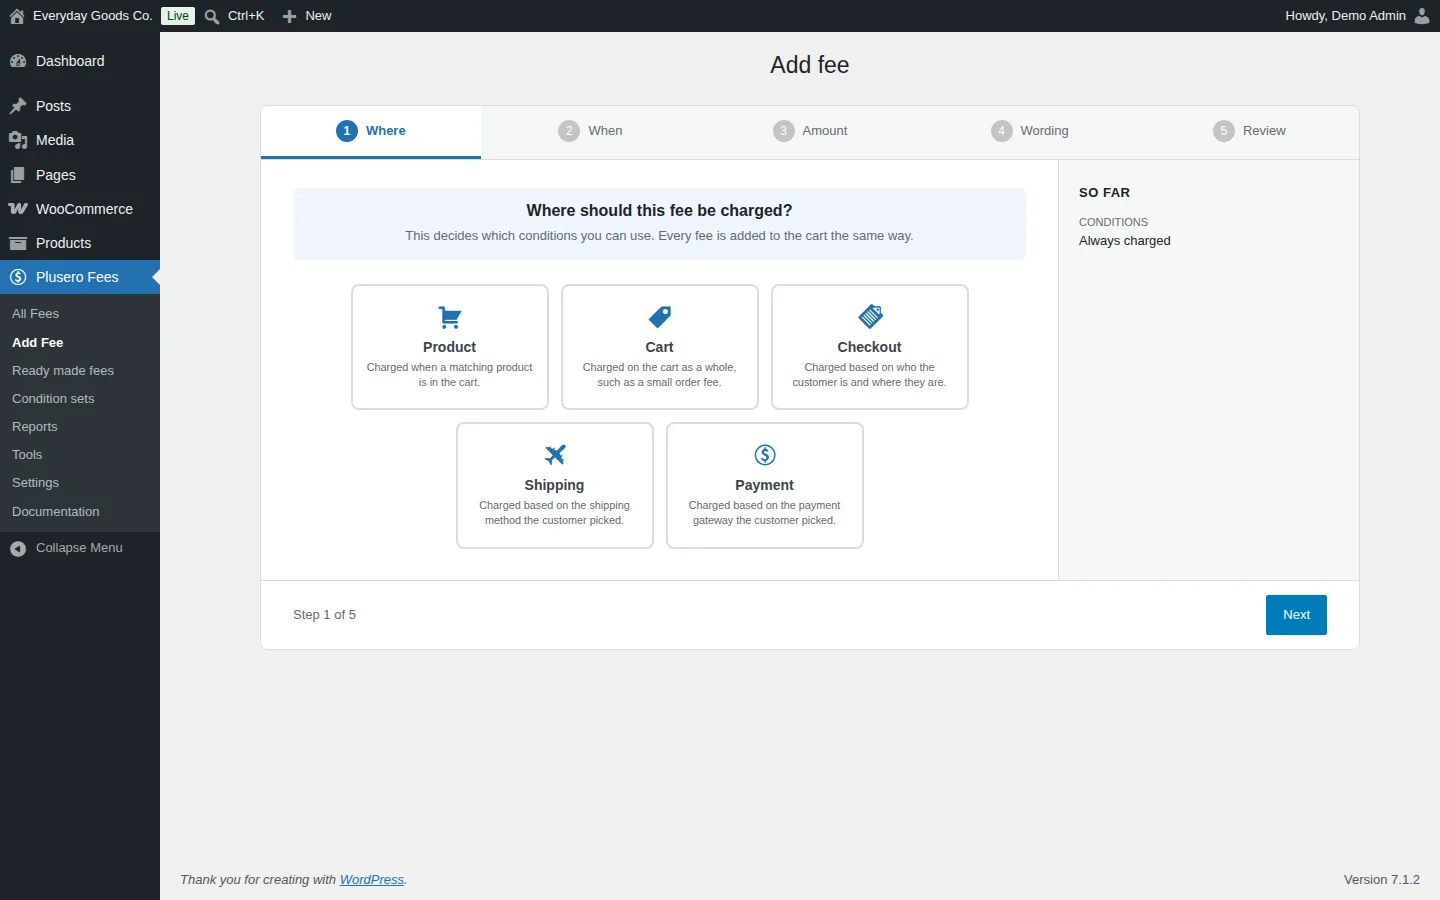
Plusero Fees > Add Fee opens the builder. You build a fee in five steps: Where, When, Amount, Wording and Review. You can go back and change any answer before you save. The So far panel on the right sums up your choices as you go.
Where
Choose where the fee is charged:
- Product: charged when a matching product is in the cart.
- Cart: charged on the cart as a whole, such as a small order fee.
- Checkout: charged based on who the customer is and where they are.
- Shipping: charged based on the shipping method the customer picked.
- Payment: charged based on the payment gateway the customer picked.
Every fee is added to the cart the same way. The location decides which conditions the builder offers you. It does not decide which page the fee shows on. Only Checkout, Shipping and Payment fees offer the Shipping method or Payment method conditions.
When
Conditions decide when a fee is charged. Leave them empty and the fee is always charged. Choose All of these match (every condition must be true) or Any of these match (one is enough). The conditions available are:
- Cart subtotal, Total quantity, Cart weight, Number of different items
- Product, Product category, Product tag
- Customer role (visitors who are not logged in count as Guest), Logged in, Orders placed before
- Billing country, Billing state, Billing postcode, Shipping country
- Payment method, Shipping method
- Day of the week, Coupon used
Pro also supports Starts with, so one postcode rule can cover a whole area. You can use more than one condition group, so a rule can need one thing to be true and any of several others. You can attach reusable condition sets, and you can schedule a fee to run between two dates, on set days of the week, or only within a window of hours.
Amount
Choose how the amount is worked out:
- Fixed amount
- Percentage, taken from a base you choose. Pro adds the item total after discounts, the subtotal plus shipping, or everything including tax.
- Per item
- Per unit of weight
- Percentage plus fixed
- Tiered: a table of ranges, each with its own amount, measured against the cart subtotal, the total quantity or the total weight.
- Round the total up: rounds the order up to the next round number and charges the difference.
You can also set a smallest and largest fee, rounding, and whether to charge tax on the fee. Any fee can reduce what the customer pays instead of charging them. You can also make a fee optional, so the customer decides whether to add it.
Wording
Set what the customer sees: the Fee label, a Description shown under the fee in the cart and checkout totals, and a Tooltip. The Internal name and Order help you manage fees in the admin. You can also highlight an individual fee here so customers do not miss it.
Review
Check your answers and save. A new fee is active straight away. To prepare a fee before customers see it, switch it off from the fee list.
#Ready made fees
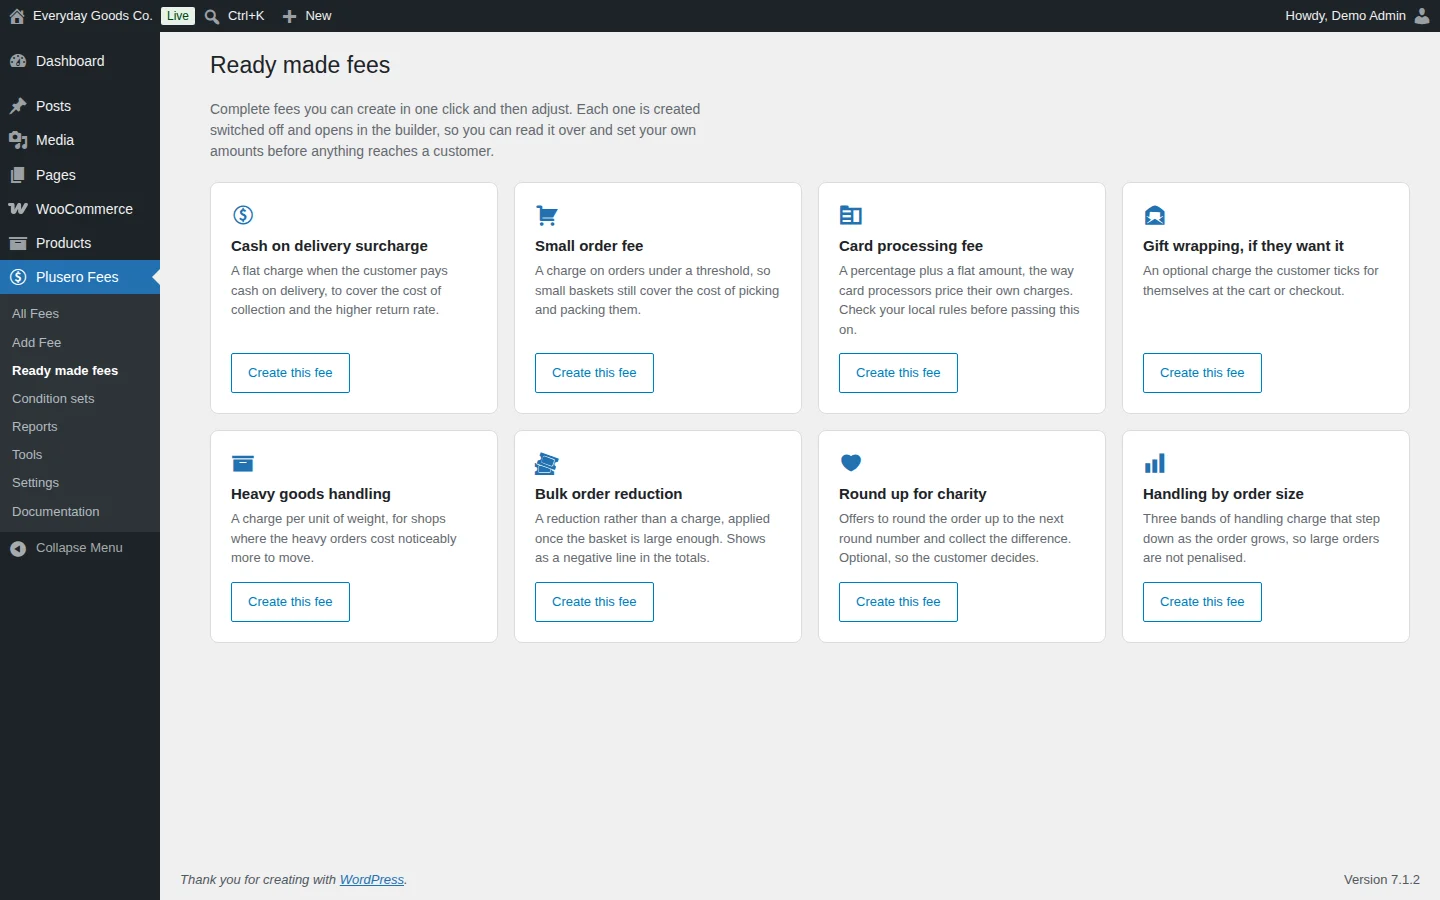
Plusero Fees > Ready made fees has eight complete fees you can create in one click and then adjust. Click Create this fee on a card. The fee is created switched off and opens in the builder, so you can read it over and set your own amounts before any customer sees it.
- Cash on delivery surcharge: a flat charge when the customer pays cash on delivery.
- Small order fee: a charge on orders under a threshold.
- Card processing fee: a percentage plus a flat amount. Check your local rules before you pass card charges on.
- Gift wrapping, if they want it: an optional charge the customer ticks for themselves in the cart or at checkout.
- Heavy goods handling: a charge per unit of weight.
- Bulk order reduction: a reduction rather than a charge, applied once the basket is large enough. It shows as a negative line in the totals.
- Round up for charity: offers to round the order up to the next round number and collect the difference. It is optional, so the customer decides.
- Handling by order size: three bands of handling charge that step down as the order grows.
When the fee looks right, switch it on in Plusero Fees > All Fees.
#Condition sets
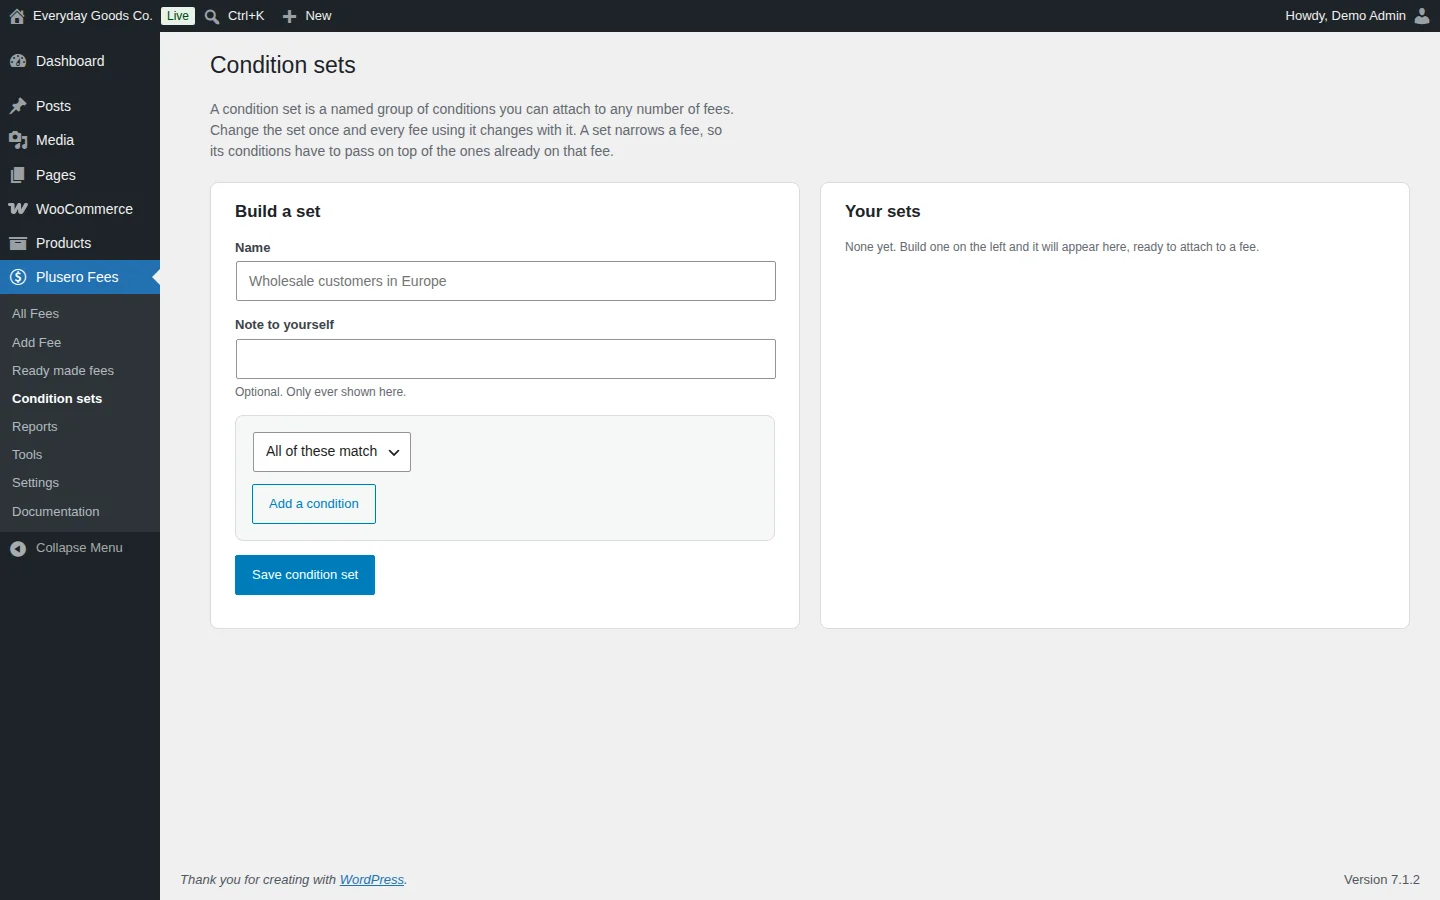
A condition set is a named group of conditions you can attach to any number of fees. When you change the set, every fee that uses it changes too. A set narrows a fee: its conditions must pass on top of the conditions already on that fee.
To build a set:
- Go to Plusero Fees > Condition sets.
- Under Build a set, enter a Name, for example a description of the customers it targets.
- Optionally add a Note to yourself. It is only ever shown on this screen.
- Choose All of these match or Any of these match.
- Click Add a condition for each condition you need.
- Click Save condition set.
Saved sets appear under Your sets, ready to attach to a fee in the builder.
#Reports
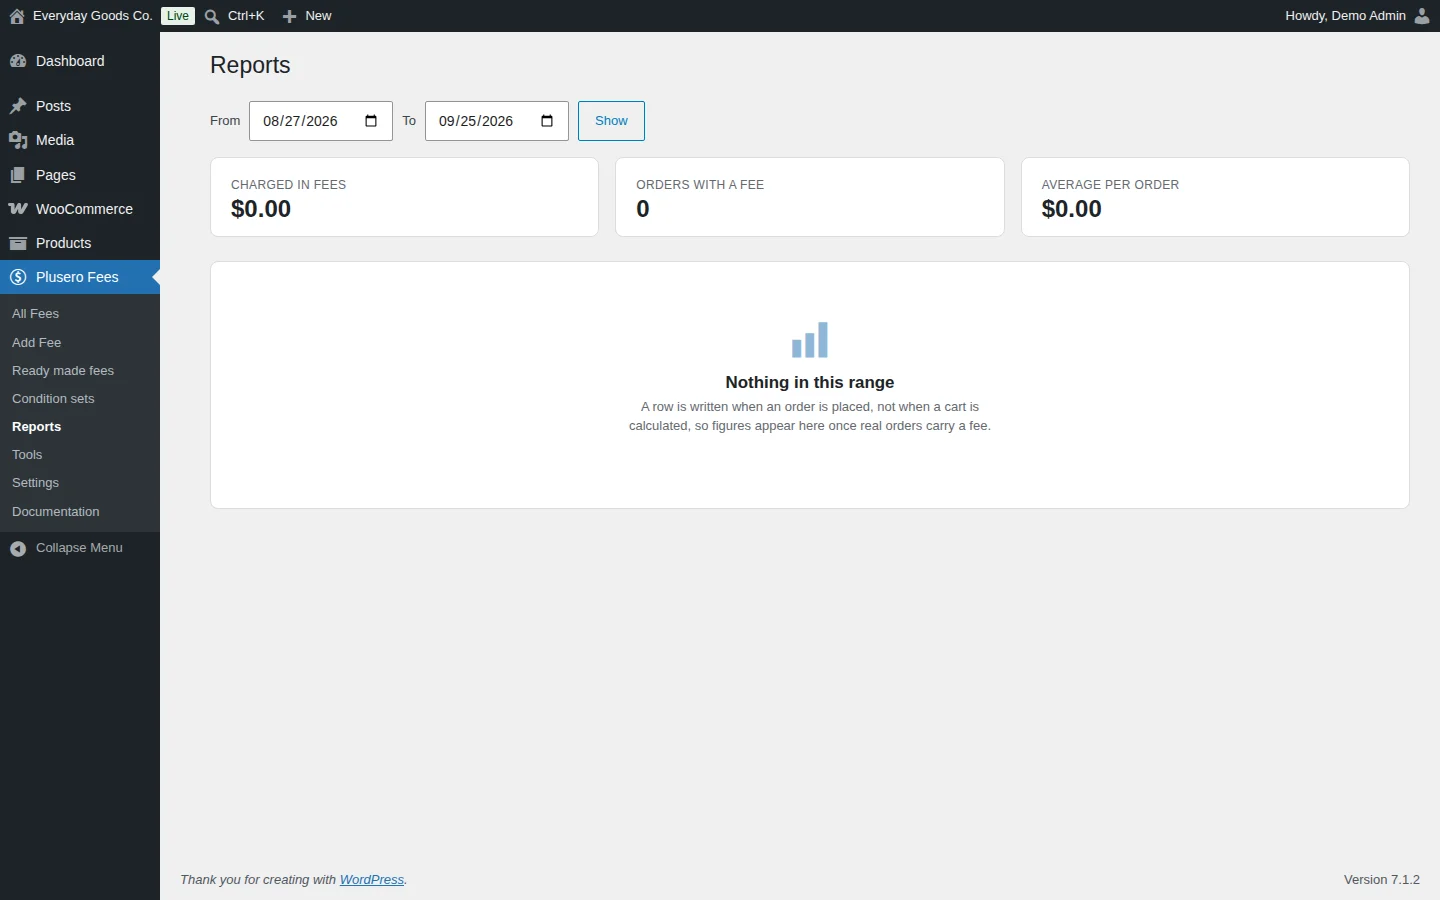
Plusero Fees > Reports shows what your fees earned over a date range. Pick the From and To dates and click Show.
The summary shows:
- Charged in fees: the total collected in fees.
- Orders with a fee: how many orders carried at least one fee.
- Average per order: the average fee amount per order.
Below the summary you get a chart by day and a table by fee, and you can download the data as a CSV file.
A report row is written when an order is placed, not when a cart is calculated. Figures appear once real orders carry a fee. If a range has no such orders, you see Nothing in this range.
#Tools
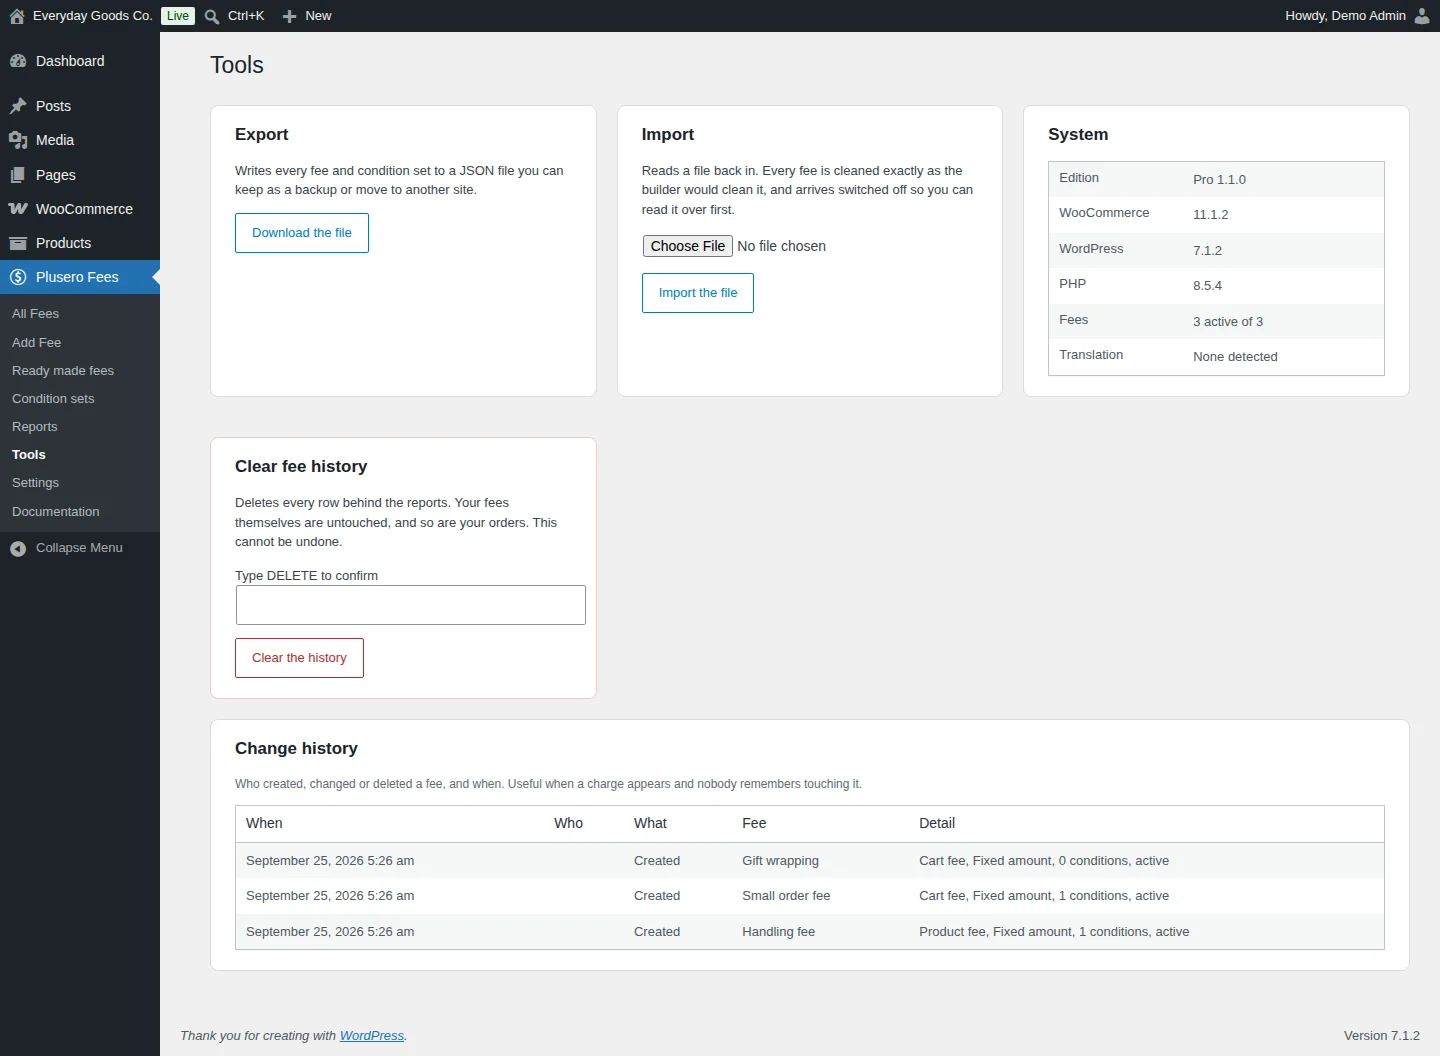
Plusero Fees > Tools groups backup, migration and housekeeping tasks.
- Export: click Download the file to write every fee and condition set to a JSON file. Keep it as a backup or move it to another site.
- Import: choose a JSON file and click Import the file. Every fee is cleaned the same way the builder would clean it. Imported fees arrive switched off so you can read them over first.
- System: shows the plugin Edition, your WooCommerce, WordPress and PHP versions, how many Fees are active, and whether a Translation plugin was detected. This is useful when you contact support.
- Clear fee history: deletes every row behind the reports. Your fees and your orders are not touched. Type
DELETEin the Type DELETE to confirm box and click Clear the history. This cannot be undone. - Change history: a log of who created, changed or deleted a fee, and when. The columns are When, Who, What, Fee and Detail. It helps when a charge appears and nobody remembers adding it.
#Settings
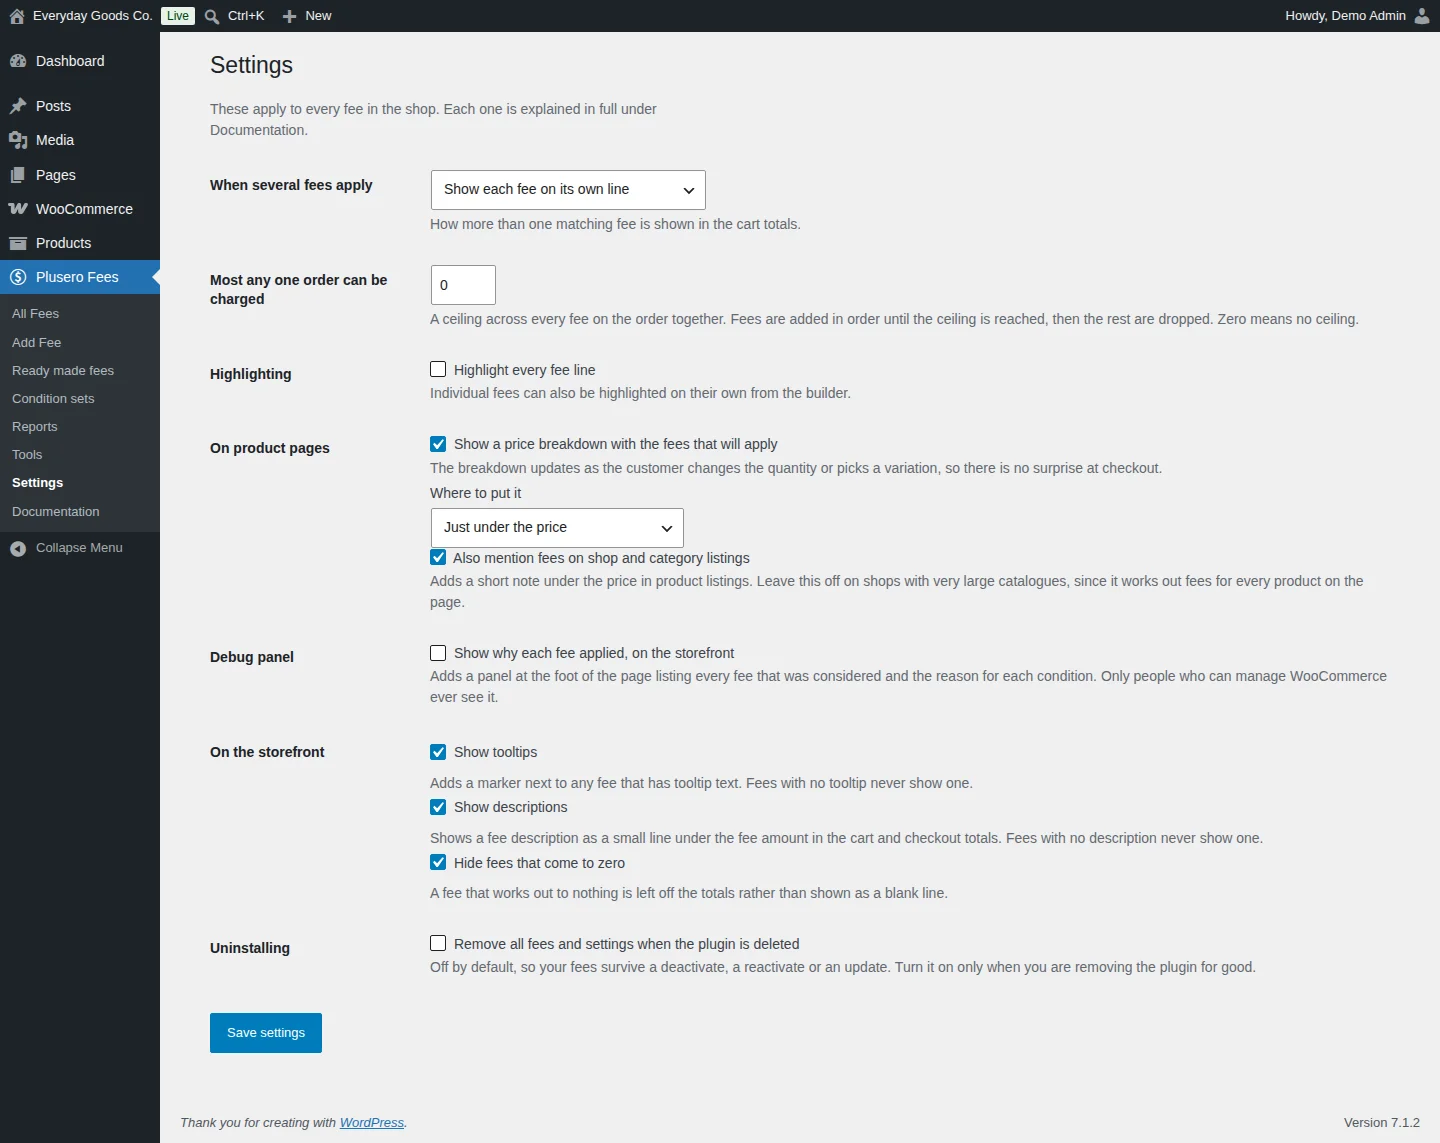
Plusero Fees > Settings holds options that apply to every fee in the store. Click Save settings when you are done.
- When several fees apply controls how more than one matching fee shows in the cart totals: each on its own line, added up into one line, grouped by where they came from, or only the first one that matches.
- Most any one order can be charged sets a ceiling across all fees on an order. Fees are added in order until the ceiling is reached. The fee that crosses it is trimmed to fit, and the rest are dropped.
0means no ceiling. - Highlighting makes every fee line stand out. You can also highlight single fees in the builder.
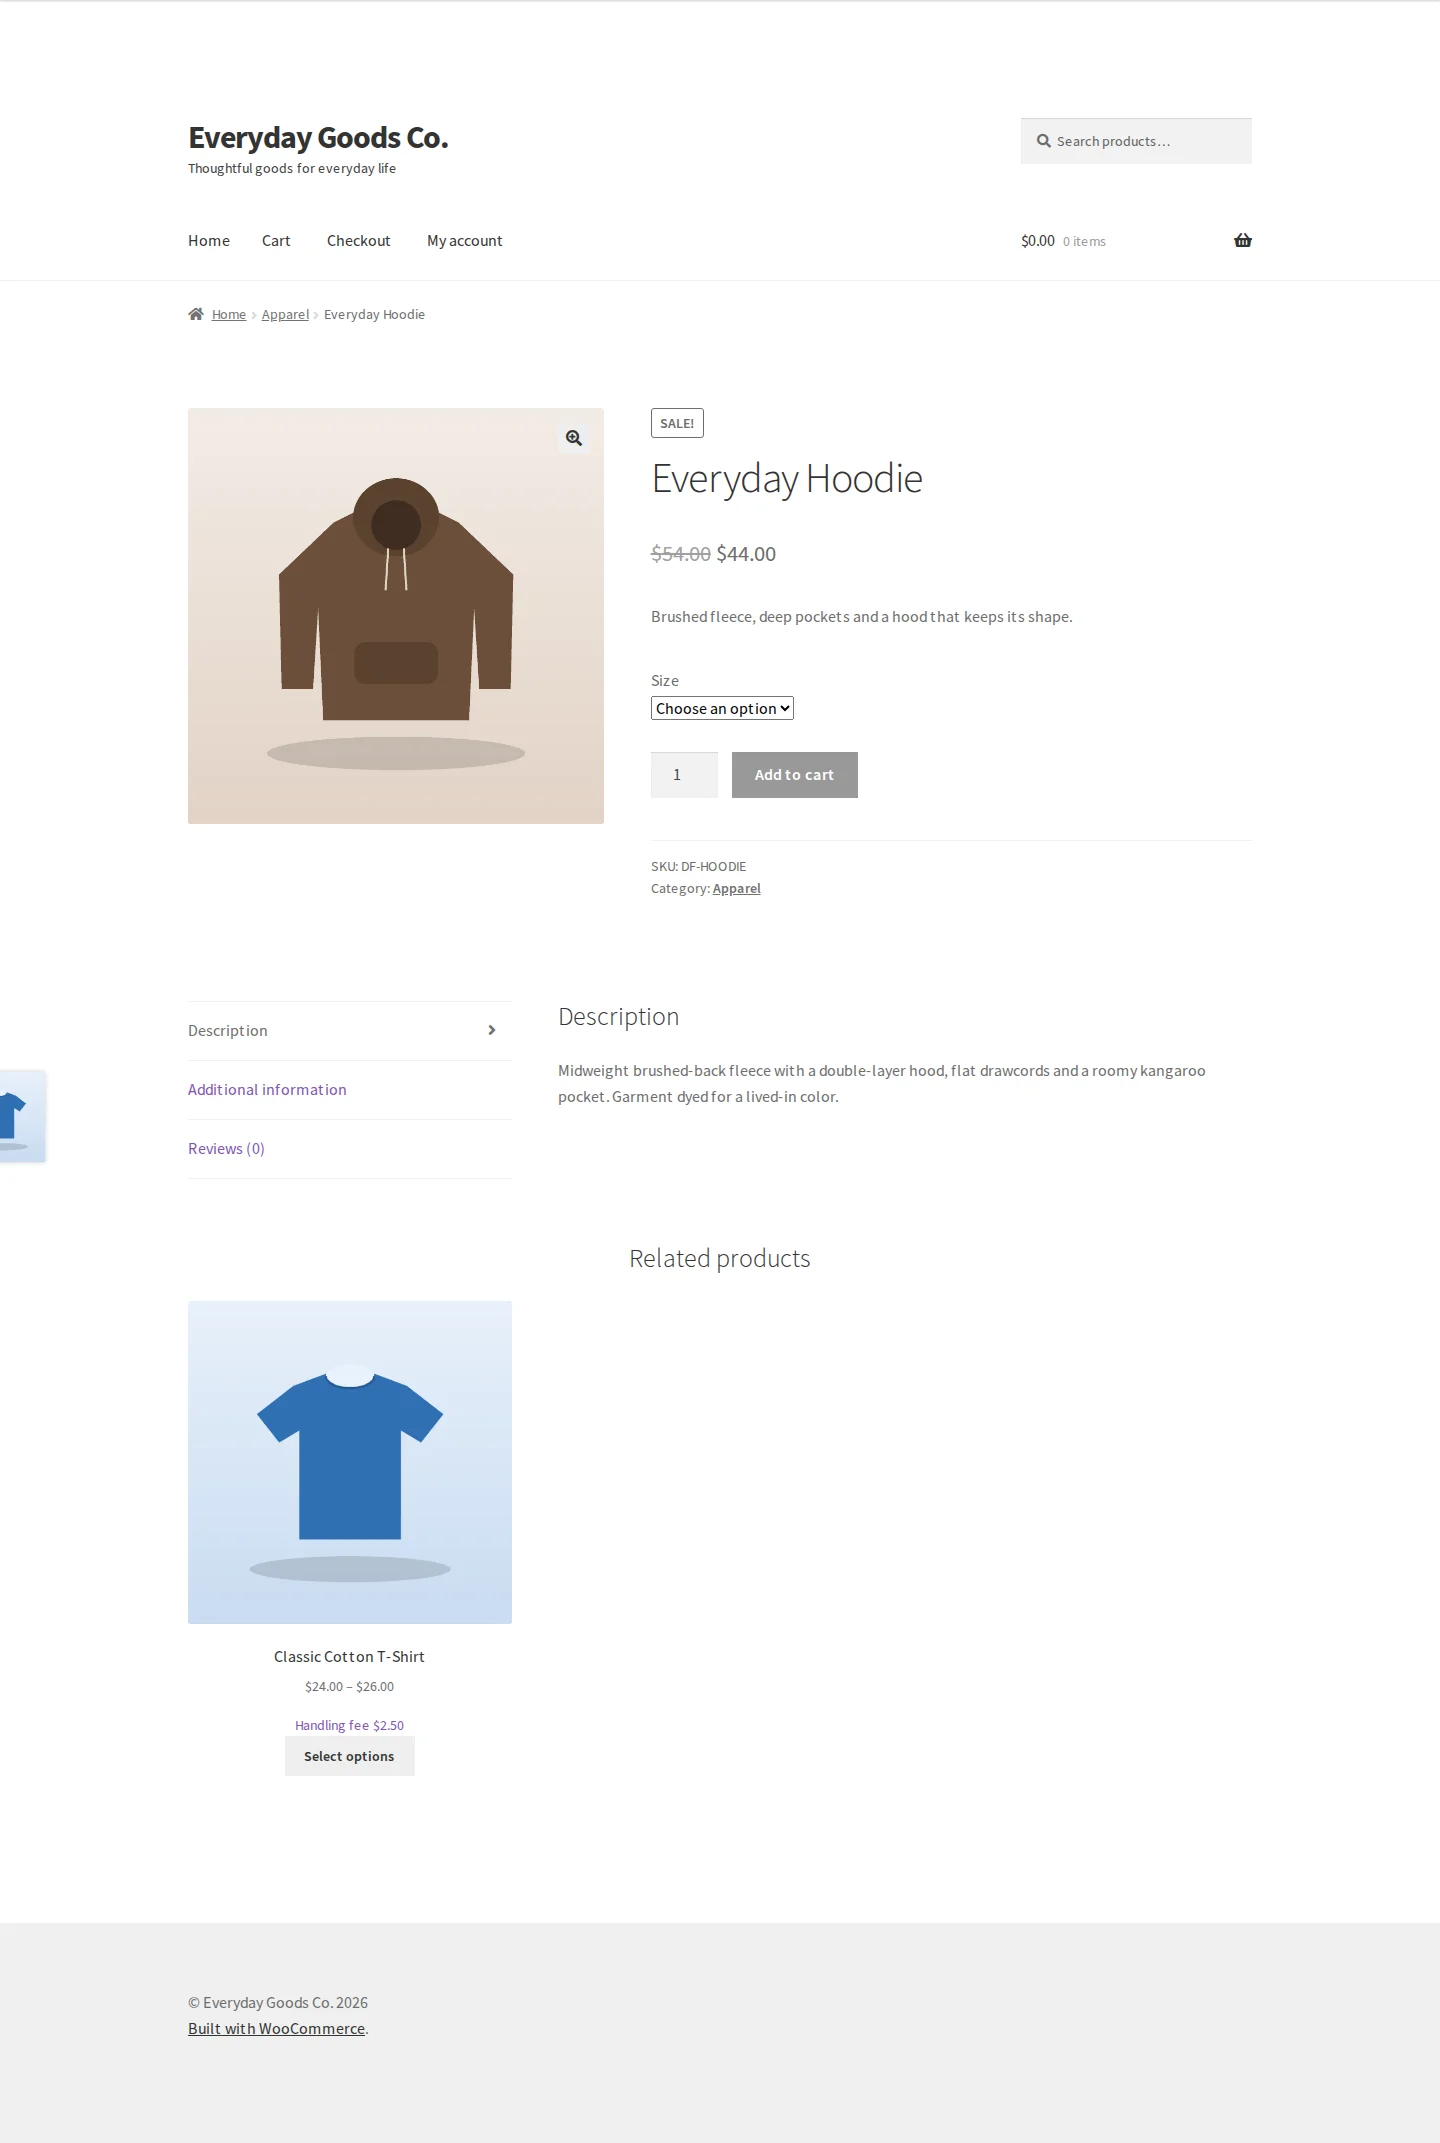
- On product pages adds a live price breakdown with the fees that will apply. It updates as the customer changes the quantity or picks a variation. You choose where it appears, and you can also mention fees on shop and category listings.
- Debug panel shows, on the storefront, every fee that was considered and the reason for each condition. Only people who can manage WooCommerce ever see it.
- On the storefront controls tooltips, descriptions and whether fees that come to zero are hidden.
- Uninstalling decides whether all fees and settings are removed when the plugin is deleted.
The full list of fields is in the settings reference below.
#Built in documentation
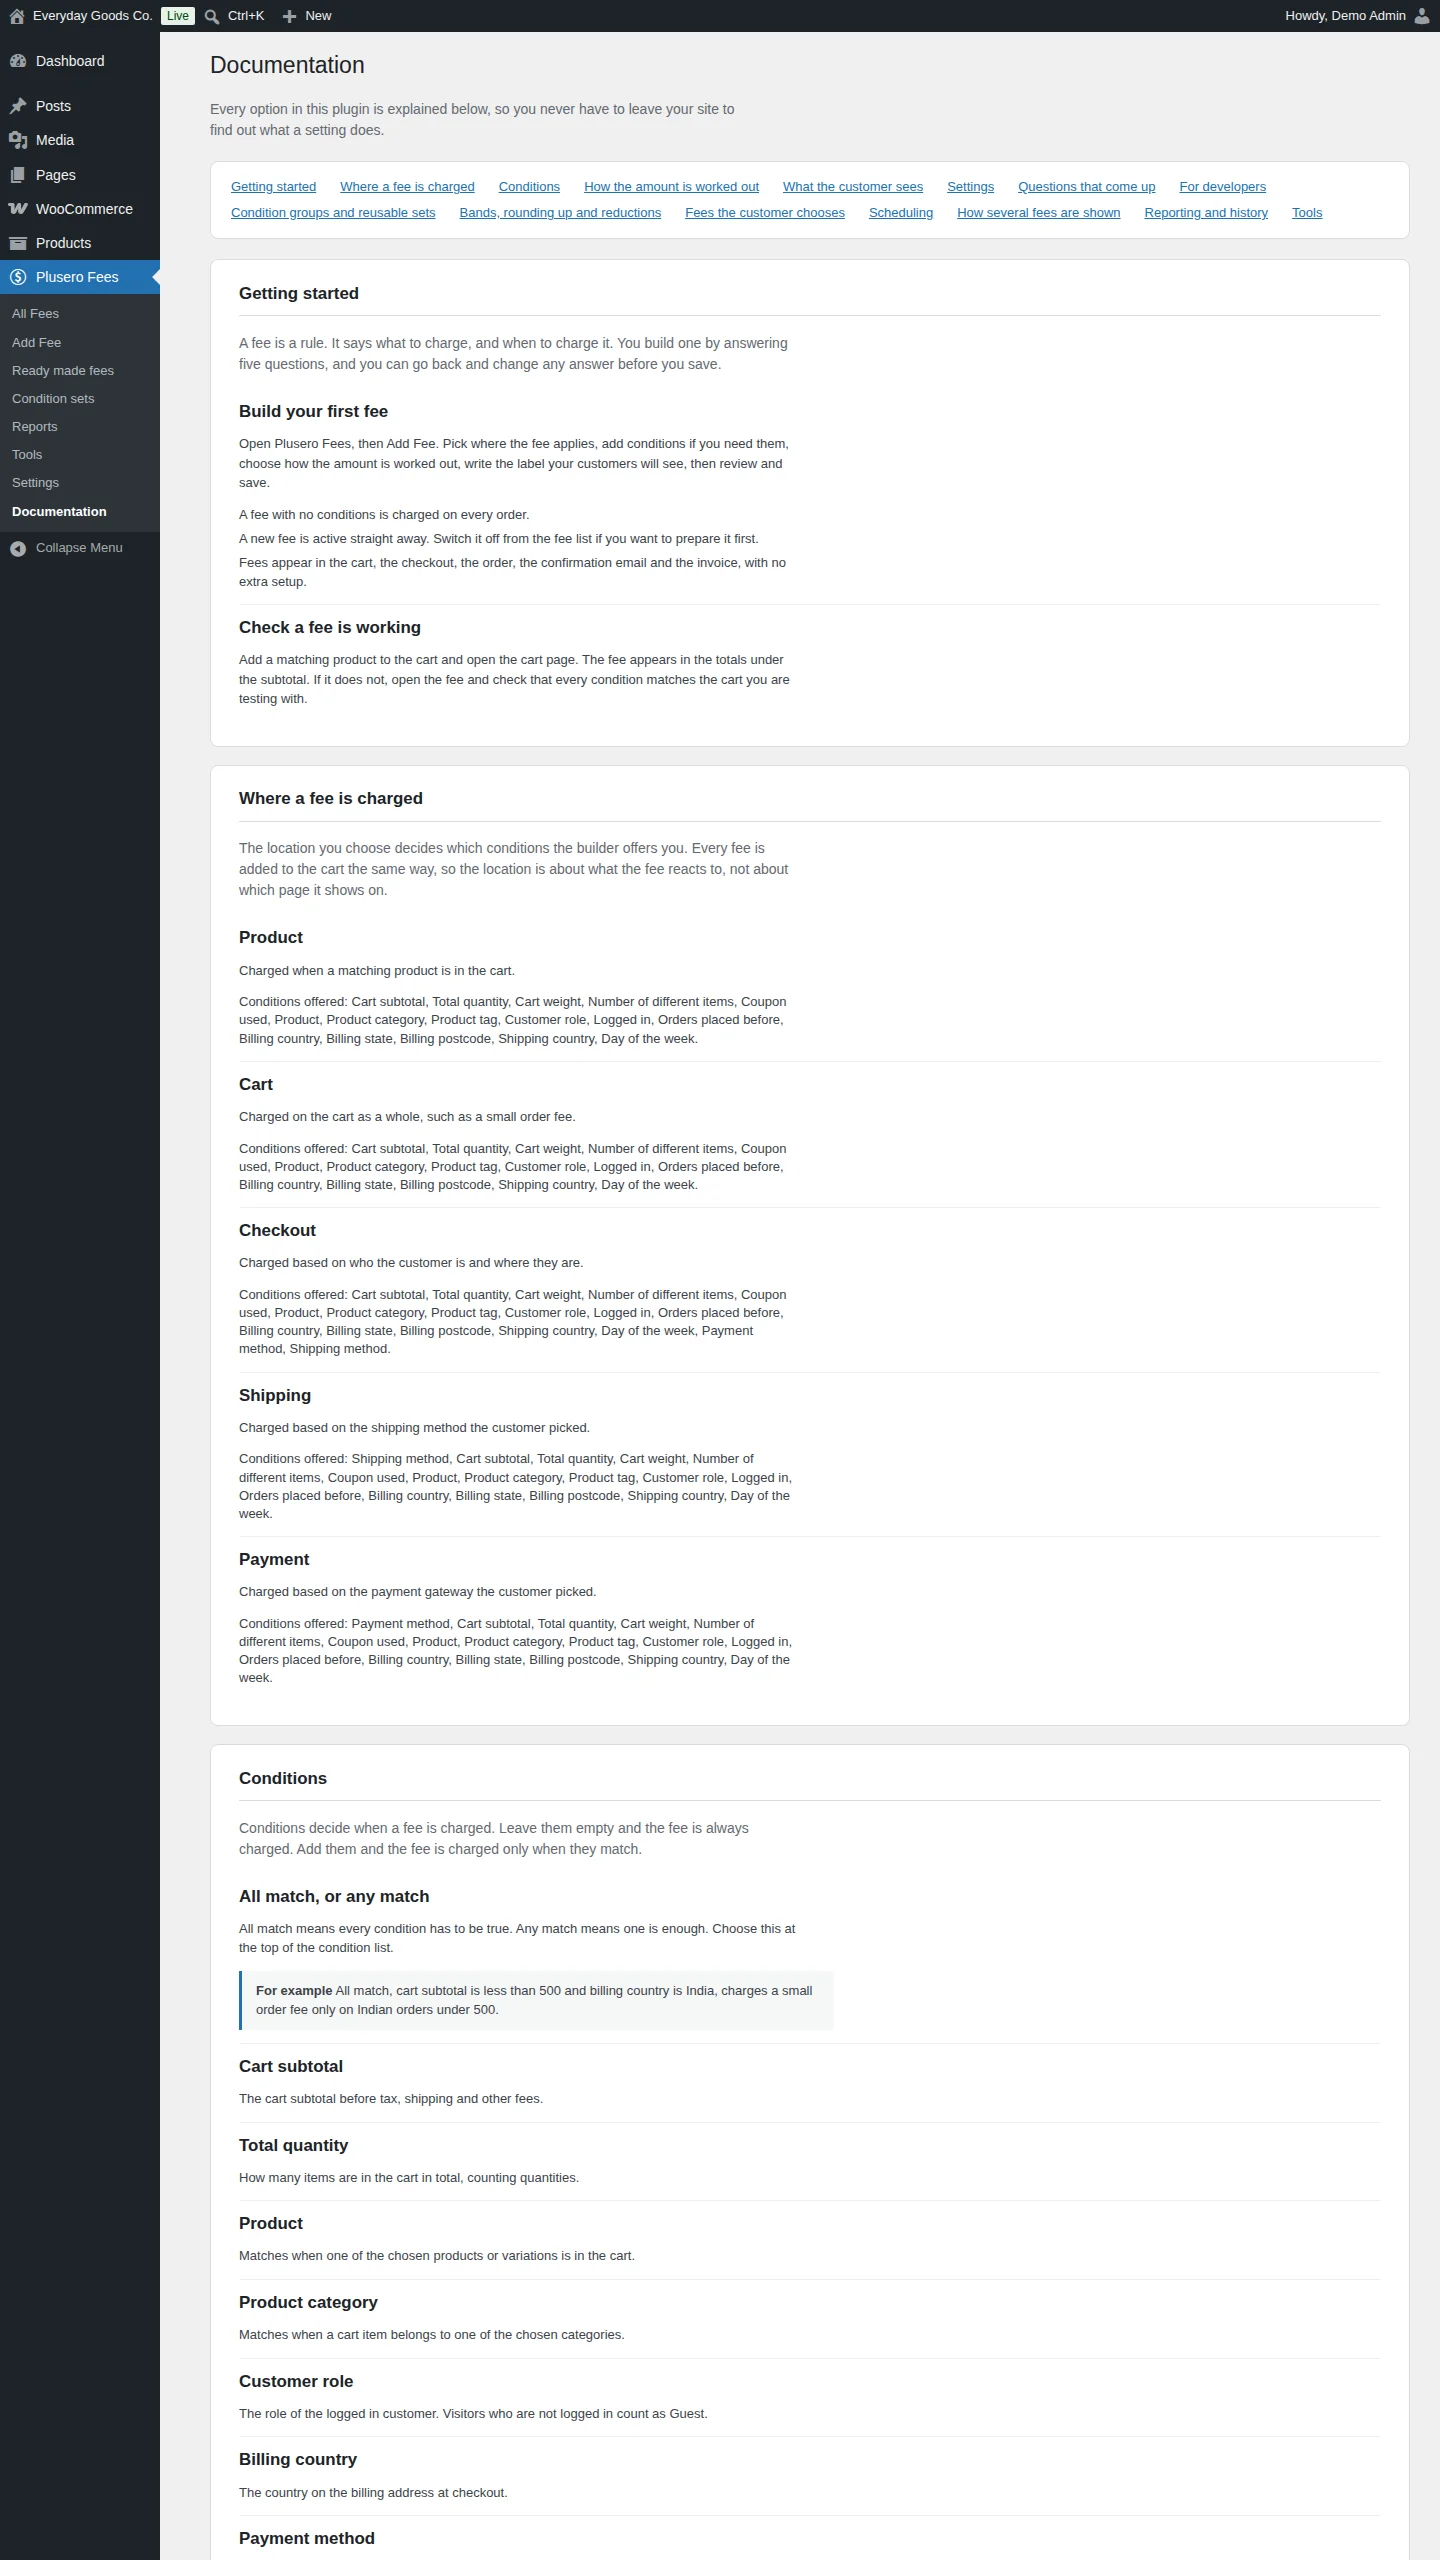
Plusero Fees > Documentation explains every option in the plugin, so you do not have to leave your site to find out what a setting does. The links at the top jump to each topic: getting started, where a fee is charged, conditions, how the amount is worked out, what the customer sees, settings, questions that come up, developer notes, condition groups and reusable sets, bands, rounding up and reductions, fees the customer chooses, scheduling, how several fees are shown, reporting and history, and tools.
For each fee location it lists exactly which conditions the builder offers. Check it when you are unsure which location to pick.
Settings reference
Plusero Fees > Settings
| Setting | Type | Default | What it does |
|---|---|---|---|
| When several fees apply | select | Show each fee on its own line |
How more than one matching fee is shown in the cart totals. Options: Show each fee on its own line, Add them up into one line, Group them by where they came from, Charge only the first one that matches. |
| Most any one order can be charged | number | 0 |
A ceiling across every fee on the order together. Fees are added in order until the ceiling is reached, then the rest are dropped. Zero means no ceiling. |
| Highlight every fee line | checkbox | off |
Makes every fee line stand out in the totals. Individual fees can also be highlighted on their own from the builder. |
| Show a price breakdown with the fees that will apply | checkbox | - | Shows a breakdown on product pages. It updates as the customer changes the quantity or picks a variation, so there is no surprise at checkout. |
| Where to put it | select | Just under the price |
Where the product page breakdown appears. Options: Just under the price, Above the add to cart button, Below the add to cart button, At the end of the product summary. |
| Also mention fees on shop and category listings | checkbox | - | Adds a short note under the price in product listings. Leave this off on shops with very large catalogues, since it works out fees for every product on the page. |
| Show why each fee applied, on the storefront | checkbox | off |
Adds a panel at the foot of the page listing every fee that was considered and the reason for each condition. Only people who can manage WooCommerce ever see it. |
| Show tooltips | checkbox | on |
Adds a marker next to any fee that has tooltip text. Fees with no tooltip never show one. |
| Show descriptions | checkbox | on |
Shows a fee description as a small line under the fee amount in the cart and checkout totals. Fees with no description never show one. |
| Hide fees that come to zero | checkbox | on |
A fee that works out to nothing is left off the totals rather than shown as a blank line. |
| Remove all fees and settings when the plugin is deleted | checkbox | off |
Off by default, so your fees survive a deactivate, a reactivate or an update. Turn it on only when you are removing the plugin for good. |
On your site
Fees appear in the cart and checkout totals under the subtotal, and then in the order, the confirmation email and the invoice. This works on the classic cart and checkout and on the block cart and checkout.
What shoppers can see:
- Fee lines in the totals, each with the label you wrote. Depending on When several fees apply, fees show on their own lines, as one combined line or grouped by where they came from.
- Descriptions as a small line under the fee amount, and a tooltip marker next to fees that have tooltip text, when those settings are on.
- Highlighted fees, if you highlight a single fee or every fee line.
- Optional fees as tick boxes under Add to your order in the cart and checkout totals. The tick box only appears when the fee's other conditions already match, and the totals update as soon as it is ticked.
- Reductions as a negative line in the totals.
- A price breakdown on product pages that shows the fees that will apply. It updates as the shopper changes the quantity or picks a variation.
- A short fee note under the price in shop and category listings, when Also mention fees on shop and category listings is on. The related products area on a product page shows this note too.
Totals update straight away when the shopper changes the payment gateway or shipping method. The debug panel, if you switch it on, is only shown to people who can manage WooCommerce.
Frequently asked questions
I already use the free edition. What happens to my fees?
Nothing. Pro reads the same fees from the same table. Activating Pro switches the free edition off, because the two would otherwise define the same things twice. Everything you built stays exactly as it was.
Can I go back to the free edition?
Yes. Deactivate Pro and activate the free plugin. Fees that use Pro only features stop applying those parts, but nothing is deleted. If you reactivate Pro, they come back.
Will deleting the plugin remove my fees?
Only if you ask it to. Go to Plusero Fees > Settings, find Uninstalling and tick Remove all fees and settings when the plugin is deleted. It is off by default.
Can I charge different amounts at different order sizes?
Yes. Choose Tiered in the Amount step and set a table of ranges, each with its own amount. The ranges can be measured against the cart subtotal, the total quantity or the total weight. The Handling by order size template on Ready made fees is a working example.
Do fees work with the block cart and checkout?
Yes. Fees work on the classic cart and checkout and on the block cart and checkout. Optional fees also work on the block cart and checkout, where they travel as Store API cart data, so no template is replaced.
Can customers choose whether to pay a fee?
Yes. Mark a fee as optional and it appears as a tick box under Add to your order in the cart and checkout totals. This suits gift wrapping, express handling, insurance or a donation. The tick box only appears when the fee's other conditions already match.
Does the plugin work with translation plugins?
Yes, it supports WPML and Polylang. Group names you set for combined fee lines can be translated. Plusero Fees > Tools shows under System whether a translation plugin was detected.
Does the plugin connect to any external service?
No. It makes no remote requests and connects to no external service. Updates are handled separately.
Troubleshooting
- The plugin will not activate, or the Plusero Fees menu is missing
Plusero needs WooCommerce. Install and activate WooCommerce 8.0 or newer, then activate Plusero again. Also check that your site runs WordPress 6.4 or later and PHP 7.4 or later.
- My fee is not showing in the cart
- In Plusero Fees > All Fees, check that the fee's status is Active. Fees created from Ready made fees or brought in with Import start switched off.
- Open the fee and check that every condition matches the cart you are testing with. With All of these match, every condition must be true.
- If you set a ceiling in Most any one order can be charged, or chose Charge only the first one that matches, later fees may be trimmed or dropped.
- If the fee comes to zero and Hide fees that come to zero is on, it is left off the totals.
- Turn on Show why each fee applied, on the storefront in Settings. While logged in as a shop manager, view the cart to see every fee that was considered and the reason for each condition. Turn it off again when you are done.
- A shipping method or payment method condition is not available in the builder
The Where step decides which conditions you can use. Payment method is offered for Checkout and Payment fees. Shipping method is offered for Checkout and Shipping fees. Go back to the Where step and pick a matching location.
- Reports show Nothing in this range
A report row is written when an order is placed, not when a cart is calculated. Test carts do not count. Check that your From and To dates cover orders that carried a fee, then click Show. If someone used Clear fee history on the Tools screen, older rows are gone and cannot be restored.
- Shop and category pages load slowly
Also mention fees on shop and category listings works out the fees for every product on the page. On shops with very large catalogues, untick it in Plusero Fees > Settings and click Save settings.
- Fee descriptions or tooltips do not appear
In Plusero Fees > Settings, under On the storefront, make sure Show descriptions and Show tooltips are ticked. Then open the fee in the builder and check that it has description or tooltip text in the Wording step. Fees with no description or tooltip never show one.