

Overview
Storefold lets other sellers open their own store inside your WooCommerce shop. Sellers apply through a form on your site, you approve them, and they manage their products and orders from a vendor dashboard on the front of your site. Vendors never see wp-admin.
Customers check out once and see one order. In the background, Storefold creates one sub-order per vendor with that vendor's share of shipping. Each vendor receives only their part of the order, and you keep a commission as a percentage, a fixed amount per item, or both.
You manage everything under the Storefold menu in wp-admin: vendors, commissions, withdrawal requests, announcements to vendors and the marketplace settings. A setup wizard and a built-in Help and docs screen explain each option. The plugin is compatible with High-Performance Order Storage (HPOS) and the Cart and Checkout blocks, and it does not connect to any external service.
Requirements
- WordPress 6.4 or later (tested up to 7.1)
- PHP 7.4 or later
- WooCommerce 8.5 or later, installed and active
Installation
Storefold is a free plugin on WordPress.org. It needs WooCommerce, so install and activate WooCommerce first.
Make sure WooCommerce is installed and active.
In wp-admin, go to Plugins > Add New.
Search for Storefold Multivendor Marketplace.
Click Install Now on the Storefold plugin, then click Activate.
After activation, a notice on the Plugins screen offers the setup wizard. You can also open it any time under Storefold > Setup wizard.
Add the Become a Vendor and Stores pages to your site menu so sellers and shoppers can find them.
Quick start
- Run the setup wizard
Go to Storefold > Setup wizard. It asks four questions: the kind of marketplace you are building, your commission, how vendors get paid, and how much you want to review. Everything can be changed later under Storefold > Settings.
- Check the marketplace pages
Activation creates three pages: Vendor Dashboard, Become a Vendor and Stores. Open Storefold > Overview and look at Marketplace health. The Marketplace pages check should say the pages are published.
- Enable a payout method
Under Storefold > Settings > Payouts, tick PayPal, Bank transfer or both, and set the Minimum withdrawal amount. Click Save settings.
- Link Become a Vendor in your menu
Add the Become a Vendor and Stores pages to your site menu under Appearance > Menus (or the Site Editor), so sellers can find the application form.
- Approve your first vendor
When someone applies, you get the Marketplace: new vendor application email. Approve the application under Storefold > Vendors, or add a vendor yourself with Add a vendor. The vendor then logs in and opens the Vendor Dashboard page.
#Marketplace overview
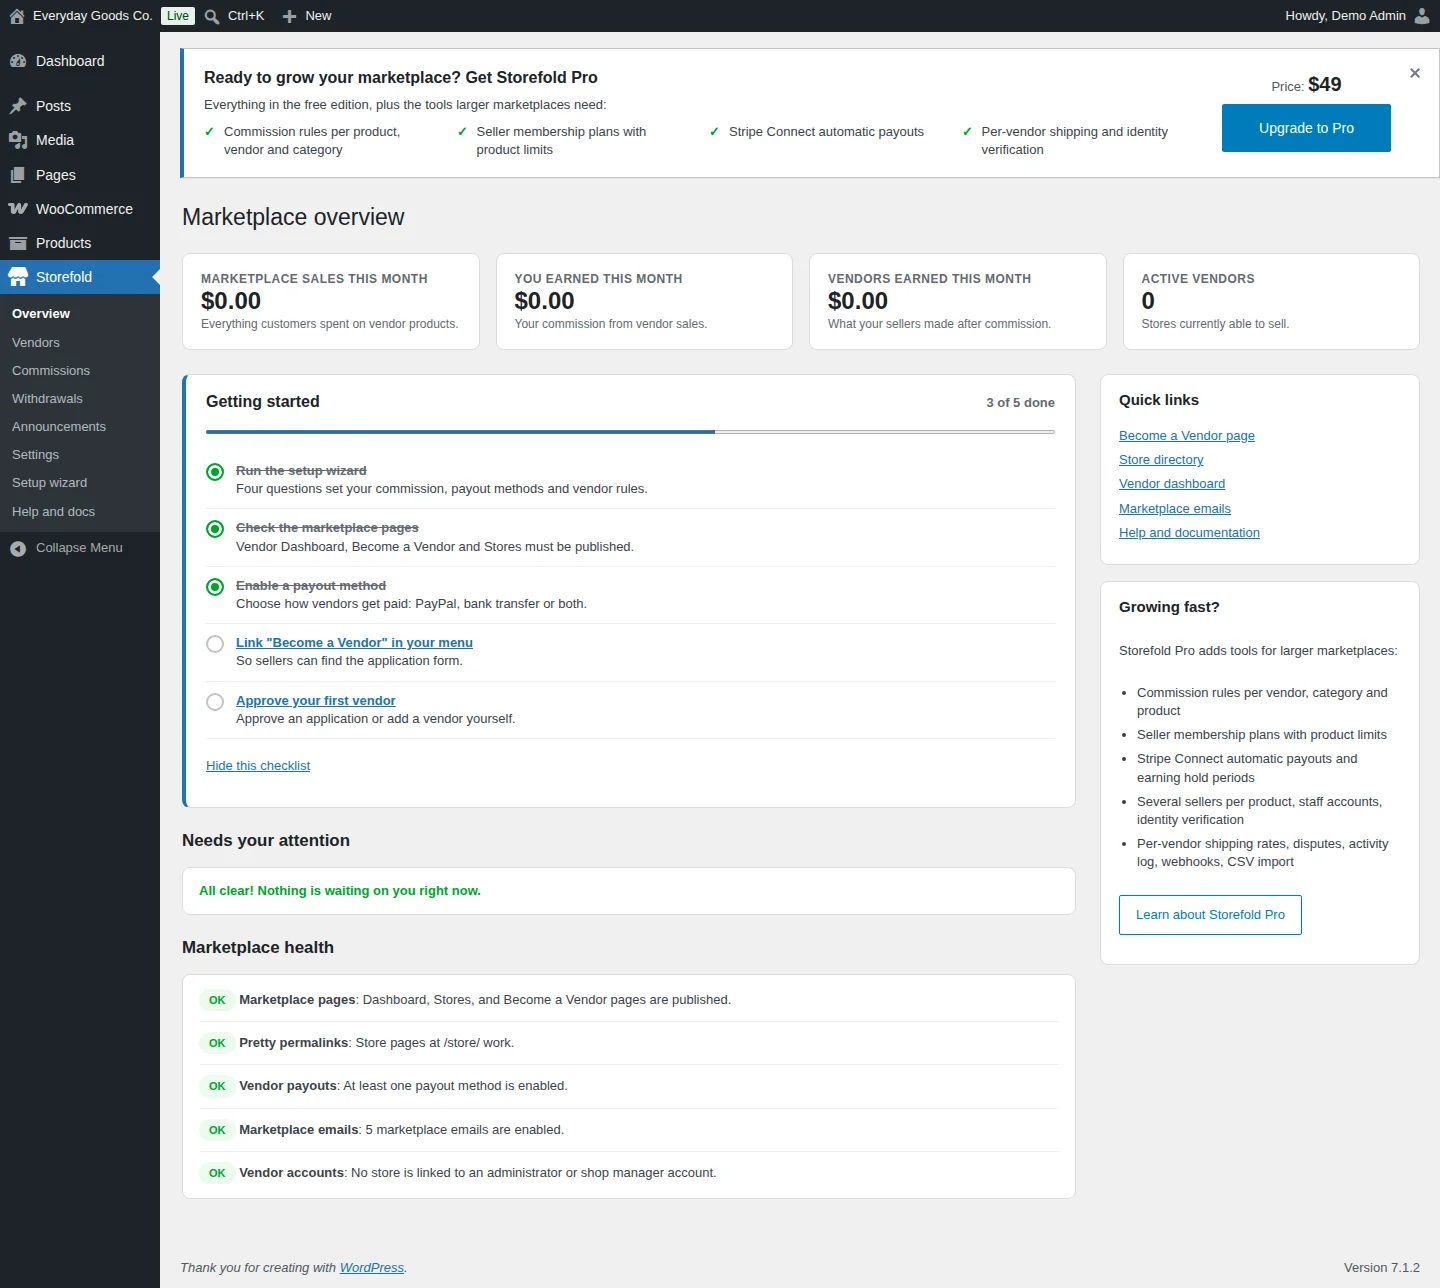
Storefold > Overview is your marketplace home screen.
- Summary cards show marketplace sales this month (everything customers spent on vendor products), what you earned this month (your commission), what vendors earned this month after commission, and the number of active vendors.
- Getting started is a five-step checklist: run the setup wizard, check the marketplace pages, enable a payout method, link "Become a Vendor" in your menu, and approve your first vendor. Click Hide this checklist once you are done.
- Needs your attention lists everything waiting on you, such as vendor applications and products waiting for review.
- Marketplace health runs checks with a plain fix for each problem: marketplace pages, pretty permalinks, vendor payouts, marketplace emails and vendor accounts.
- Quick links take you to the Become a Vendor page, the store directory, the vendor dashboard, the marketplace emails and the help screen.
A banner about Storefold Pro appears at the top of Storefold admin screens. You can dismiss it with the close button.
#Vendors
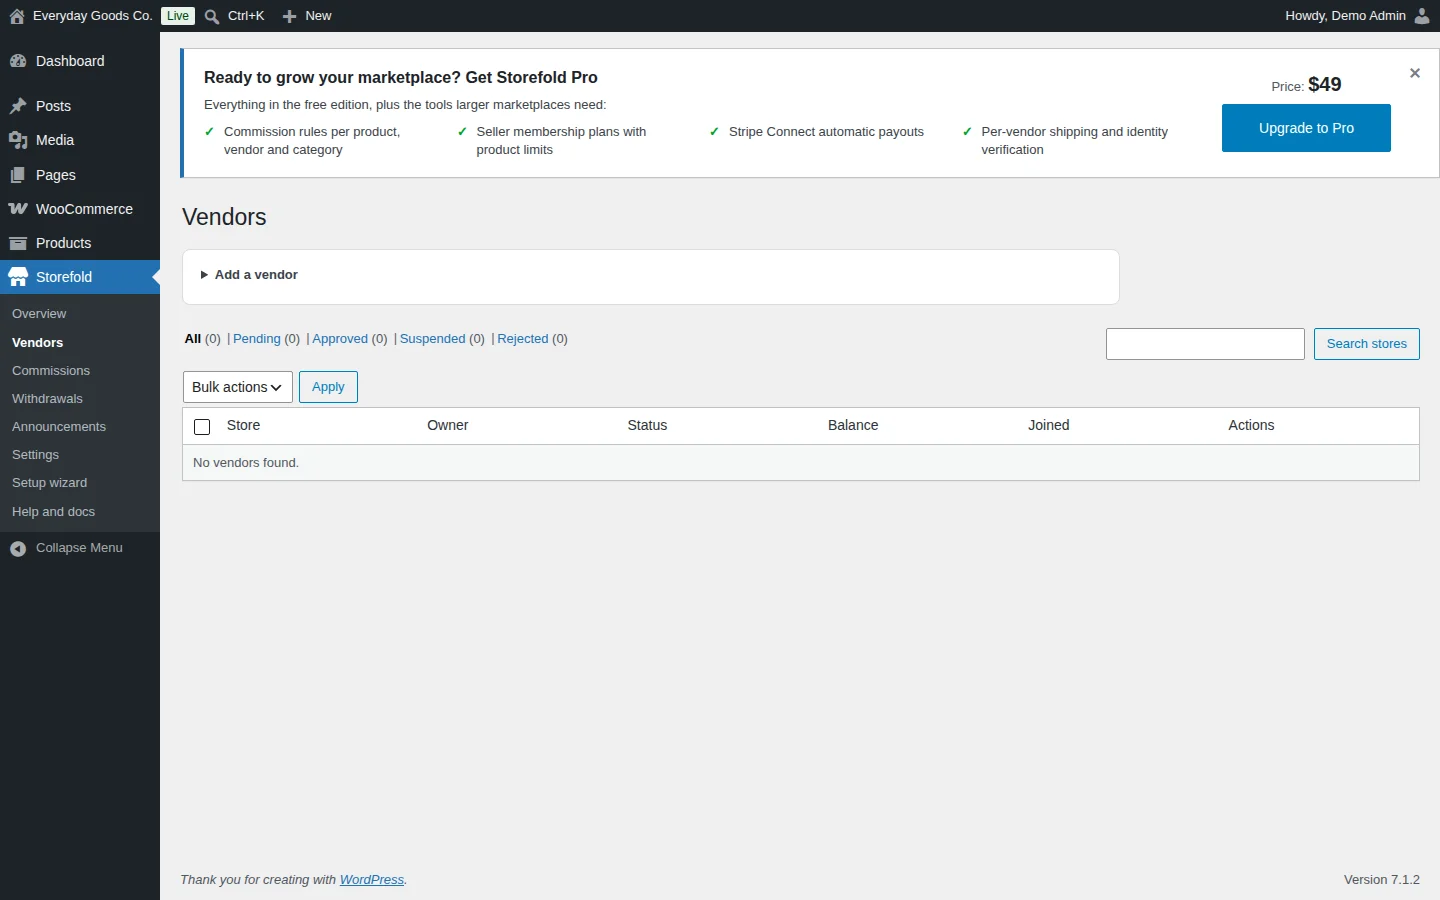
Storefold > Vendors lists every store with its Store, Owner, Status, Balance, Joined date and Actions.
Statuses
- Pending: the seller applied and is waiting for you.
- Approved: the vendor can sell.
- Suspended: their products can no longer be bought and their dashboard shows a notice. Use it for temporary problems.
- Rejected: the application was declined.
Use the status links above the table to filter the list, and Search stores to find a store by name.
Add a vendor yourself
- Click Add a vendor.
- Enter the Store name and the Owner email.
- Save. If an account with that email exists, it becomes the owner. Otherwise a new account is created and emailed a link to set a password.
Administrators and shop managers cannot be vendors, because every product their account creates would count as that store's products. To try the vendor side, apply with a separate account.
Bulk actions
Tick several vendors, choose Approve, Suspend, Reject or Delete under Bulk actions, and click Apply.
Deleting a vendor removes the store and the vendor role and cancels open withdrawal requests. The user account, their products, and all commission and ledger history are kept, because they are financial records.
#Commissions
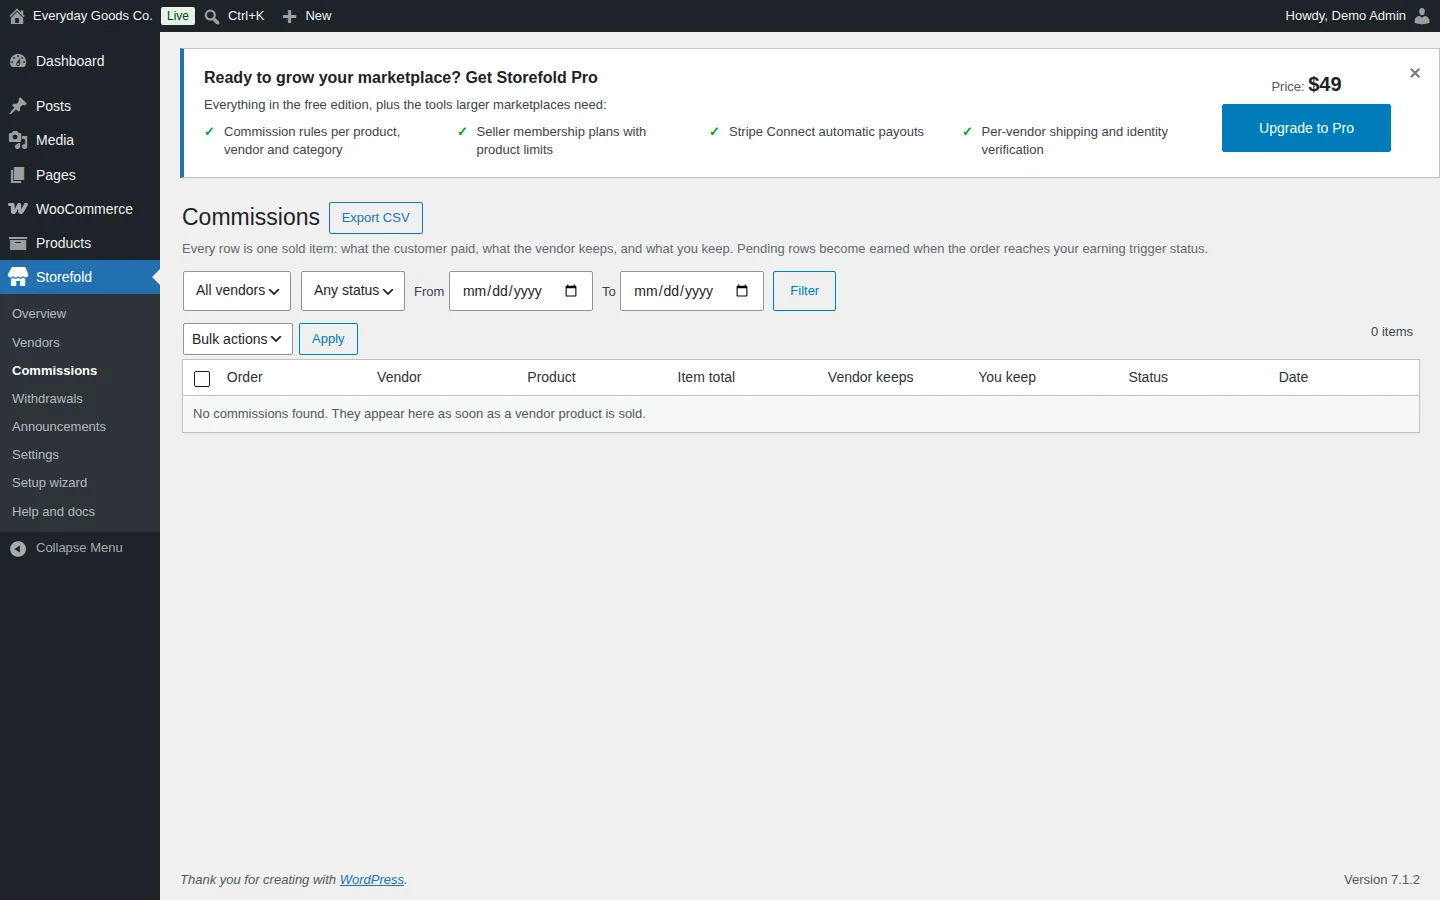
Storefold > Commissions shows one row per sold item: what the customer paid, what the vendor keeps and what you keep. The columns are Order, Vendor, Product, Item total, Vendor keeps, You keep, Status and Date.
Commission rows start as Pending. They become Earned when the vendor order reaches the status you chose under Vendors earn their money when in the settings, and the vendor balance goes up. When you refund an order, the matching earning is Reversed automatically.
To narrow the list:
- Pick a vendor (or keep All vendors).
- Pick a status: Any status, Pending, Earned or Reversed.
- Optionally set a From and To date.
- Click Filter.
Click Export CSV to download the commissions as a CSV file.
#Withdrawals
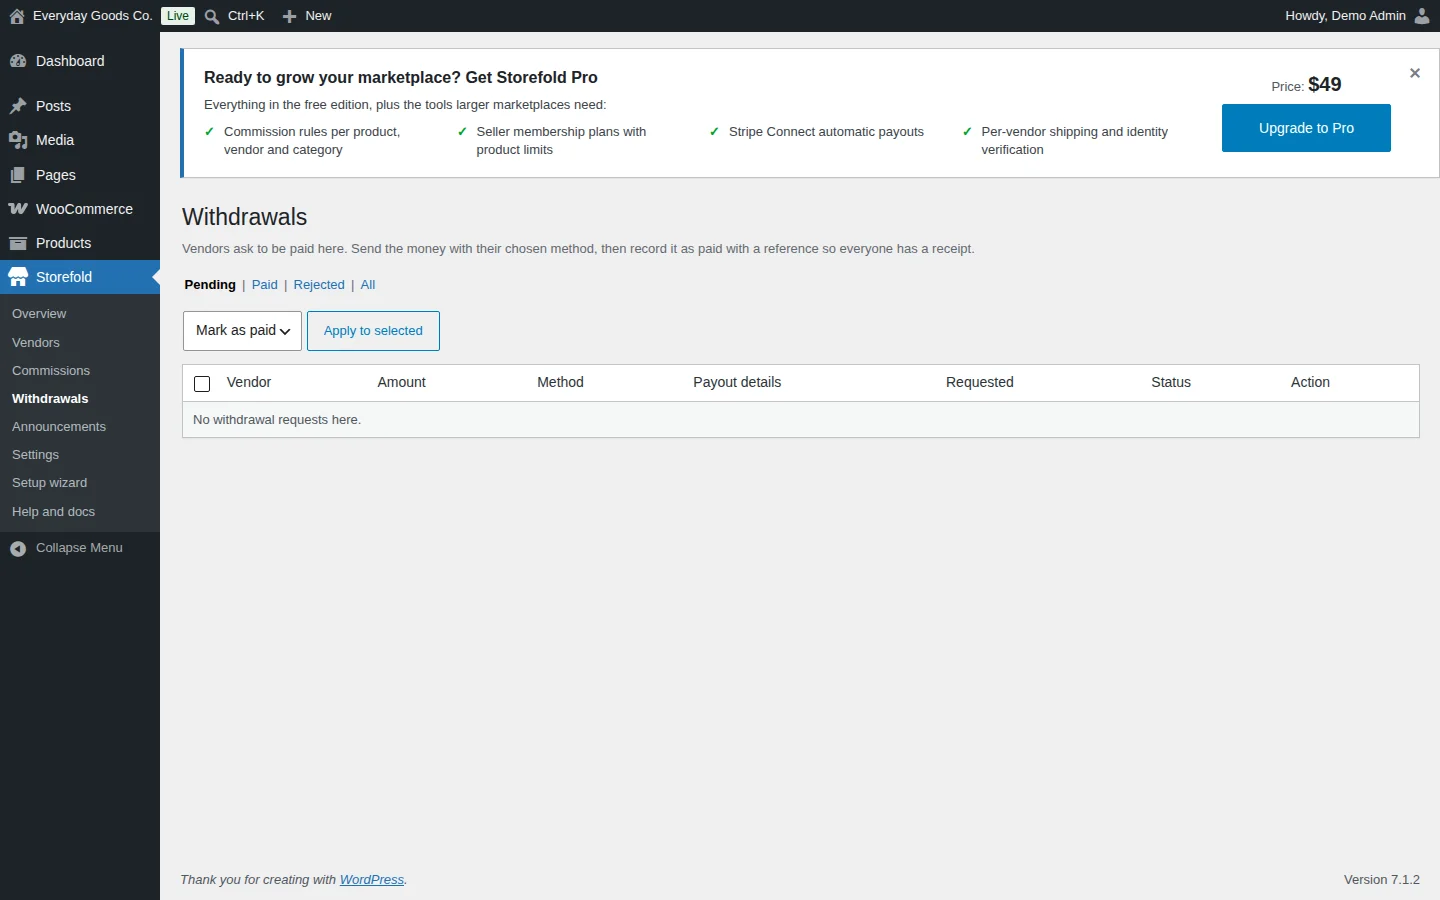
Vendors request payouts from their dashboard, and the requests appear under Storefold > Withdrawals. The table shows the Vendor, Amount, Method, Payout details, Requested date, Status and Action.
You send the money yourself:
- Open the Pending tab.
- Send the amount to the vendor with the method they chose (PayPal or bank transfer), using the payout details shown.
- Record the request as paid with a reference, so everyone has a receipt.
To handle several requests at once, tick them, choose Mark as paid or Reject, and click Apply to selected. The Paid, Rejected and All tabs show earlier requests.
Vendors can only request a payout once their available balance reaches the Minimum withdrawal amount from the settings.
#Announcements
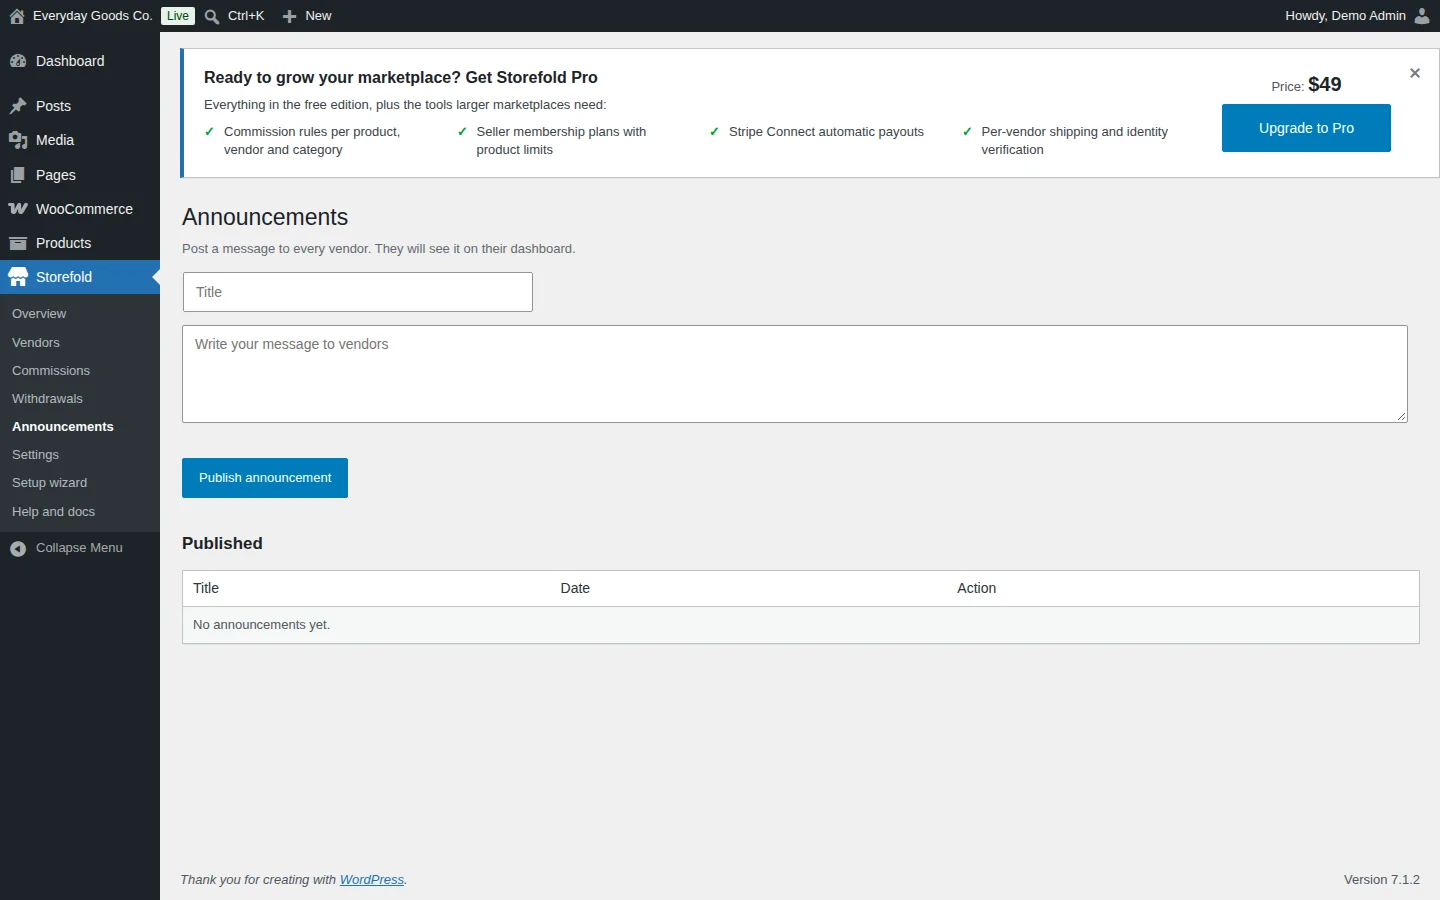
Use Storefold > Announcements to post a message to every vendor. Vendors see it on their dashboard.
- Enter a Title.
- Write the message in Write your message to vendors.
- Click Publish announcement.
Published announcements are listed under Published with their Title, Date and an Action column.
#Settings
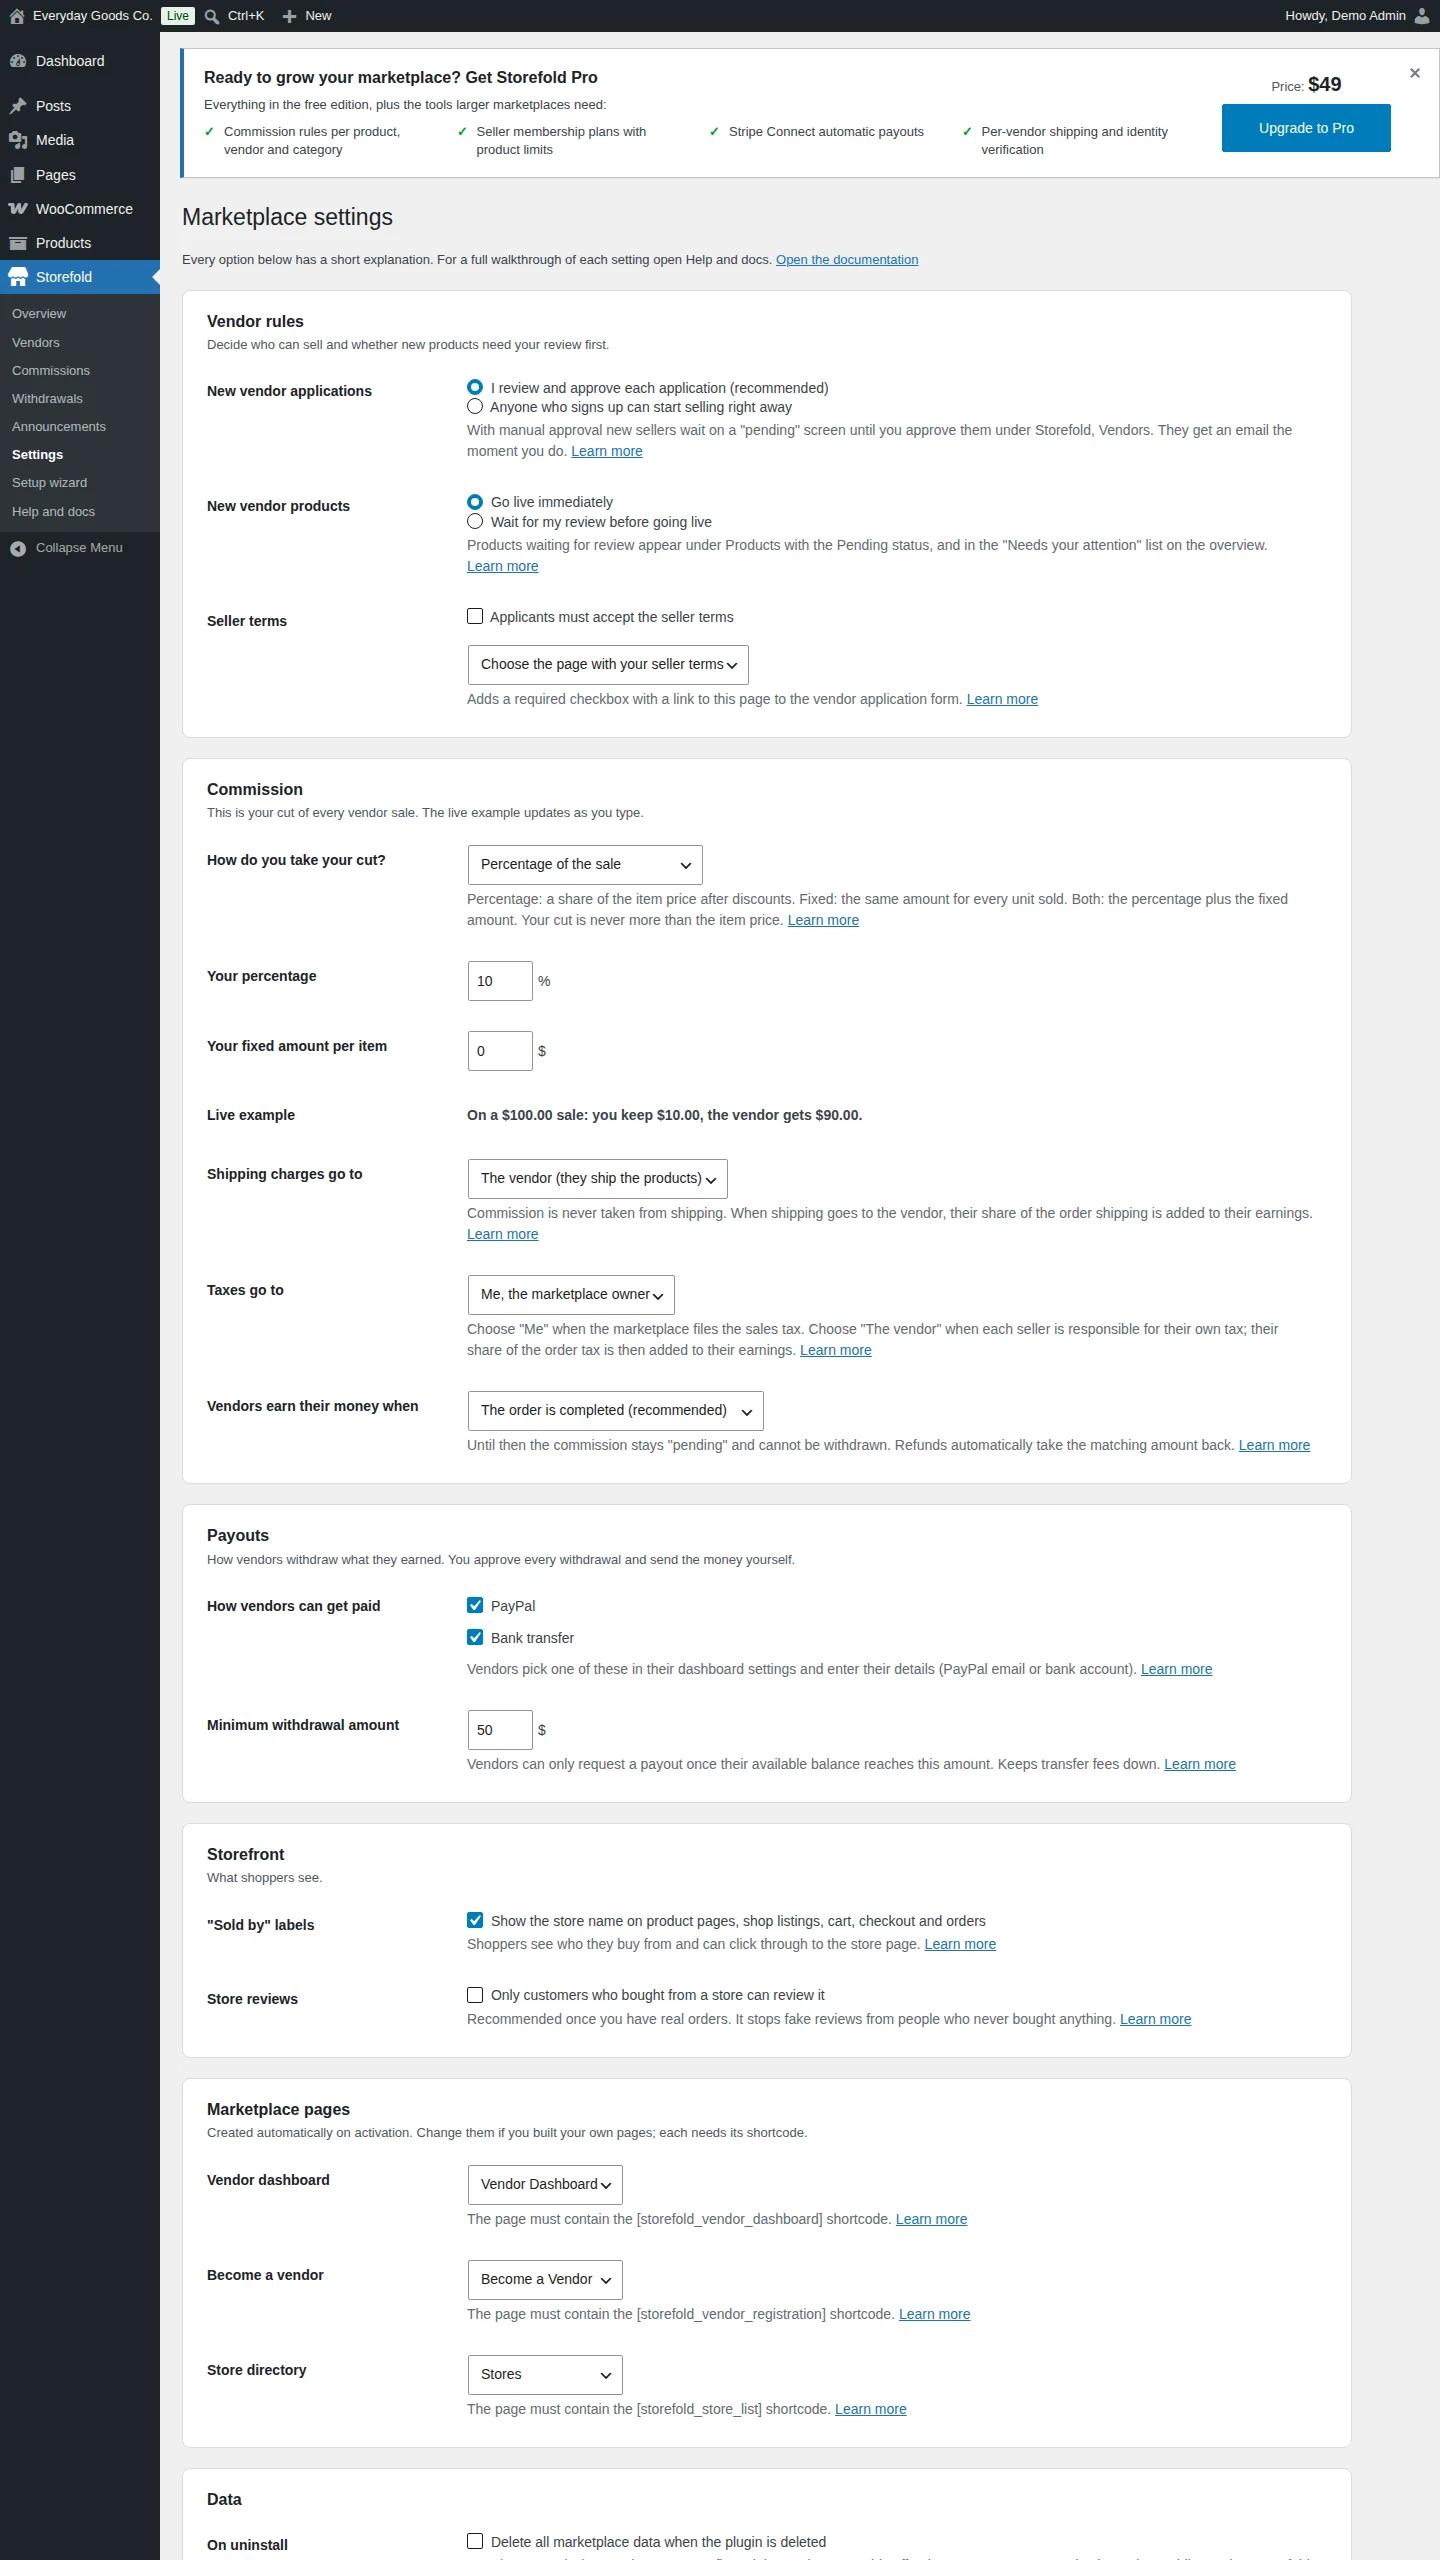
Storefold > Settings holds all marketplace options, grouped in six boxes. Each option has a short explanation and a Learn more link to the matching entry in Help and docs. Click Save settings when you are done.
- Vendor rules: whether you approve each new vendor or anyone can start selling right away, whether new vendor products go live immediately or wait for your review, and an optional seller terms checkbox on the application form.
- Commission: how you take your cut (percentage, fixed amount per item, or both), your percentage and fixed amount, and who gets shipping and tax. A Live example line shows what you and the vendor get on a sample sale while you type.
- Payouts: the payout methods vendors can choose (PayPal, Bank transfer) and the Minimum withdrawal amount.
- Storefront: "Sold by" labels and who can review a store.
- Marketplace pages: which pages hold the vendor dashboard, the application form and the store directory.
- Data: whether deleting the plugin also deletes marketplace data.
Commission is calculated per sold item, on the item total after coupons, when the order is placed. The rule used is saved with each commission row, so later changes never rewrite history. Commission is never taken from shipping or tax.
See the settings reference below for every field.
#Setup wizard
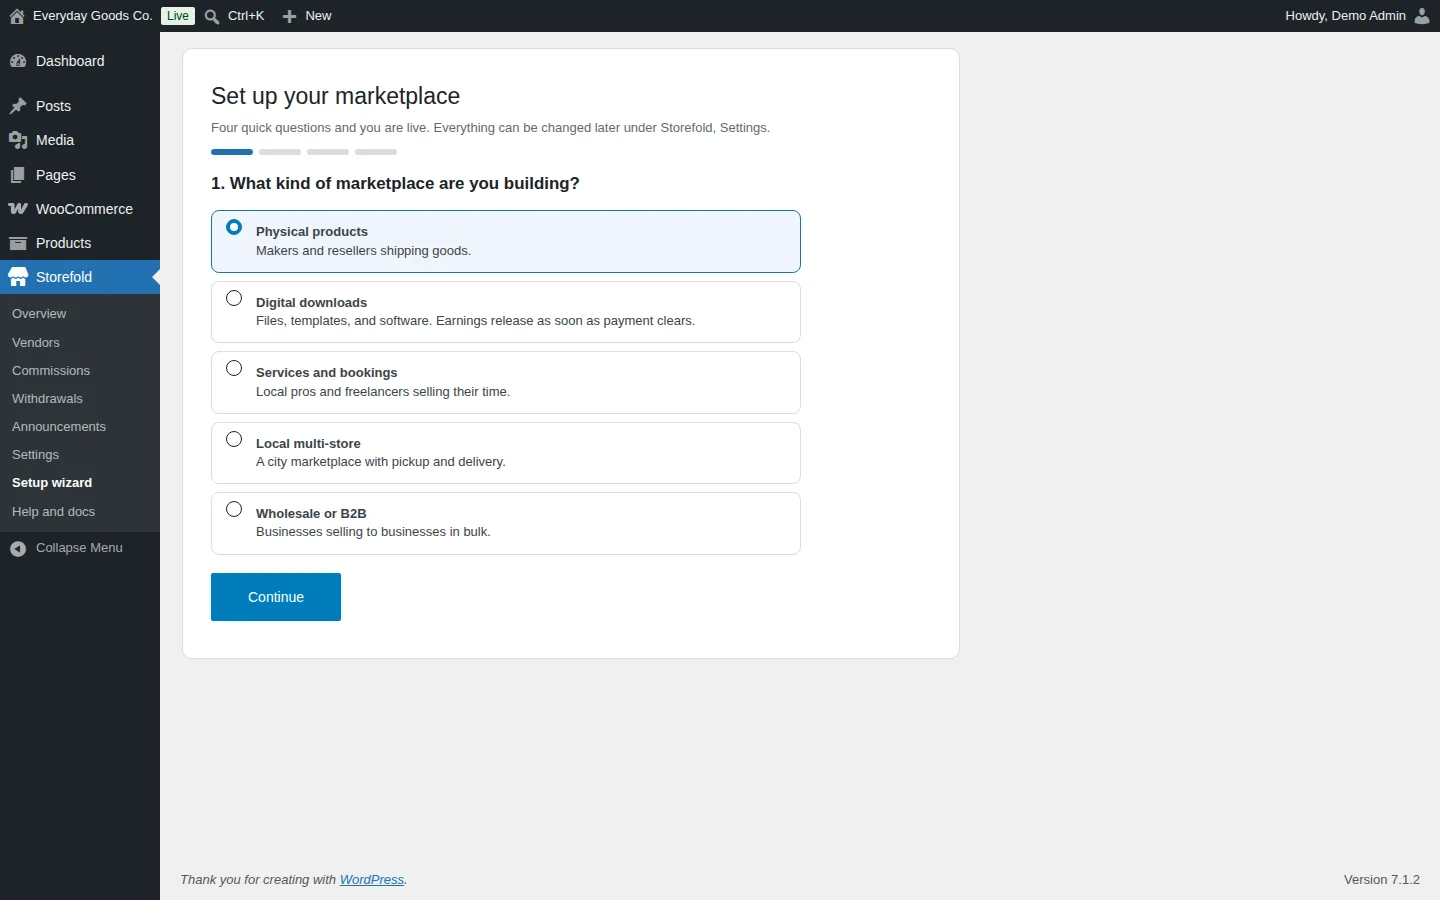
Storefold > Setup wizard asks four quick questions: the kind of marketplace, your commission, how vendors get paid, and how much you want to review. Your answers fill in the settings, and you can change every answer later under Storefold > Settings.
The first question is What kind of marketplace are you building? Choose one:
- Physical products: makers and resellers shipping goods.
- Digital downloads: files, templates and software. Earnings release as soon as payment clears.
- Services and bookings: local pros and freelancers selling their time.
- Local multi-store: a city marketplace with pickup and delivery.
- Wholesale or B2B: businesses selling to businesses in bulk.
Click Continue to move to the next question.
#Help and docs
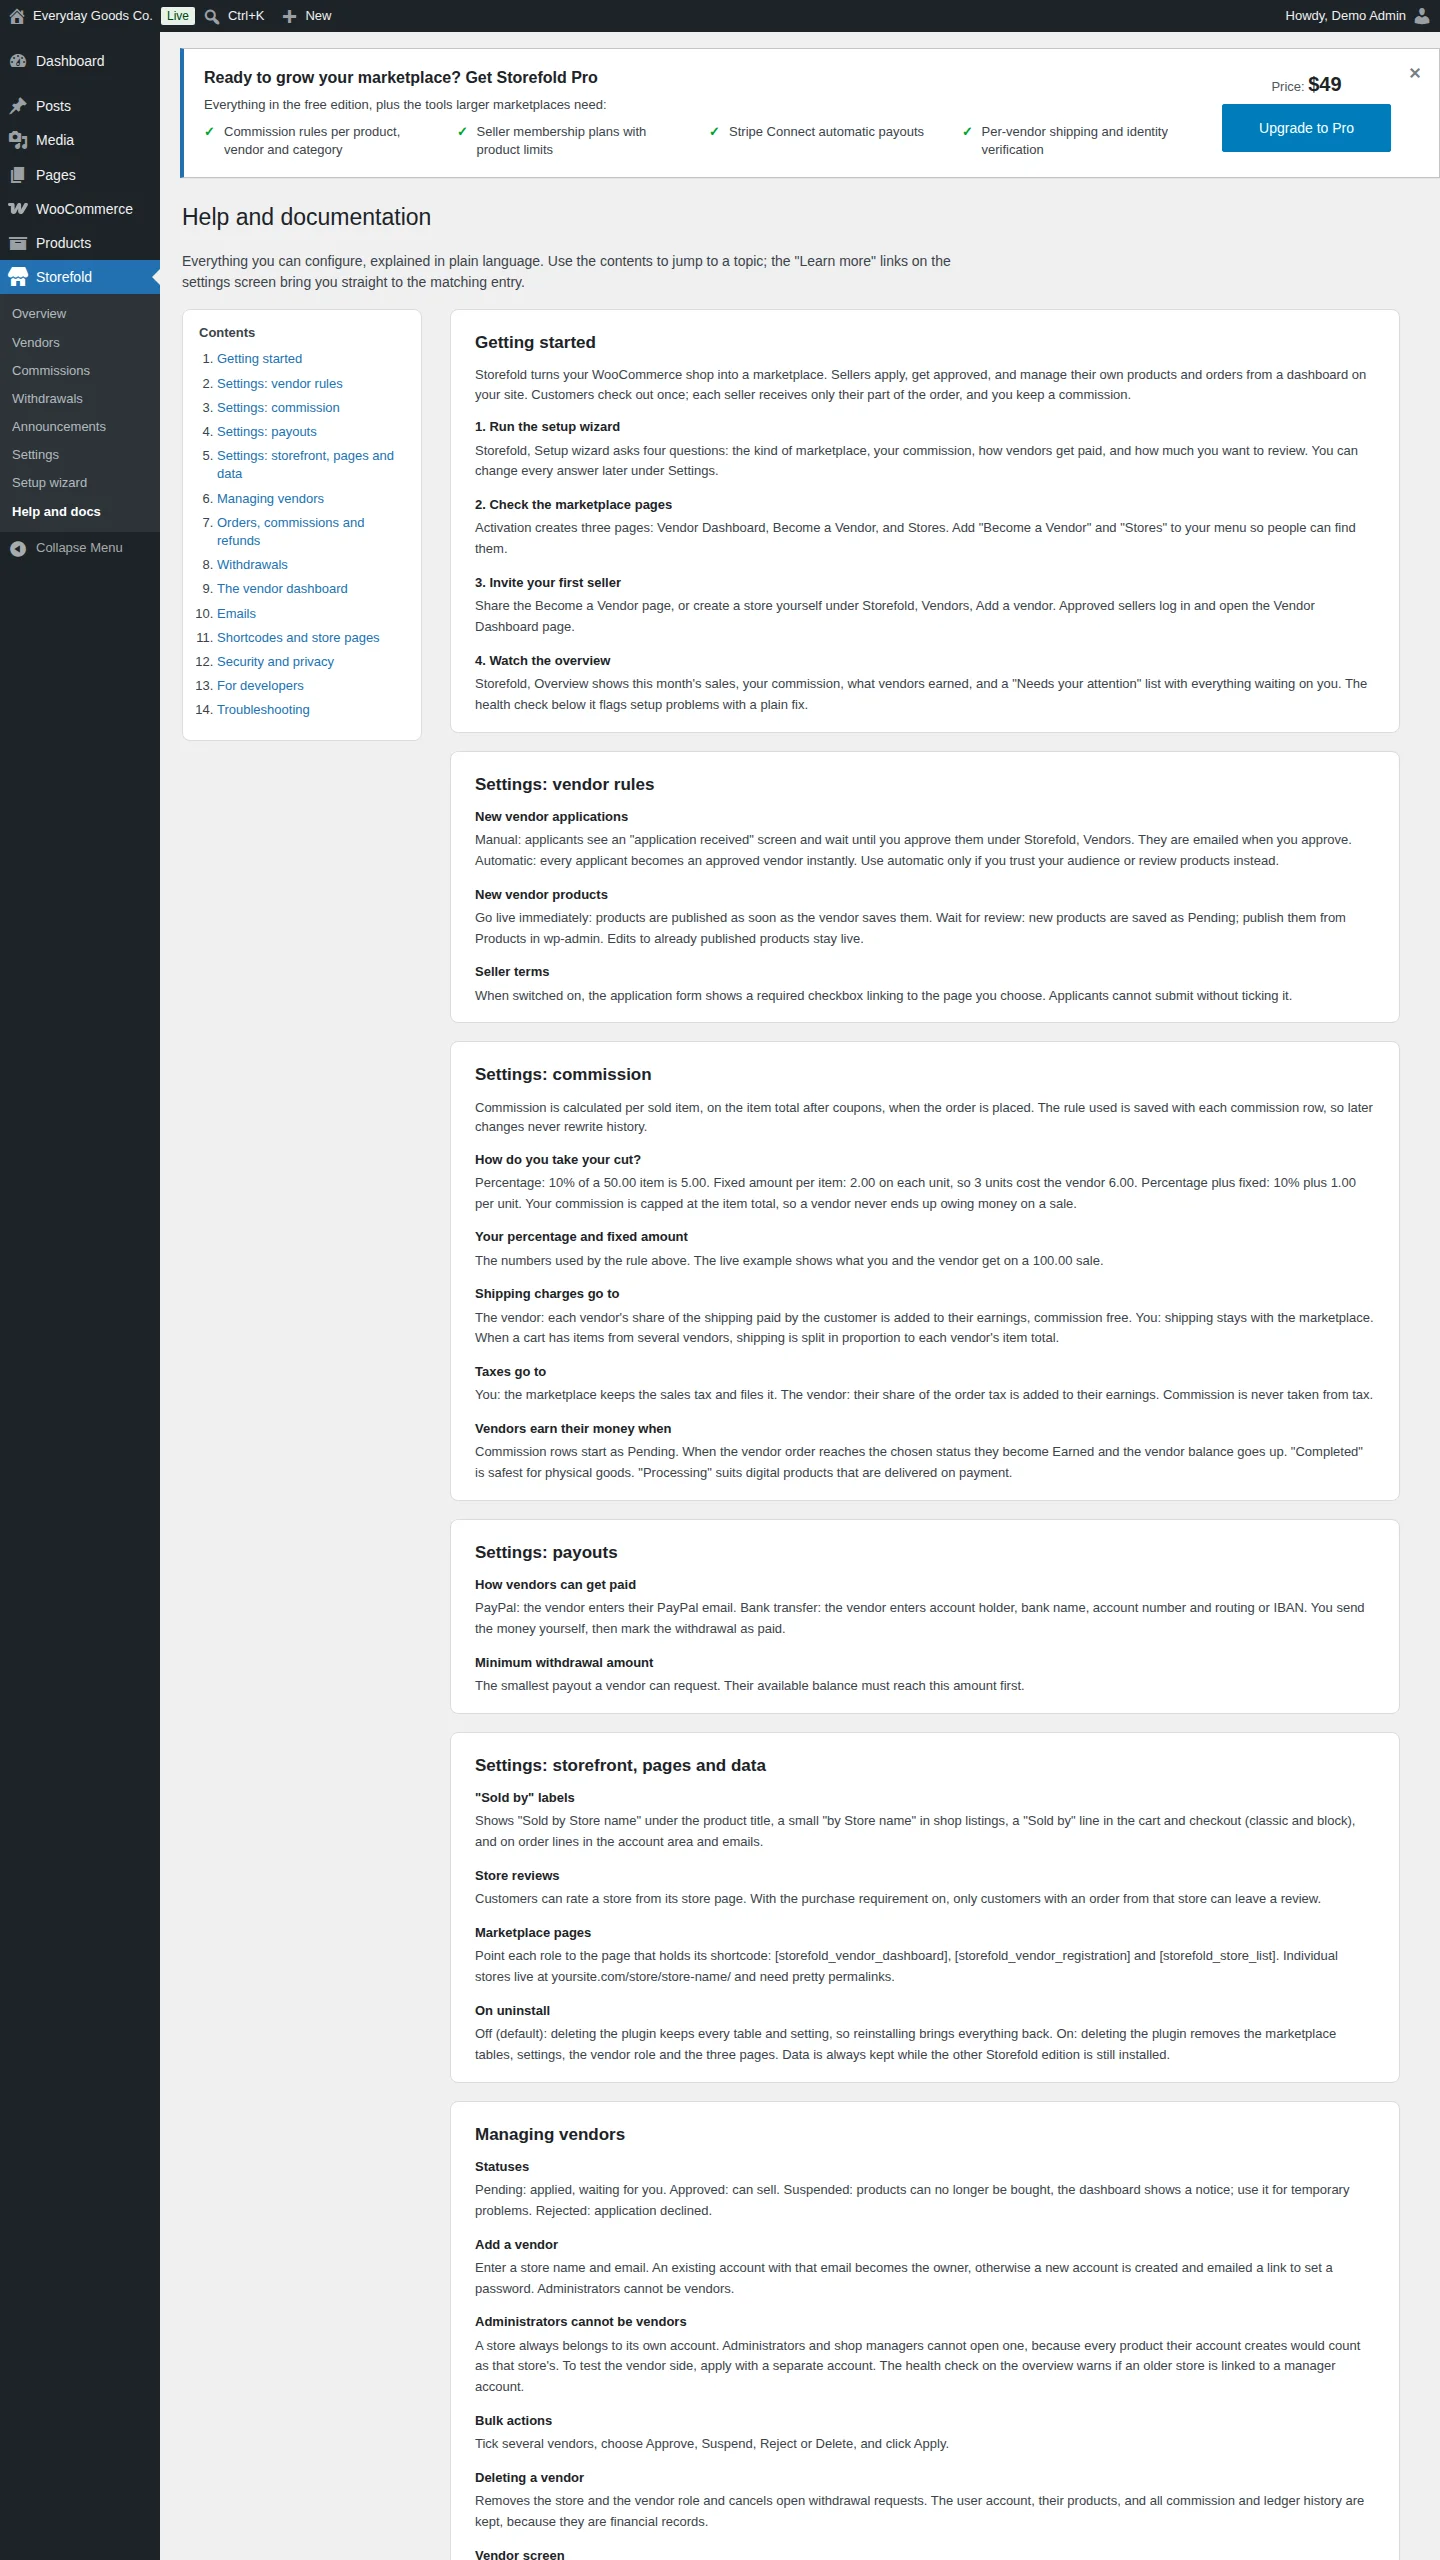
Storefold > Help and docs explains everything you can configure, in plain language. Use the Contents list to jump to a topic:
- Getting started
- Settings: vendor rules
- Settings: commission
- Settings: payouts
- Settings: storefront, pages and data
- Managing vendors
- Orders, commissions and refunds
- Withdrawals
- The vendor dashboard
- Emails
- Shortcodes and store pages
- Security and privacy
- For developers
- Troubleshooting
The Learn more links on the settings screen bring you straight to the matching entry here.
#Marketplace emails
Storefold registers five marketplace emails as WooCommerce emails. You edit them under WooCommerce > Settings > Emails, like any other WooCommerce email. Each one has an editable subject, heading and body text with placeholders such as {site_title} and {store_name}, and a preview.
Two examples:
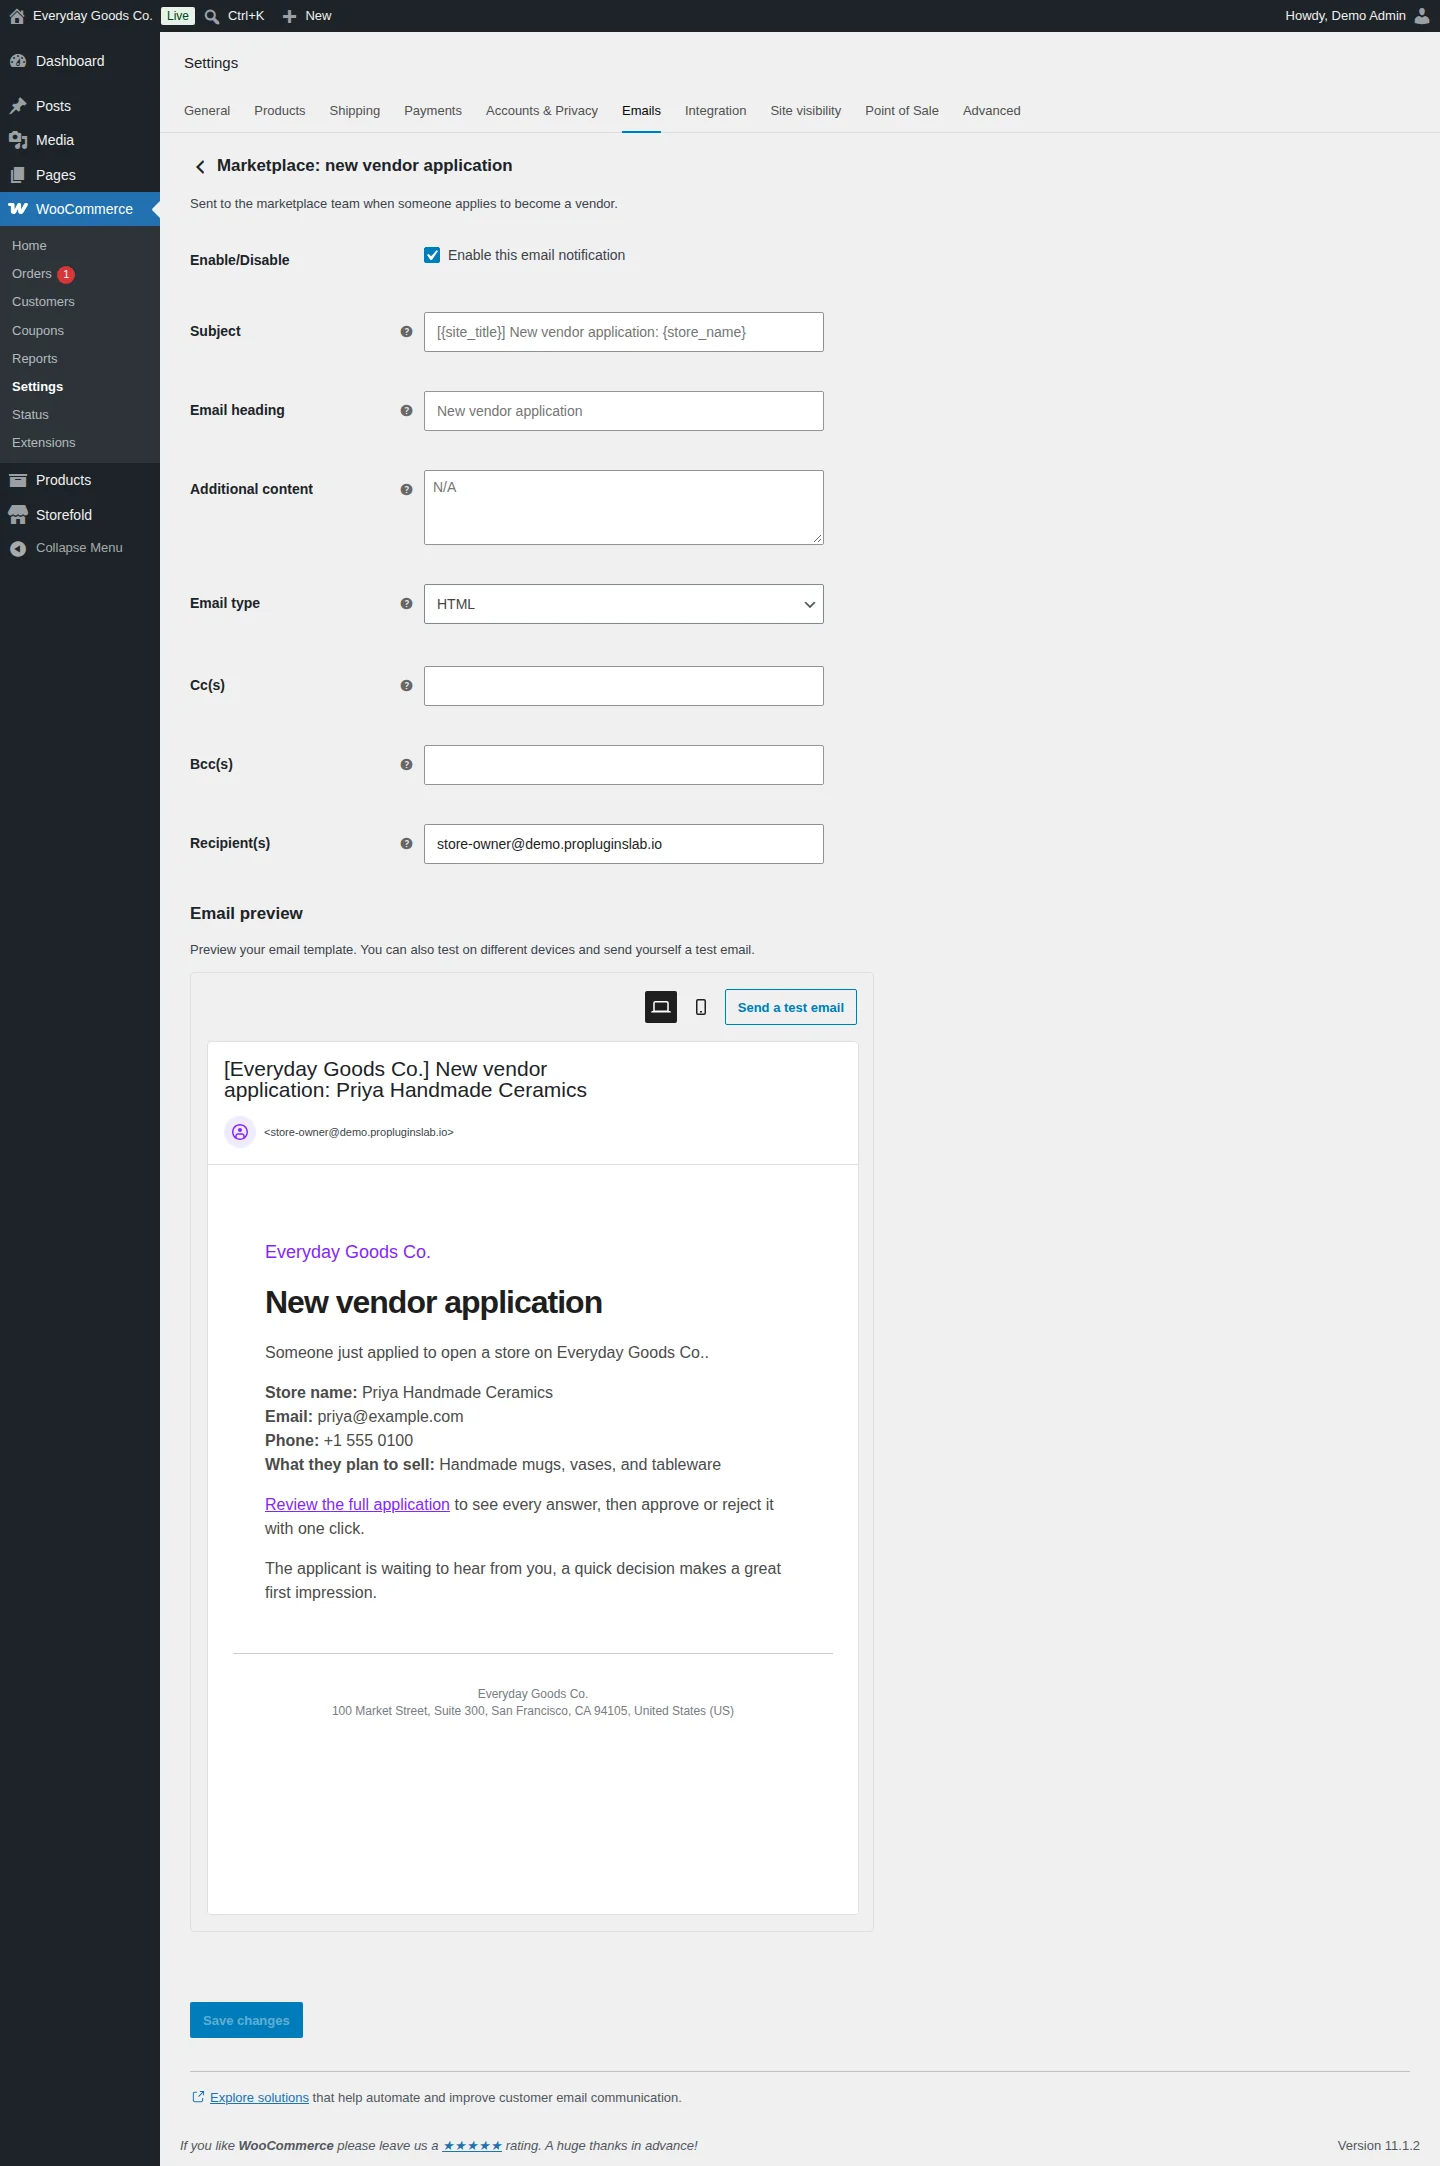
- Marketplace: new vendor application is sent to the marketplace team when someone applies to become a vendor. It lists the applicant's answers and links to the full application so you can approve or reject it. Set who receives it in Recipient(s).
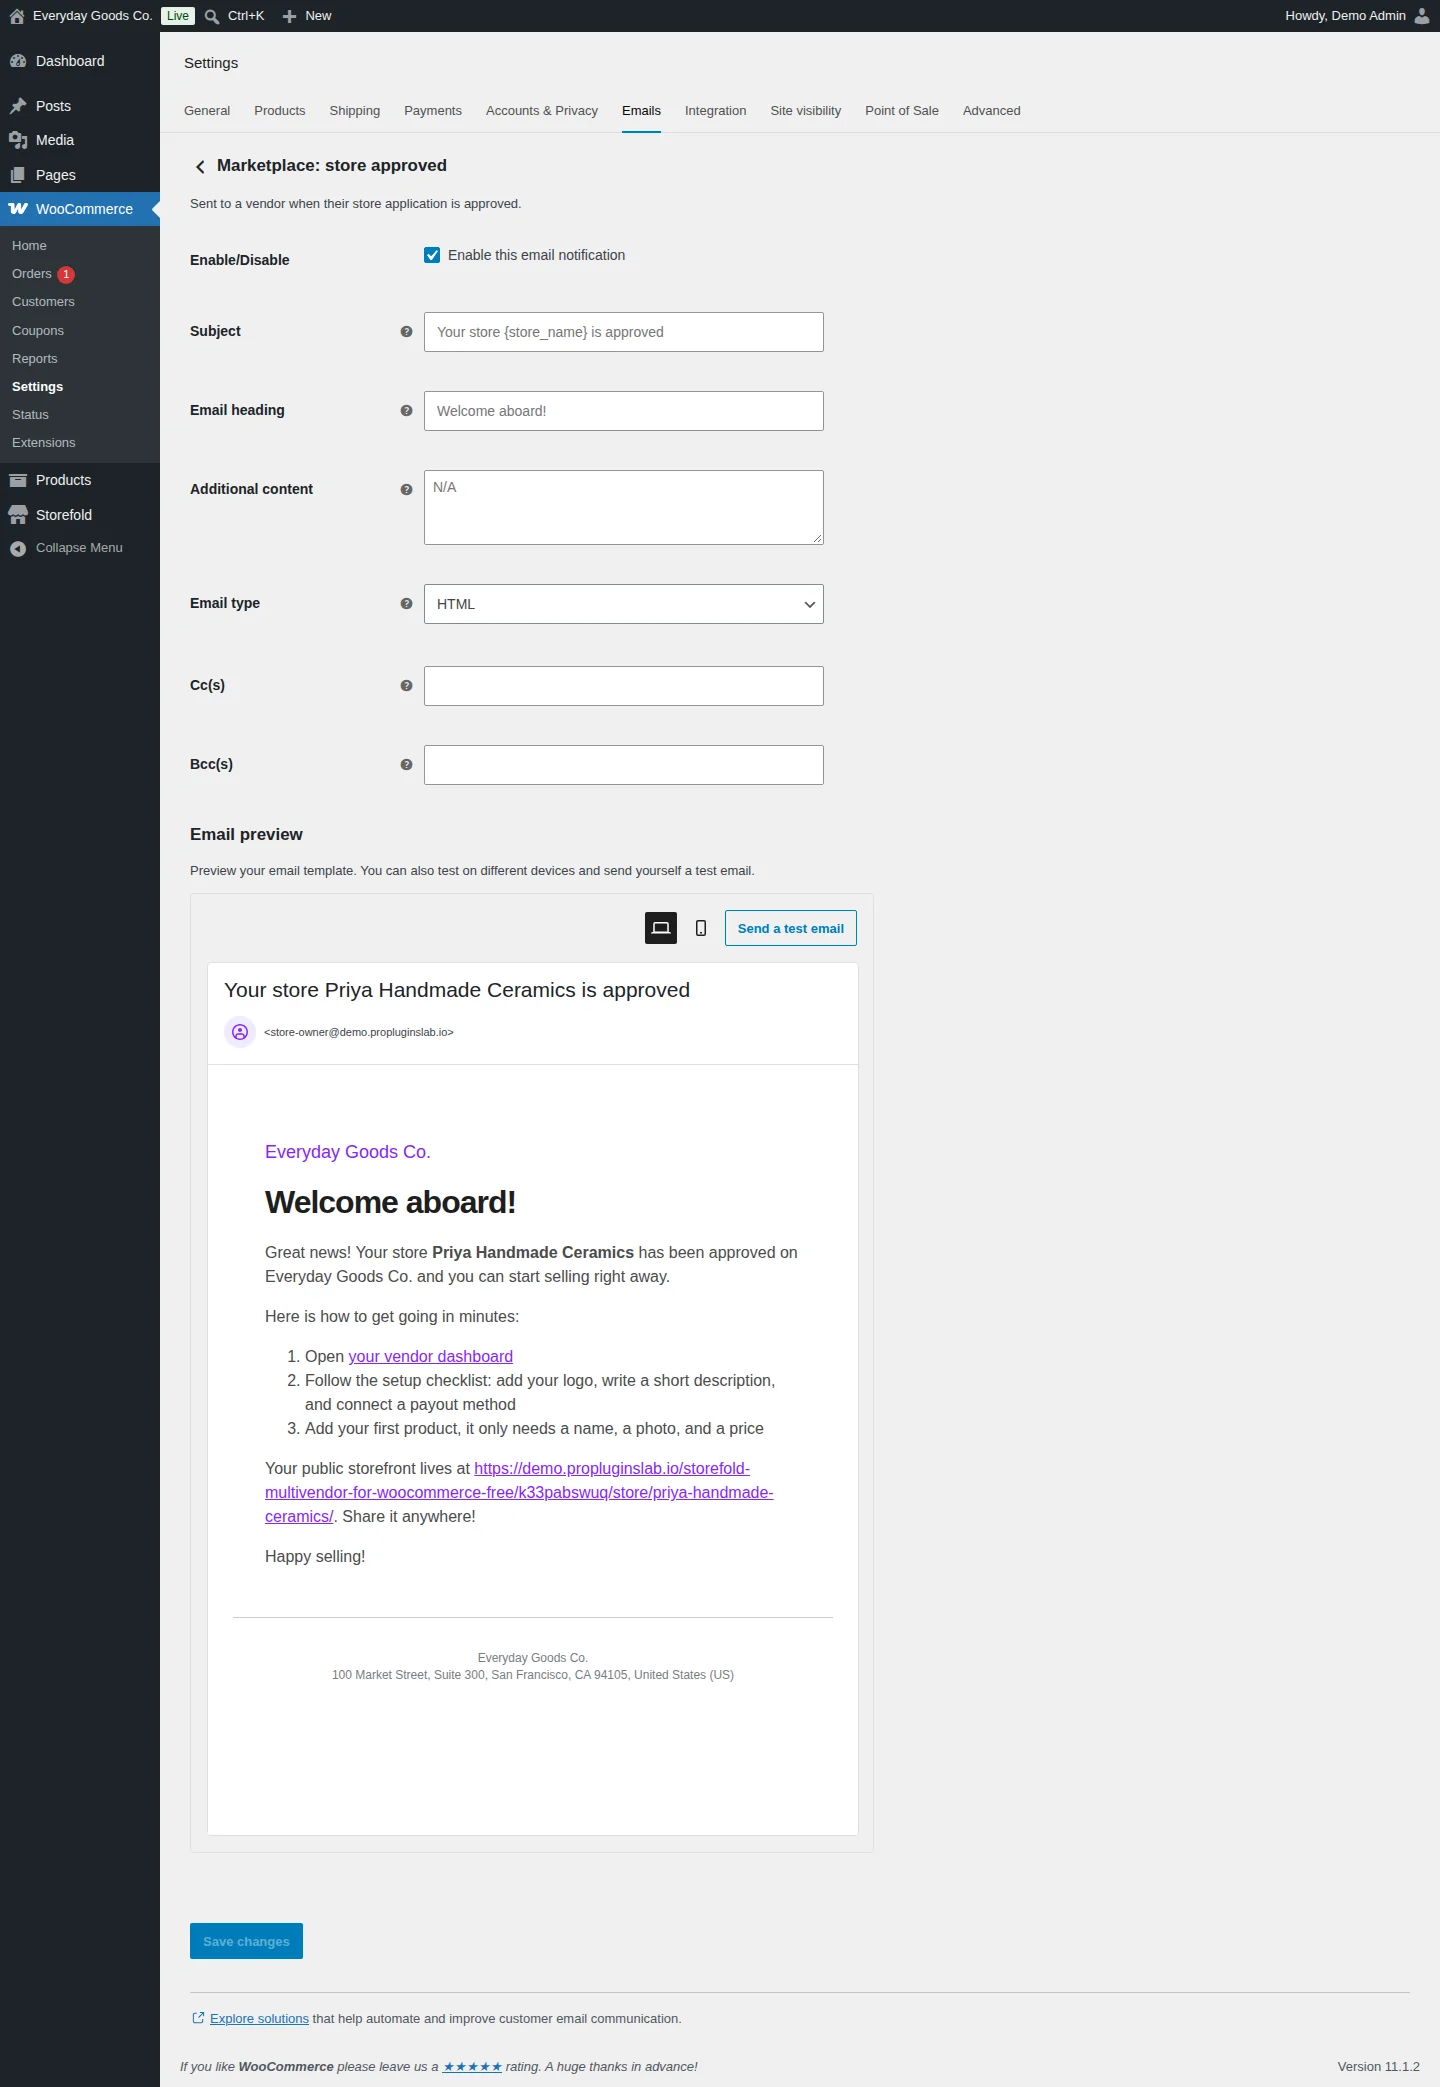
- Marketplace: store approved is sent to a vendor when their store application is approved. It links to their vendor dashboard and their public storefront.
For each email you can:
- Turn it on or off with Enable/Disable.
- Change the Subject, Email heading and Additional content. The fields show the default text as a placeholder.
- Choose the Email type: Plain text, HTML or Multipart.
- Add Cc(s) and Bcc(s) addresses.
- Check the Email preview on desktop or mobile, or click Send a test email.
- Click Save changes.
Settings reference
Storefold > Settings
| Setting | Type | Default | What it does |
|---|---|---|---|
| New vendor applications | radio | I review and approve each application (recommended) |
Choose **I review and approve each application (recommended)** or **Anyone who signs up can start selling right away**. With manual approval, new sellers wait on a pending screen until you approve them under Storefold > Vendors, and they get an email when you do. |
| New vendor products | radio | Go live immediately |
**Go live immediately** publishes products as soon as the vendor saves them. **Wait for my review before going live** saves new products as Pending; they appear under Products with the Pending status and in the Needs your attention list on the overview. Edits to already published products stay live. |
| Applicants must accept the seller terms | checkbox | off |
Adds a required checkbox with a link to your seller terms page to the vendor application form. Applicants cannot submit without ticking it. |
| Seller terms | select | - | The page with your seller terms, linked from the checkbox on the vendor application form. |
| How do you take your cut? | select | Percentage of the sale |
**Percentage of the sale**: a share of the item price after discounts. **Fixed amount per item**: the same amount for every unit sold. **Percentage plus a fixed amount**: both. Your cut is never more than the item price. |
| Your percentage | number | - | The percentage you keep when the rule uses a percentage. |
| Your fixed amount per item | number | - | The amount you keep per unit sold when the rule uses a fixed amount. |
| Shipping charges go to | select | - | **The vendor (they ship the products)** or **Me, the marketplace owner**. Commission is never taken from shipping. When shipping goes to the vendor, their share of the order shipping is added to their earnings. |
| Taxes go to | select | - | Choose **Me, the marketplace owner** when the marketplace files the sales tax. Choose **The vendor** when each seller is responsible for their own tax; their share of the order tax is then added to their earnings. |
| Vendors earn their money when | select | The order is completed (recommended) |
**The order is completed (recommended)** or **Payment is received (order is processing)**. Until then the commission stays pending and cannot be withdrawn. Refunds automatically take the matching amount back. |
| PayPal | checkbox | - | Lets vendors choose PayPal as their payout method and enter their PayPal email in their dashboard settings. |
| Bank transfer | checkbox | - | Lets vendors choose bank transfer and enter their account holder, bank name, account number and routing or IBAN. |
| Minimum withdrawal amount | number | - | Vendors can only request a payout once their available balance reaches this amount. Keeps transfer fees down. |
| Show the store name on product pages, shop listings, cart, checkout and orders | checkbox | on |
Shows "Sold by" labels so shoppers see who they buy from and can click through to the store page. |
| Only customers who bought from a store can review it | checkbox | off |
Recommended once you have real orders. It stops fake reviews from people who never bought anything. |
| Vendor dashboard | select | Vendor Dashboard |
The page used as the vendor dashboard. It must contain the `[storefold_vendor_dashboard]` shortcode. |
| Become a vendor | select | Become a Vendor |
The page with the vendor application form. It must contain the `[storefold_vendor_registration]` shortcode. |
| Store directory | select | Stores |
The page that lists all stores. It must contain the `[storefold_store_list]` shortcode. |
| Delete all marketplace data when the plugin is deleted | checkbox | off |
Off keeps every table and setting, so reinstalling brings everything back. On removes the marketplace tables, settings, the vendor role and the three pages when you delete the plugin. Commissions and payouts are financial records, so leave this off unless you are sure. Data is always kept while another Storefold edition is installed. |
WooCommerce > Settings > Emails > Marketplace: new vendor application
| Setting | Type | Default | What it does |
|---|---|---|---|
| Enable/Disable | checkbox | on |
Sends this email to the marketplace team when someone applies to become a vendor. |
| Subject | text | - | The email subject. The field shows the default `[{site_title}] New vendor application: {store_name}` as a placeholder. |
| Email heading | text | - | The heading at the top of the email. The placeholder shows the default `New vendor application`. |
| Additional content | textarea | - | Extra text added to the email. |
| Email type | select | HTML |
The email format: **Plain text**, **HTML** or **Multipart**. |
| Cc(s) | text | - | Addresses that receive a copy. |
| Bcc(s) | text | - | Addresses that receive a blind copy. |
| Recipient(s) | text | - | Who receives the new vendor application email. |
WooCommerce > Settings > Emails > Marketplace: store approved
| Setting | Type | Default | What it does |
|---|---|---|---|
| Enable/Disable | checkbox | on |
Sends this email to a vendor when their store application is approved. |
| Subject | text | - | The email subject. The placeholder shows the default `Your store {store_name} is approved`. |
| Email heading | text | - | The heading at the top of the email. The placeholder shows the default `Welcome aboard!`. |
| Additional content | textarea | - | Extra text added to the email. |
| Email type | select | HTML |
The email format: **Plain text**, **HTML** or **Multipart**. |
| Cc(s) | text | - | Addresses that receive a copy. |
| Bcc(s) | text | - | Addresses that receive a blind copy. |
Shortcodes
[storefold_vendor_dashboard]
Shows the frontend vendor dashboard where vendors manage their products, orders, coupons, earnings, payouts, announcements and settings. The page set as **Vendor dashboard** under Storefold > Settings > Marketplace pages must contain it.
[storefold_vendor_dashboard][storefold_vendor_registration]
Shows the step-by-step vendor application form, which creates the account at the same time. The page set as **Become a vendor** under Storefold > Settings > Marketplace pages must contain it.
[storefold_vendor_registration][storefold_store_list]
Shows the store directory with a search box. The page set as **Store directory** under Storefold > Settings > Marketplace pages must contain it.
[storefold_store_list]On your site
Storefold adds these pages and elements to the front of your site:
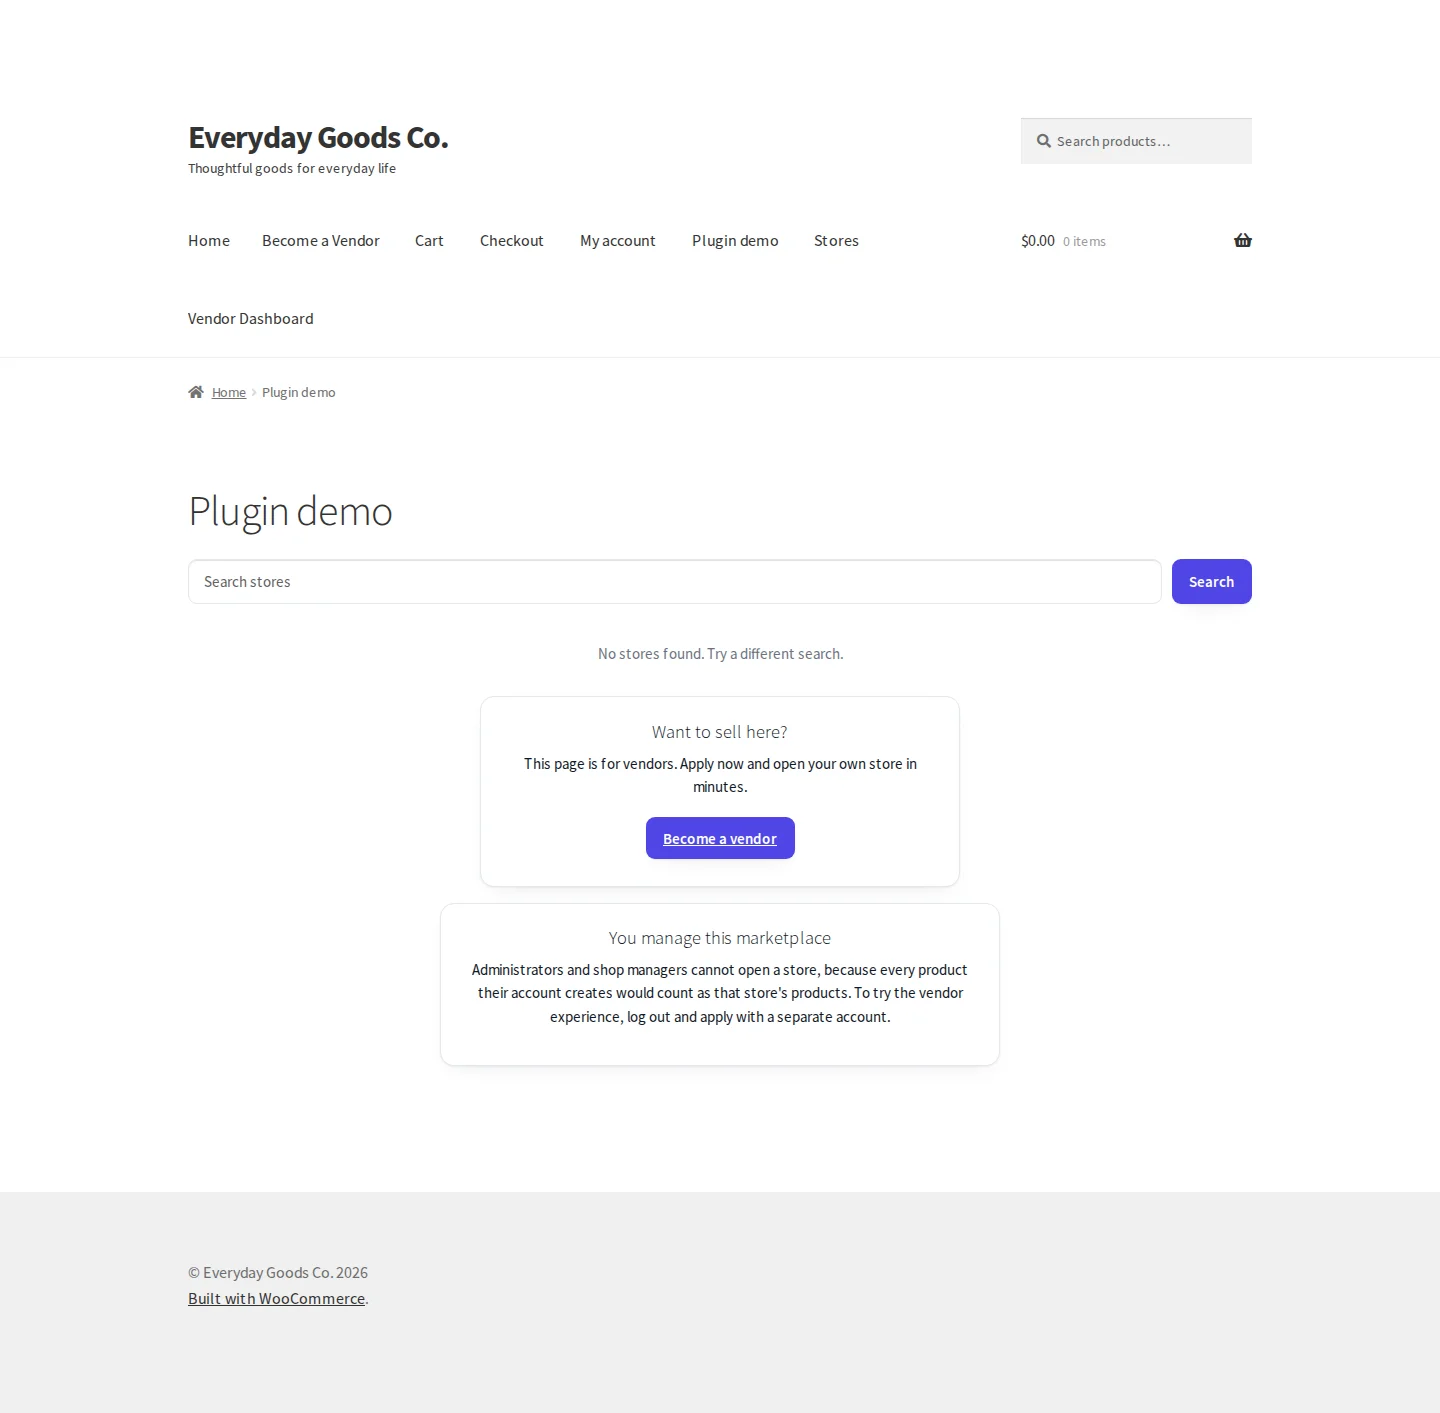
- Store directory: the page with
[storefold_store_list]lists your stores with a Search stores box. When nothing matches, shoppers see "No stores found. Try a different search." - Become a vendor: visitors without a store see a Want to sell here? box with a Become a vendor button that leads to the application form.
- Store pages: each vendor gets a store page at
/store/store-name/with banner, logo, policies, products and reviews. These pages need pretty permalinks. - "Sold by" labels: when enabled, product pages, shop listings, cart, checkout (classic and block) and orders show the store name, so shoppers can click through to the store.
- Vendor dashboard: approved vendors manage their products, orders, coupons, earnings, payouts, announcements and settings from the Vendor Dashboard page. Vendors can also switch on vacation mode with a custom message.
If you are logged in as an administrator or shop manager, you see a You manage this marketplace note instead of the application prompt. These accounts cannot open a store. To try the vendor side, log out and apply with a separate account.
Frequently asked questions
Does the customer see several orders?
No. The customer pays once and sees one order. Vendor sub-orders are created in the background and hidden from the customer account.
How does a vendor get paid?
The vendor requests a withdrawal from their dashboard. You send the money by PayPal or bank transfer and mark the request as paid under Storefold > Withdrawals.
What happens on a refund?
Refund from the vendor order in WooCommerce as usual. The vendor earning for the refunded items is reversed in their ledger automatically.
Can vendors use wp-admin?
No. Vendors work from the Vendor Dashboard page on the front of the site, and they only see their own media uploads.
Where do I edit the marketplace emails?
Under WooCommerce > Settings > Emails. Each marketplace email has an editable subject, heading and body text with placeholders.
Can I change the look of the vendor pages?
Yes. Copy any file from the plugin templates folder to yourtheme/storefold/ and edit the copy.
Is it compatible with High-Performance Order Storage?
Yes. All order access uses the WooCommerce CRUD layer. Storefold also works with the Cart and Checkout blocks.
Can vendors export their sales?
Yes. On the Vendor Dashboard Earnings screen, vendors can download a CSV file of their own sales and earnings, for all time or for a date range. It only ever contains that vendor's rows.
Troubleshooting
- Store pages at /store/store-name/ do not load
Store pages need pretty permalinks. Go to Settings > Permalinks, choose any option other than Plain and save. The Pretty permalinks check under Marketplace health on Storefold > Overview should then show OK.
- The vendor dashboard, application form or store directory page is empty or missing
Open Storefold > Settings > Marketplace pages and check that each option points to a published page. The pages must contain
[storefold_vendor_dashboard],[storefold_vendor_registration]and[storefold_store_list]. The Marketplace pages health check on the overview tells you when a page is missing.- I cannot open a store with my administrator account
This is intended. Administrators and shop managers cannot be vendors, because every product their account creates would count as that store's products. Log out and apply with a separate account. The Vendor accounts health check warns you if an older store is linked to a manager account.
- A vendor cannot request a withdrawal
Check two things under Storefold > Settings:
- Earnings stay pending until the order reaches the status set in Vendors earn their money when. Pending earnings cannot be withdrawn.
- The vendor's available balance must reach the Minimum withdrawal amount.
Also make sure at least one payout method (PayPal or Bank transfer) is ticked.
- New vendor products do not appear in the shop
If New vendor products is set to Wait for my review before going live, new products are saved with the Pending status. Find them under Products or in Needs your attention on the overview and publish them.
- You are not receiving new vendor application emails
Go to WooCommerce > Settings > Emails > Marketplace: new vendor application. Make sure Enable/Disable is ticked and that Recipient(s) holds the right address, then click Send a test email to check delivery.
Upgrade
Upgrade to Storefold - Multivendor Marketplace for WooCommerce
This free edition is complete on its own. Storefold Pro is a separate, standalone edition for larger marketplaces. It contains everything in the free edition and adds more tools. Activating Pro switches the free edition off and keeps all your data.
- Disputes: customers open a case, you rule and refund
- Automatic vendor payouts with Stripe Connect
- Seller membership plans, free or paid, with product limits
- Staff accounts for vendors with limited permissions
- Offers: several vendors can sell the same product
- Activity log and CSV vendor import