
Overview
Visuaro turns any WooCommerce product into a customizable one. Customers open the designer from the product page, add text, upload images, pick shapes, clipart and stickers, add QR codes and Code 128 barcodes, and see their design on a product mockup. A live price updates as the design changes. A print check explains problems in plain language before the customer orders.
When an order is paid, Visuaro makes print files at the real size and resolution of each print area: a vector PDF with live text and embedded fonts, an SVG for cutters and lasers, and a transparent PNG at the target DPI. The files appear in Visuaro > Production queue and on the order, and the store receives a "Print files ready" email with secure download links.
The plugin is for store owners and print shops that sell personalised products. You build templates from your own product photos or install the bundled mockup library, draw print areas in millimetres, and turn the designer on product by product. The free plugin is complete on its own: nothing in it is limited, locked or time restricted.
Requirements
- WordPress 6.4 or later (tested up to 7.1)
- PHP 7.4 or later
- WooCommerce 8.5 or later, installed and active
- The GD image library (Imagick is used automatically when present, but it is not required)
Installation
Visuaro is a free plugin on WordPress.org. WooCommerce 8.5 or newer must be installed and active before you activate Visuaro.
In your WordPress admin, go to Plugins > Add New.
Search for Visuaro - Product Designer for WooCommerce.
Click Install Now on the plugin card.
Click Activate. A new Visuaro menu appears in the admin sidebar.
Quick start
- Add a product template
Go to Visuaro > Templates. Click Install bundled mockups to add ready made templates (t-shirt, hoodie, mug, poster and more), or click New template from my photos to build one from your own product photos.
- Check the print areas
Click Edit on a template. Drag the print area box onto the printable part of the photo and enter its real width and height in millimetres. Click save.
- Turn the designer on for a product
Edit a WooCommerce product and open the Designer tab in the Product data box. Tick Enable designer, choose the template under Mockup template and update the product.
- Review the main settings
Open Visuaro > Settings. Check the button text on General, the file formats and order statuses on Print output, and any customisation charges on Pricing. Click Save settings.
- Try it as a customer
View the product on your store. Click the Customize button, add some text or an image, and click Add to cart in the designer. The cart shows a preview of the design and an Edit design link.
- Get your print files
Place a test order and set it to Processing. Visuaro makes the print files in the background. Download them from Visuaro > Production queue or from the "Print files ready" email.
#Dashboard
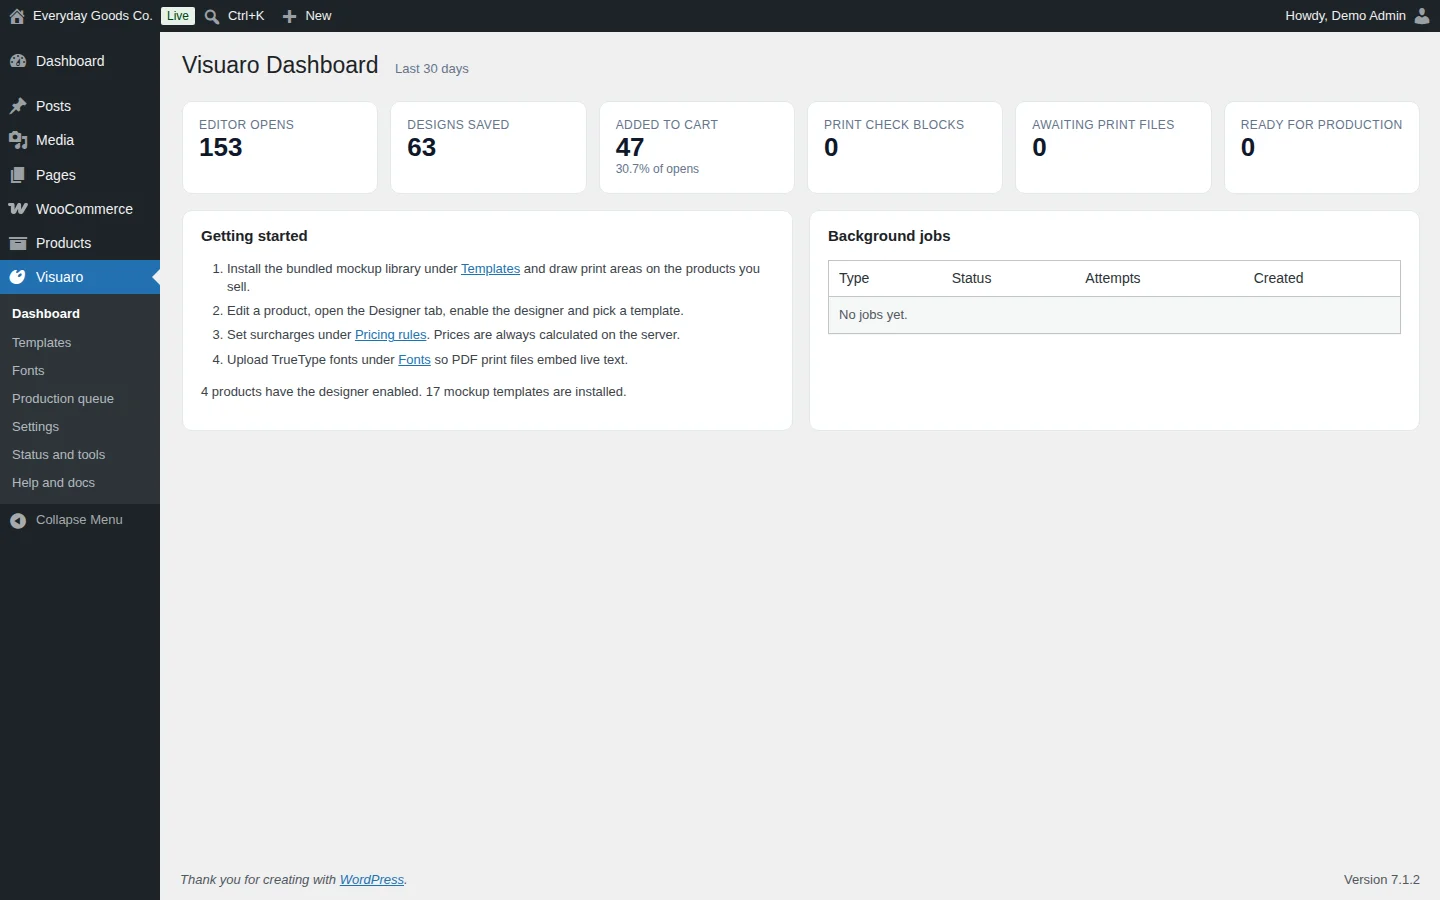
Visuaro > Dashboard gives you an overview of the last 30 days:
- Editor opens: how often shoppers opened the designer.
- Designs saved: designs saved by shoppers.
- Added to cart: designs added to the cart, with the share of designer opens.
- Print check blocks: designs the print check kept out of the cart.
- Awaiting print files and Ready for production: order items waiting for files, and items whose files are ready.
The counters use the anonymous events recorded when Designer statistics is ticked under Visuaro > Settings > General. The events stay in your own database.
The Getting started box lists the setup steps and shows how many products have the designer enabled and how many mockup templates are installed. The Background jobs table lists recent jobs, such as print file generation, with their Type, Status, Attempts and Created date.
#Templates and print areas
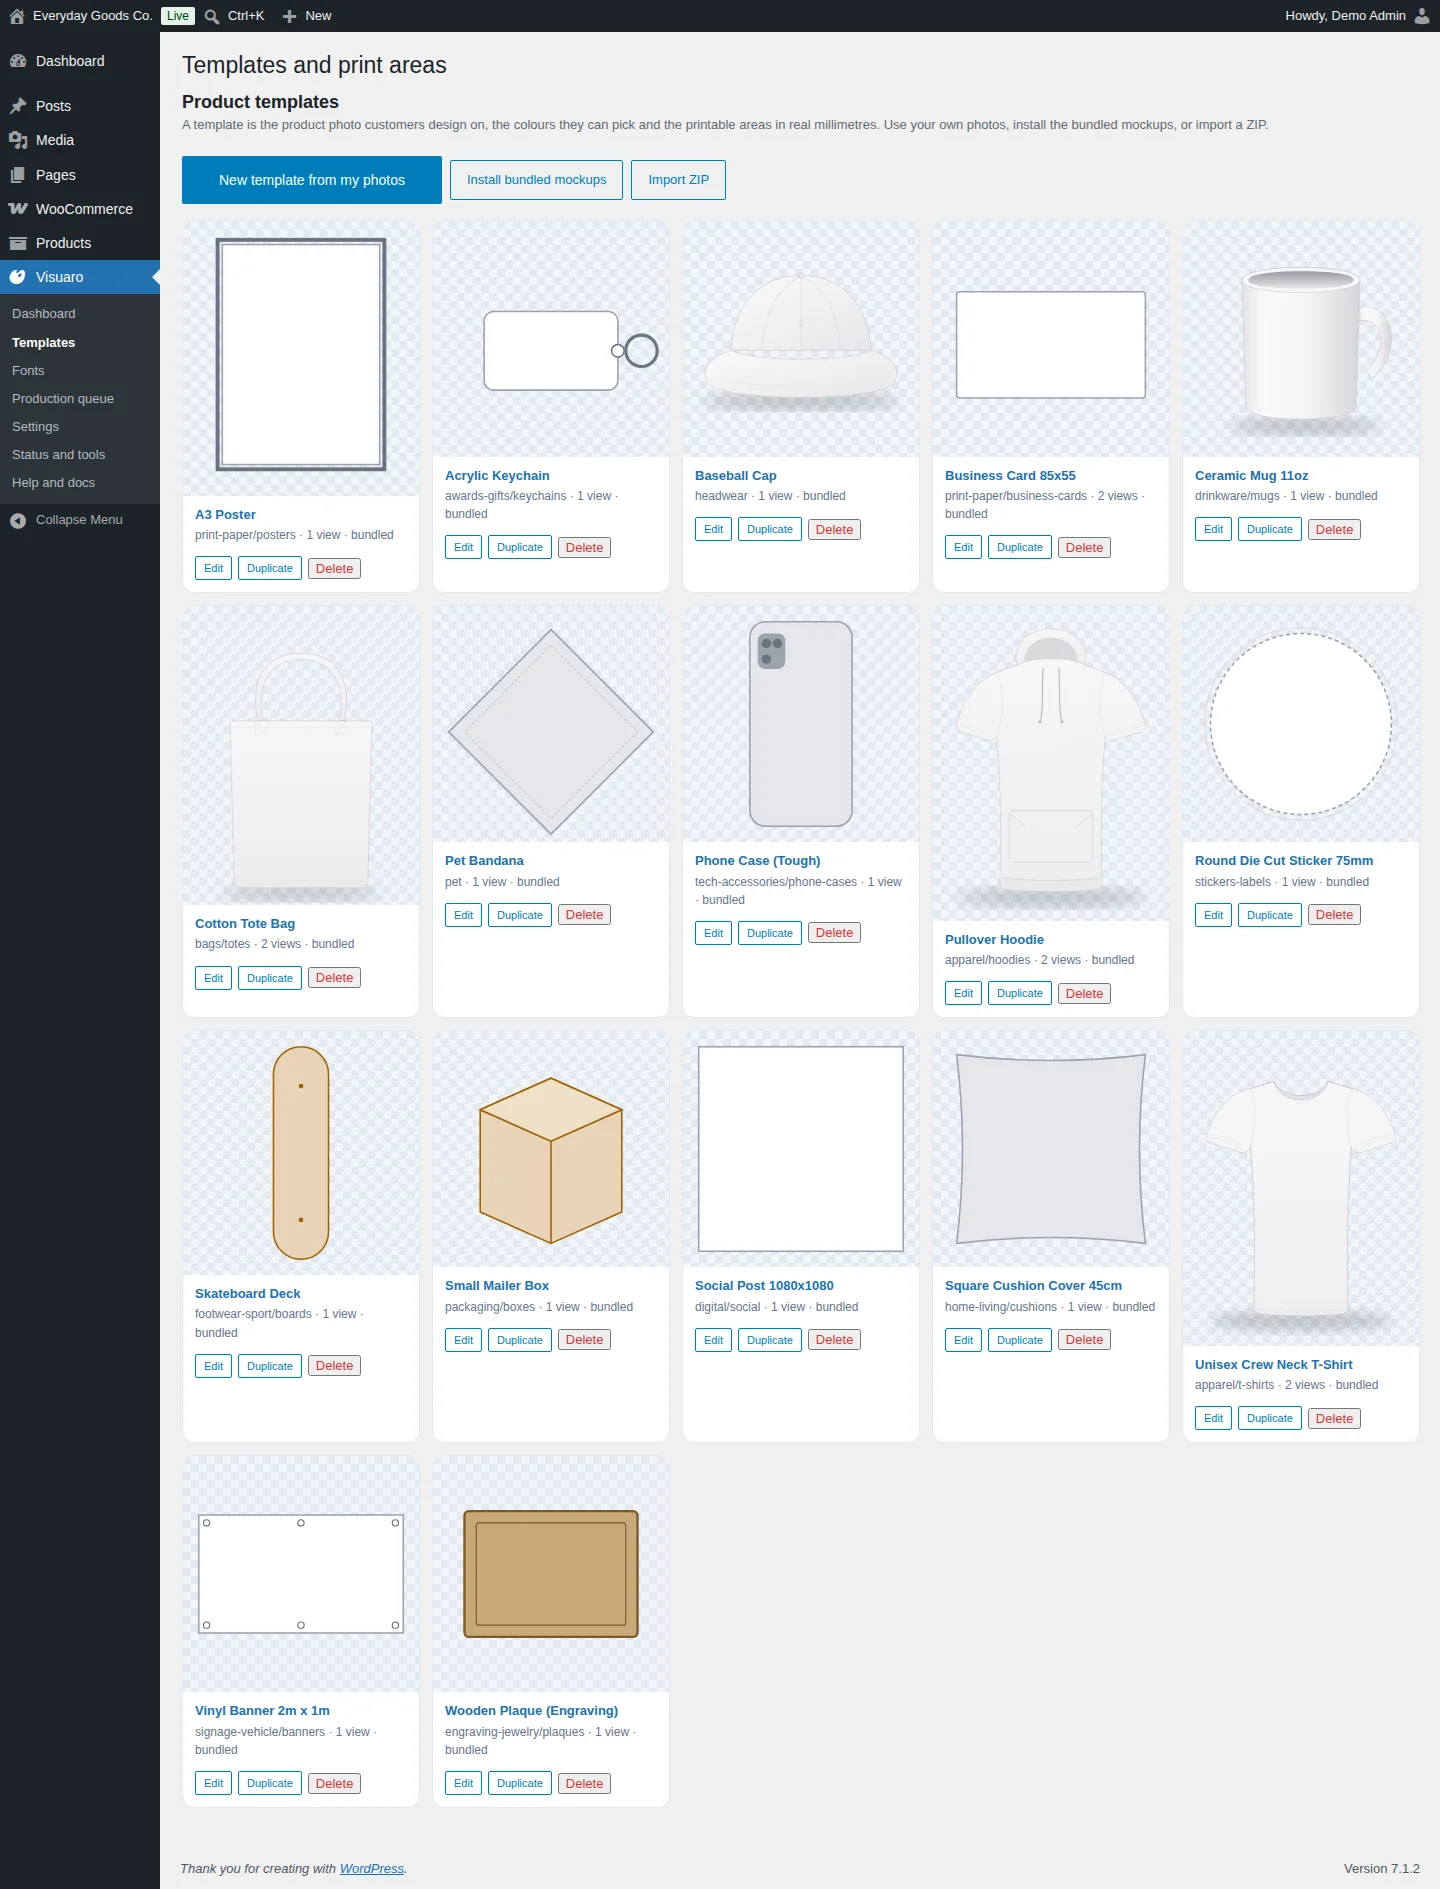
A template is the product as shoppers see it: one photo per view, the colours they may pick, and one or more print areas in real millimetres. Many products can share one template. Manage templates under Visuaro > Templates.
Add templates
- Install bundled mockups adds the bundled library: A3 Poster, Acrylic Keychain, Baseball Cap, Business Card 85x55, Ceramic Mug 11oz, Cotton Tote Bag, Pet Bandana, Phone Case (Tough), Pullover Hoodie, Round Die Cut Sticker 75mm, Skateboard Deck, Small Mailer Box, Social Post 1080x1080, Square Cushion Cover 45cm, Unisex Crew Neck T-Shirt, Vinyl Banner 2m x 1m and Wooden Plaque (Engraving). You can also install it from Visuaro > Status and tools.
- New template from my photos opens a short wizard. Pick the Product type, enter a Template name and a Category, upload one photo per view under Views and photos, and add the Colours customers can choose. Click Create and edit print areas to continue in the template editor.
- Import ZIP imports a template package made of a
manifest.jsonfile plus PNG or SVG layers.
Each template card shows its category, number of views and source, with Edit, Duplicate and Delete buttons.
Template editor options
- Product type: a starting point with sensible views and print areas (t-shirt front and back, mug wrap, phone case and more). Everything can be changed afterwards.
- Views: each side of the product (Front, Back, Sleeve...). Each view has its own photo and print areas. Add views with + Add view.
- Product photo: any image type works (JPEG, PNG, WebP, AVIF, GIF, SVG). Use a sharp photo at least 1500 pixels wide on a plain background for the best recolouring. A plain JPEG is fine; it does not have to be a transparent PNG.
- Colour mask: an optional white silhouette of the product. Without it, the designer finds the product in the photo automatically when a shopper picks another colour. Detect garment builds the mask for you. Check each colour on the product page afterwards.
- Shading and front overlays: optional images drawn over the design. Shading makes artwork follow folds; a front overlay hides artwork under a pocket or a handle.
- Colours customers can choose: each colour has a name and a value. The product photo is recoloured live in the designer, keeping folds and shading.
- Print area: the printable region. Drag the box on the photo, then enter the true width and height in millimetres. When the box shape differs from that size, a notice offers Fit box to size.
- Shape: rectangle, rounded, ellipse, polygon, curved band (for chest prints and mug wraps), free drawing or a pasted SVG path. Artwork is clipped to the shape in the designer and in every print file.
- Bleed: extra artwork beyond the edge that is trimmed away, so cuts never show a white line. 2 to 3 mm is typical for printed paper; 0 for garments.
- Safe zone: the distance from the edge that important text should keep. It shows as a dashed line and the print check tests it.
- Target DPI: the resolution of raster print files for this area, and the minimum the print check expects from images.
- Allowed print methods: optional. Limits which print methods may use this area. Leave all unticked to allow any.
#The Designer tab on a product
Every WooCommerce product has a Designer tab in its Product data box. These options apply to that product only. The Customize button works on simple and variable products. The chosen variation is passed to the designer and stored with the design.
- Enable designer: shows the Customize button on this product.
- Mockup template: the template with the product photos, colours and print areas. Choose None (blank print area below) to give shoppers a blank print area of the size set below.
- Print method: how this product is printed. It sets the print check rules and output details. Products that do not choose a method use Default print method from Settings > Print output.
- Button text: overrides the global button label for this product. Leave it empty to use the label from Settings > General.
Blank print area (used when no template is selected), for example for business cards or stickers:
- Size (mm): width and height (200 and 250 by default).
- Bleed / safe (mm): bleed and safe zone (0 and 3 by default).
- Target DPI: 300 by default.
Customer tools choose which tools shoppers get: Text, Image uploads, Shapes (including the pen and brush), Clipart library (clipart and stickers) and QR codes and barcodes. They are all on by default. Tools you switch off are hidden in the designer, and a design that contains them is refused at the cart. Tick Require a design before adding to cart (off by default) to stop the product being bought without a design.
Max objects (200 by default) is the most elements one view of a design may contain on this product. The designer stops adding more, and larger designs are refused at the cart.
Pricing overrides (leave blank to use global settings) set customisation charges for this product only: Customization fee, Per print area used, Per text object, Per image, Per uploaded file and Per square cm covered. Leave a field blank to use the value from Settings > Pricing.
#Fonts
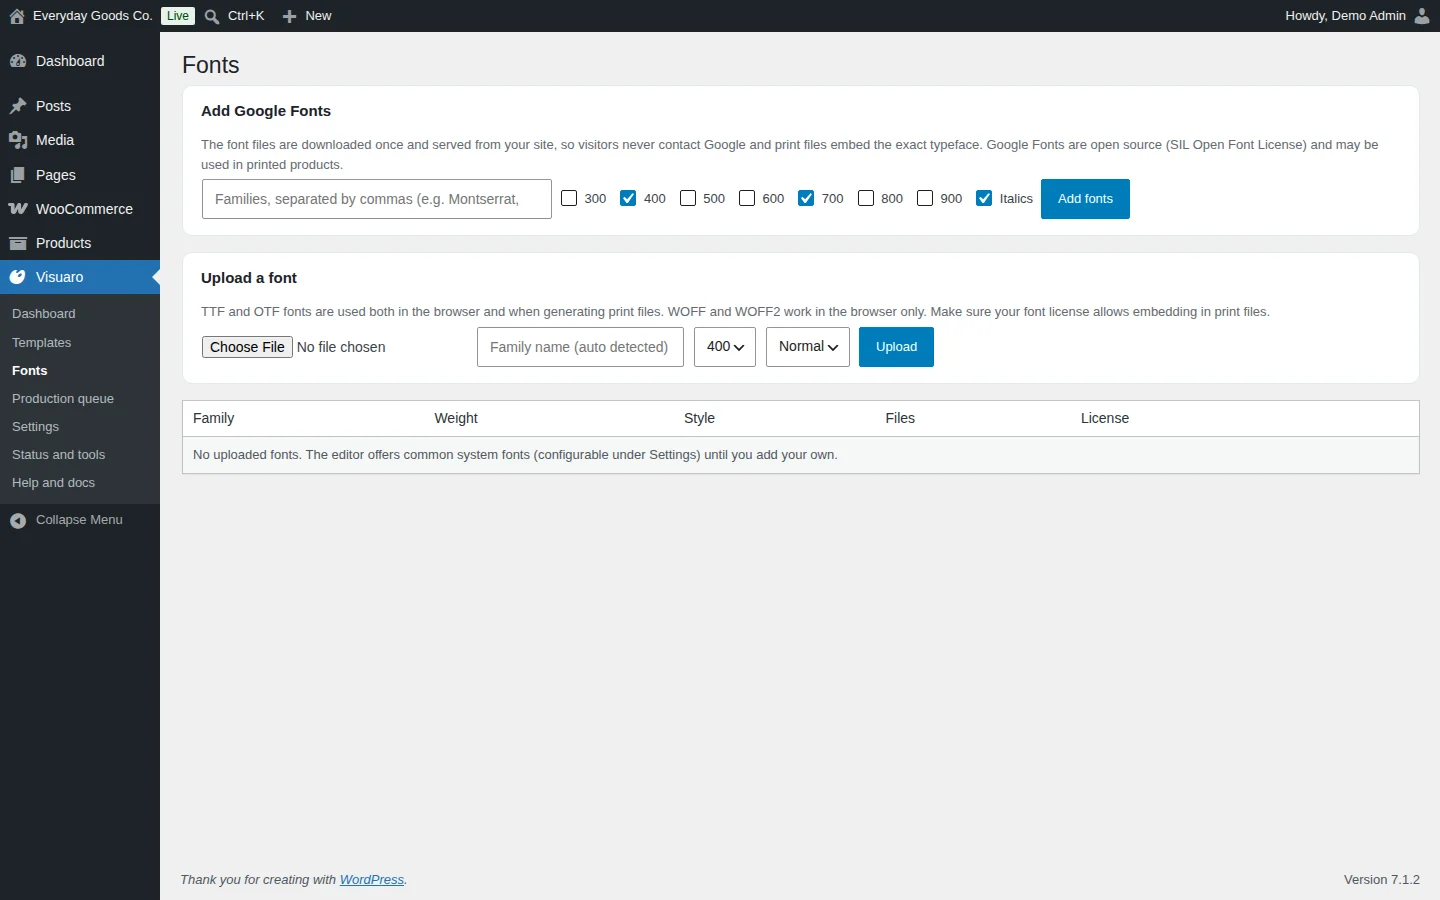
Visuaro > Fonts manages the fonts shoppers can use in the designer. Until you add your own, the designer offers the system fonts listed under Settings > Fonts.
Add Google Fonts
- Type one or more family names, separated by commas (for example
Montserrat, Pacifico). - Tick the weights you need (300 to 900) and Italics if you want italic styles. 400, 700 and Italics are ticked by default.
- Click Add fonts.
Your server downloads the font files once from Google Fonts. They are then served from your own site, so visitors never contact Google and print files embed the exact typeface. Google Fonts are open source (SIL Open Font License) and may be used on printed products. Only the family names you enter are sent to Google.
Upload a font
- Click Choose File and pick a font file.
- Check Family name (auto detected) and choose the weight and the style (Normal or Italic).
- Click Upload.
TTF and OTF fonts work in the designer and in print files. WOFF and WOFF2 fonts work in the designer only. Make sure the font licence allows embedding in print files.
The table lists your fonts with their Family, Weight, Style, Files and License. Add fonts here so PDF print files embed live text. Without a TrueType file on the server, a font prints with a fallback.
#Production queue and print files
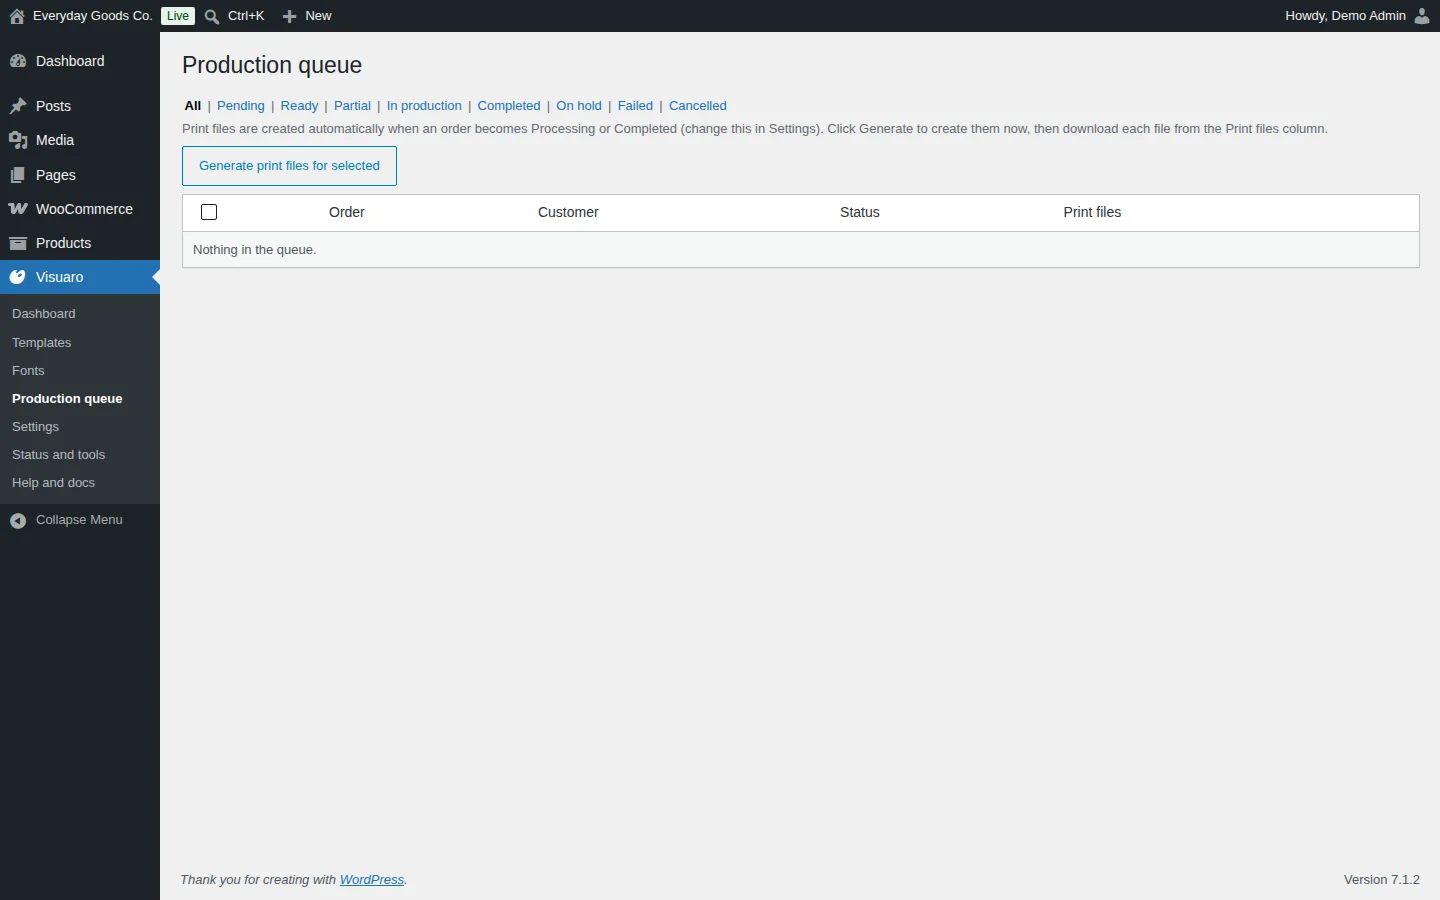
Visuaro > Production queue lists every designed order item with a preview, the Order, the Customer, the production Status and the Print files.
How print files are made
- When an order reaches a status ticked under Settings > Print output (Processing and Completed by default), Visuaro makes the print files in the background.
- The files appear as download buttons in the Print files column and in the Visuaro panel under each order item. Download links are signed and only work for staff who can view orders.
- The store receives the "Print files ready" email with secure links.
Each file is made at the print area's true size: a PDF with live text and embedded fonts, an SVG for vector work and a transparent PNG at the target DPI. Direct to Film files are mirrored automatically.
Generate files by hand
- Click Generate on a row (or Regenerate when files already exist), for example for an on hold order.
- To do several at once, tick the rows (or Select all) and click Generate print files for selected.
Track production
Set each row's status to Pending, Ready, In production, Completed, On hold or Cancelled. Rows can also show Partial or Failed after generation. Use the links above the table to filter by status. Status changes are recorded in the audit log.
When generation fails, the row shows a short note in red, for example when the server ran out of memory. See Troubleshooting below.
#The "Print files ready" email
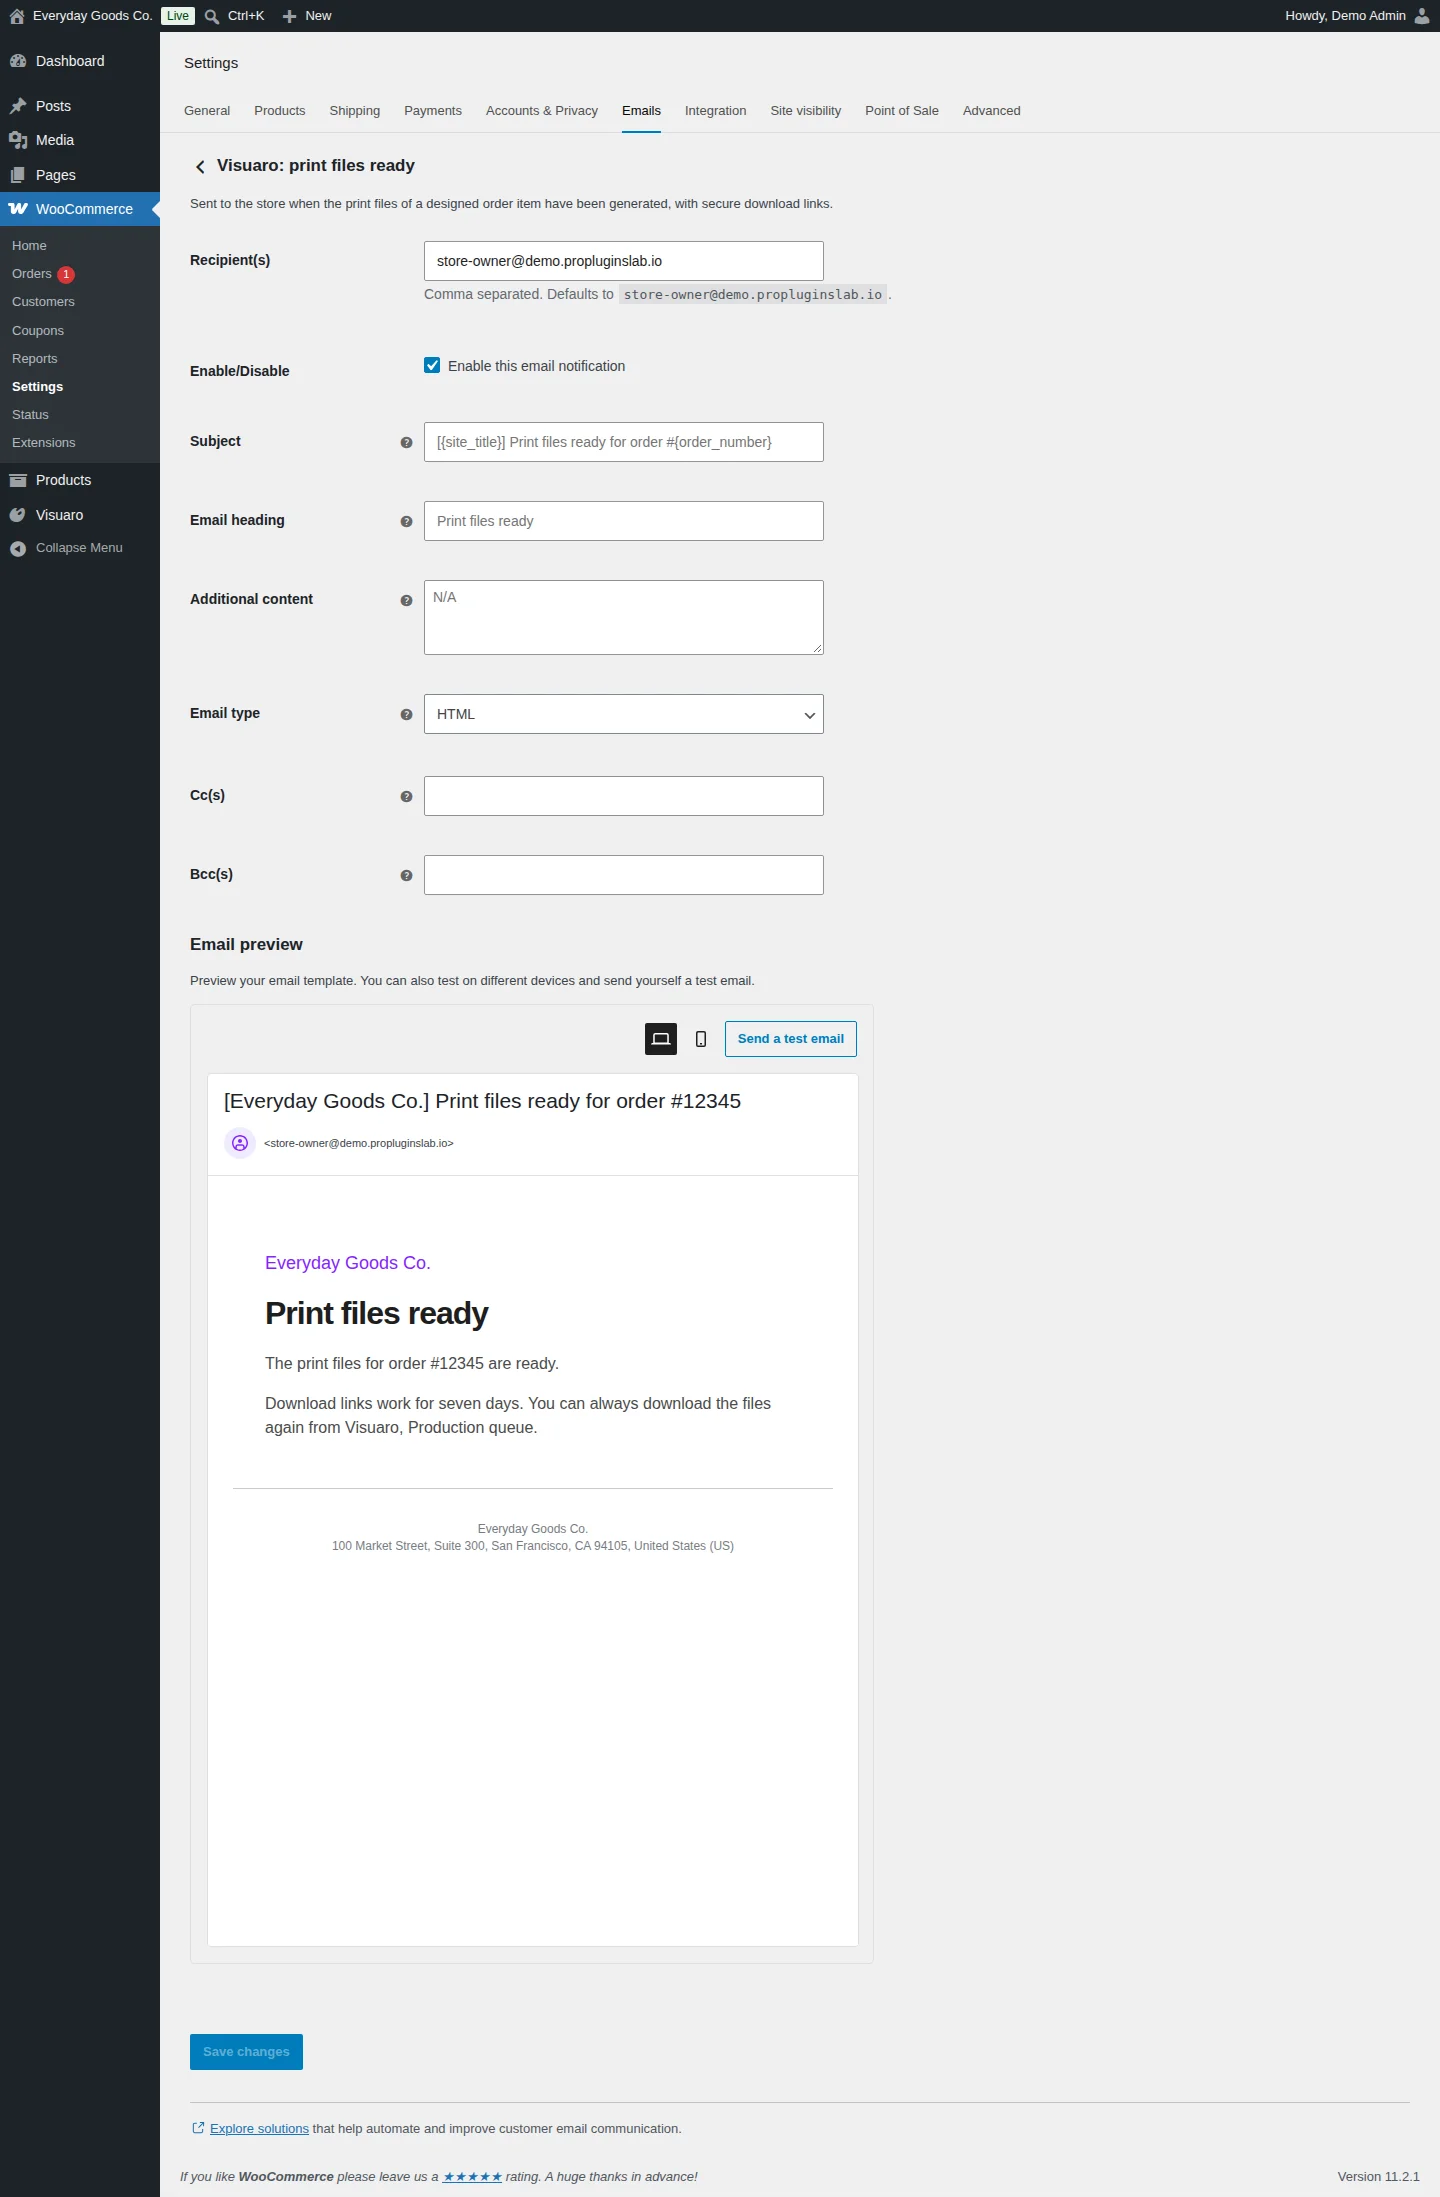
Visuaro adds a store email under WooCommerce > Settings > Emails > Visuaro: print files ready. It is sent to the store when the print files of a designed order item have been generated, with secure download links. The links work for seven days. You can always download the files again from Visuaro > Production queue.
- Recipient(s): comma separated addresses. When empty, the email goes to the site admin email address.
- Enable/Disable: untick to stop sending this email.
- Subject and Email heading: leave them empty to use
[{site_title}] Print files ready for order #{order_number}andPrint files ready. - Additional content, Email type, Cc(s) and Bcc(s) work like other WooCommerce emails.
Use Send a test email in the Email preview to check how the email looks.
To attach the files themselves as well as the links, tick Attach files to the "Print files ready" email under Visuaro > Settings > Print output. Large files may exceed your mail server's attachment limit.
#Settings: General
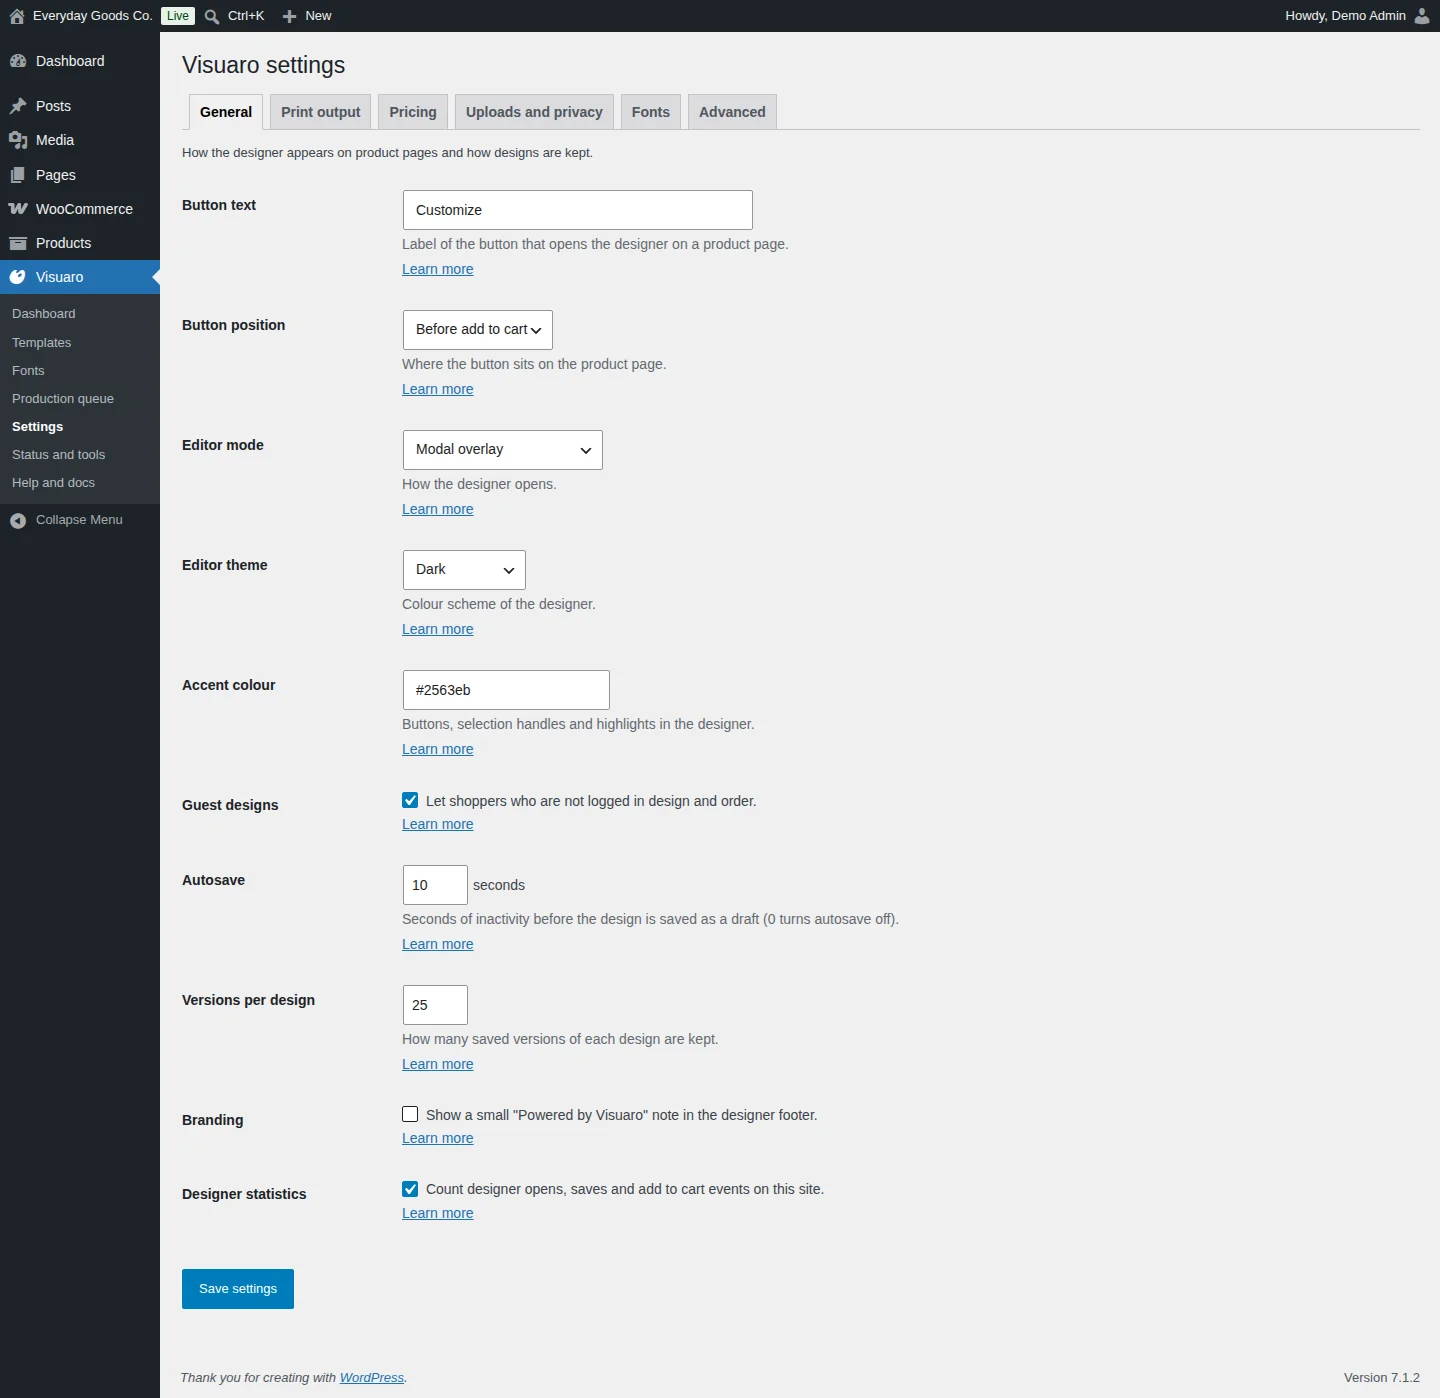
Visuaro > Settings has six tabs. Every option has a Learn more link to the built in Help and docs. Click Save settings after changing a tab.
The General tab controls how the designer appears on product pages and how designs are kept.
- Button text: shown on every product with the designer switched on. A product can use its own label in its Designer tab. Keep it short and active, for example "Customize" or "Design yours".
- Button position: Before add to cart puts the designer first, which suits products that must be personalised. After add to cart suits products that can also be bought plain.
- Editor mode:
- Modal overlay opens the designer above the product page. It is the best default.
- Full page (strict CSP) opens a dedicated designer page with a strict Content Security Policy. Use it when theme or plugin styles clash with the designer.
- Inline on the product page embeds the designer in the product page itself.
- Editor theme: Dark puts the focus on the product and the artwork. Light matches bright store themes. Follow device uses the shopper's system setting.
- Accent colour: use your brand colour for buttons, selection handles and highlights. The designer keeps text on this colour readable automatically.
- Guest designs: guests get a private, signed cookie that identifies their designs. When they log in or register, their designs move to the account. Untick it to ask shoppers to log in before they can save.
- Autosave: drafts appear under My account > Saved designs. Ten seconds balances safety and server load. Enter 0 to turn autosave off.
- Versions per design: older versions are removed automatically, except versions that belong to an order, which are never deleted. At least three are always kept.
- Branding: shows a small "Powered by Visuaro" note, linking to propluginslab.io, in the designer footer. Off by default. It has no effect on any feature.
- Designer statistics: counts designer opens, saves and add to cart events for the Dashboard. Events use a hashed, anonymous session id, stay in your database and keep no personal data.
#Settings: Print output and print methods
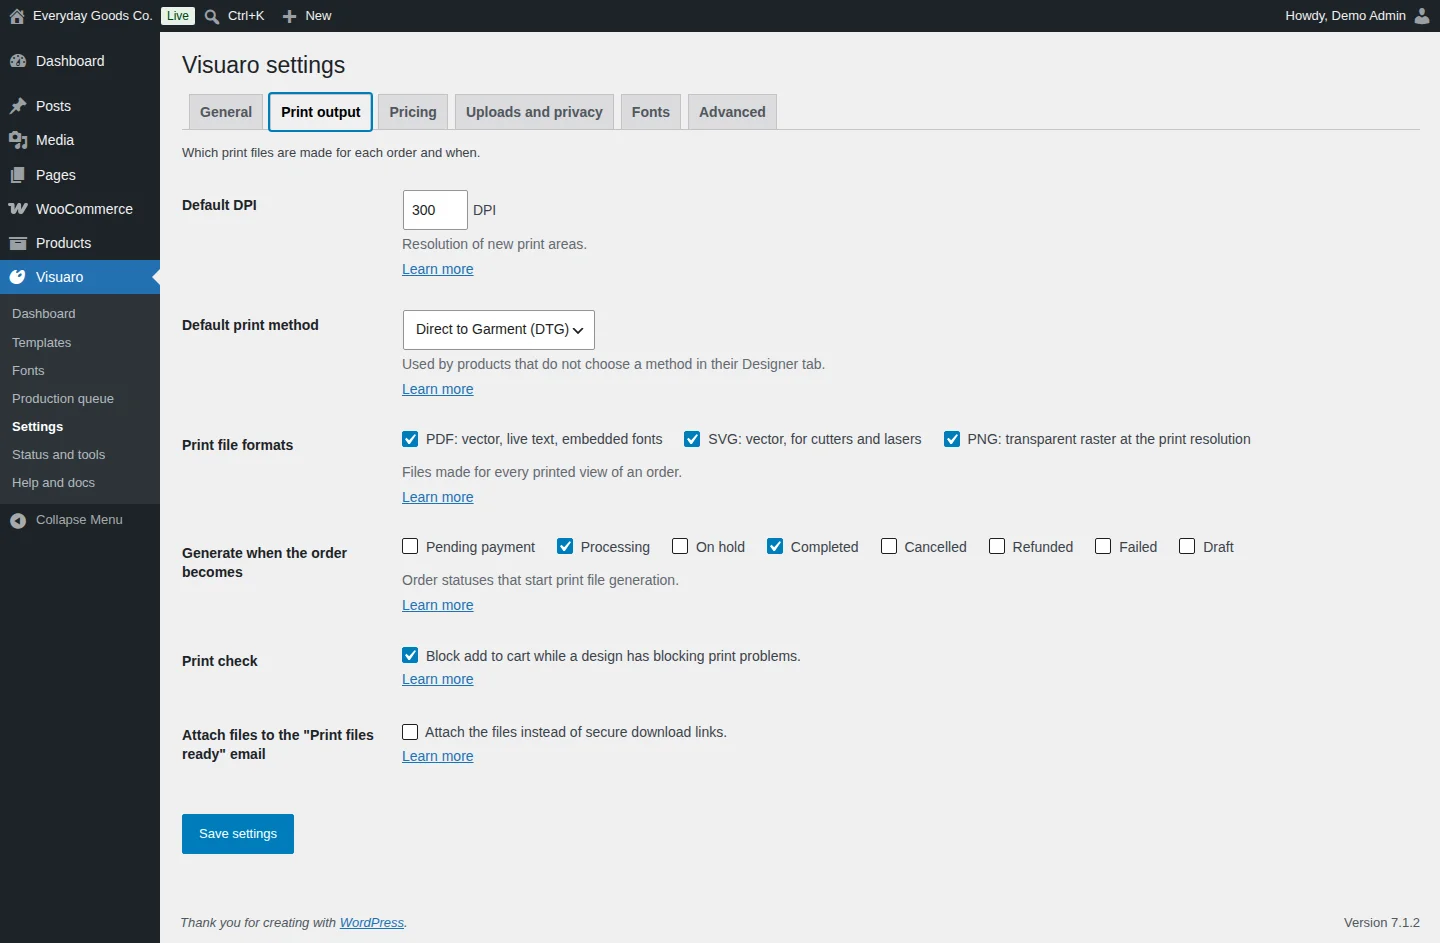
The Print output tab decides which print files are made for each order and when.
- Default DPI: the resolution of raster print files and the target the print check uses for new print areas. 300 suits most printing; large format work often uses 150. Each print area can override it in the template editor.
- Default print method: used by products that do not choose a method in their Designer tab.
- Print file formats: files made for every printed view of an order.
- PDF: vector, live text, embedded fonts keeps vector shapes and live text, which printers prefer.
- SVG: vector, for cutters and lasers is a vector file for cutters, lasers and design tools.
- PNG: transparent raster at the print resolution suits DTF, DTG and sublimation.
- Generate when the order becomes: the order statuses that start print file generation, normally when the order is paid (Processing). On hold orders, such as bank transfers, wait until you mark them paid. You can always generate files by hand in the production queue.
- Print check: blocks add to cart while a design has blocking print problems. The print check flags images too low in resolution, artwork outside the printable area, missing images and text too small to print. Blocking problems stop the order until fixed; warnings only inform. Untick it to let shoppers order anyway. The product's own tool restrictions still apply.
- Attach files to the "Print files ready" email: attaches the files as well as the secure download links.
Print methods
The print method sets the print check rules and whether files are mirrored. Choose a store default here and override it per product in the Designer tab. The plugin uses these values for each method:
| Print method | Minimum image resolution | Smallest text | Thinnest line | Colour limit | Mirrored |
|---|---|---|---|---|---|
| Direct to Garment (DTG) | 150 DPI | 6 pt | 0.5 pt | None | No |
| Direct to Film (DTF) | 150 DPI | 6 pt | 0.75 pt | None | Yes |
| Sublimation | 150 DPI | 5 pt | 0.3 pt | None | Yes |
| Screen Printing | 150 DPI | 8 pt | 1 pt | 6 | No |
| Vinyl / HTV | Not checked | 12 pt | 2 pt | 3 | Yes |
| Embroidery | Not checked | 18 pt | 2 pt | 12 | No |
| UV Printing | 300 DPI | 4 pt | 0.25 pt | None | No |
| Laser Engraving | Not checked | 8 pt | 0.5 pt | 1 | No |
| CNC / Routing | Not checked | 20 pt | 3 pt | 1 | No |
| Offset / Litho | 300 DPI | 4 pt | 0.25 pt | None | No |
| Wide Format | 100 DPI | 12 pt | 1 pt | None | No |
| Digital Print | 300 DPI | 4 pt | 0.25 pt | None | No |
Direct to Garment and Direct to Film produce a transparent PNG at the print resolution. Direct to Film is mirrored for transfer.
#Settings: Pricing
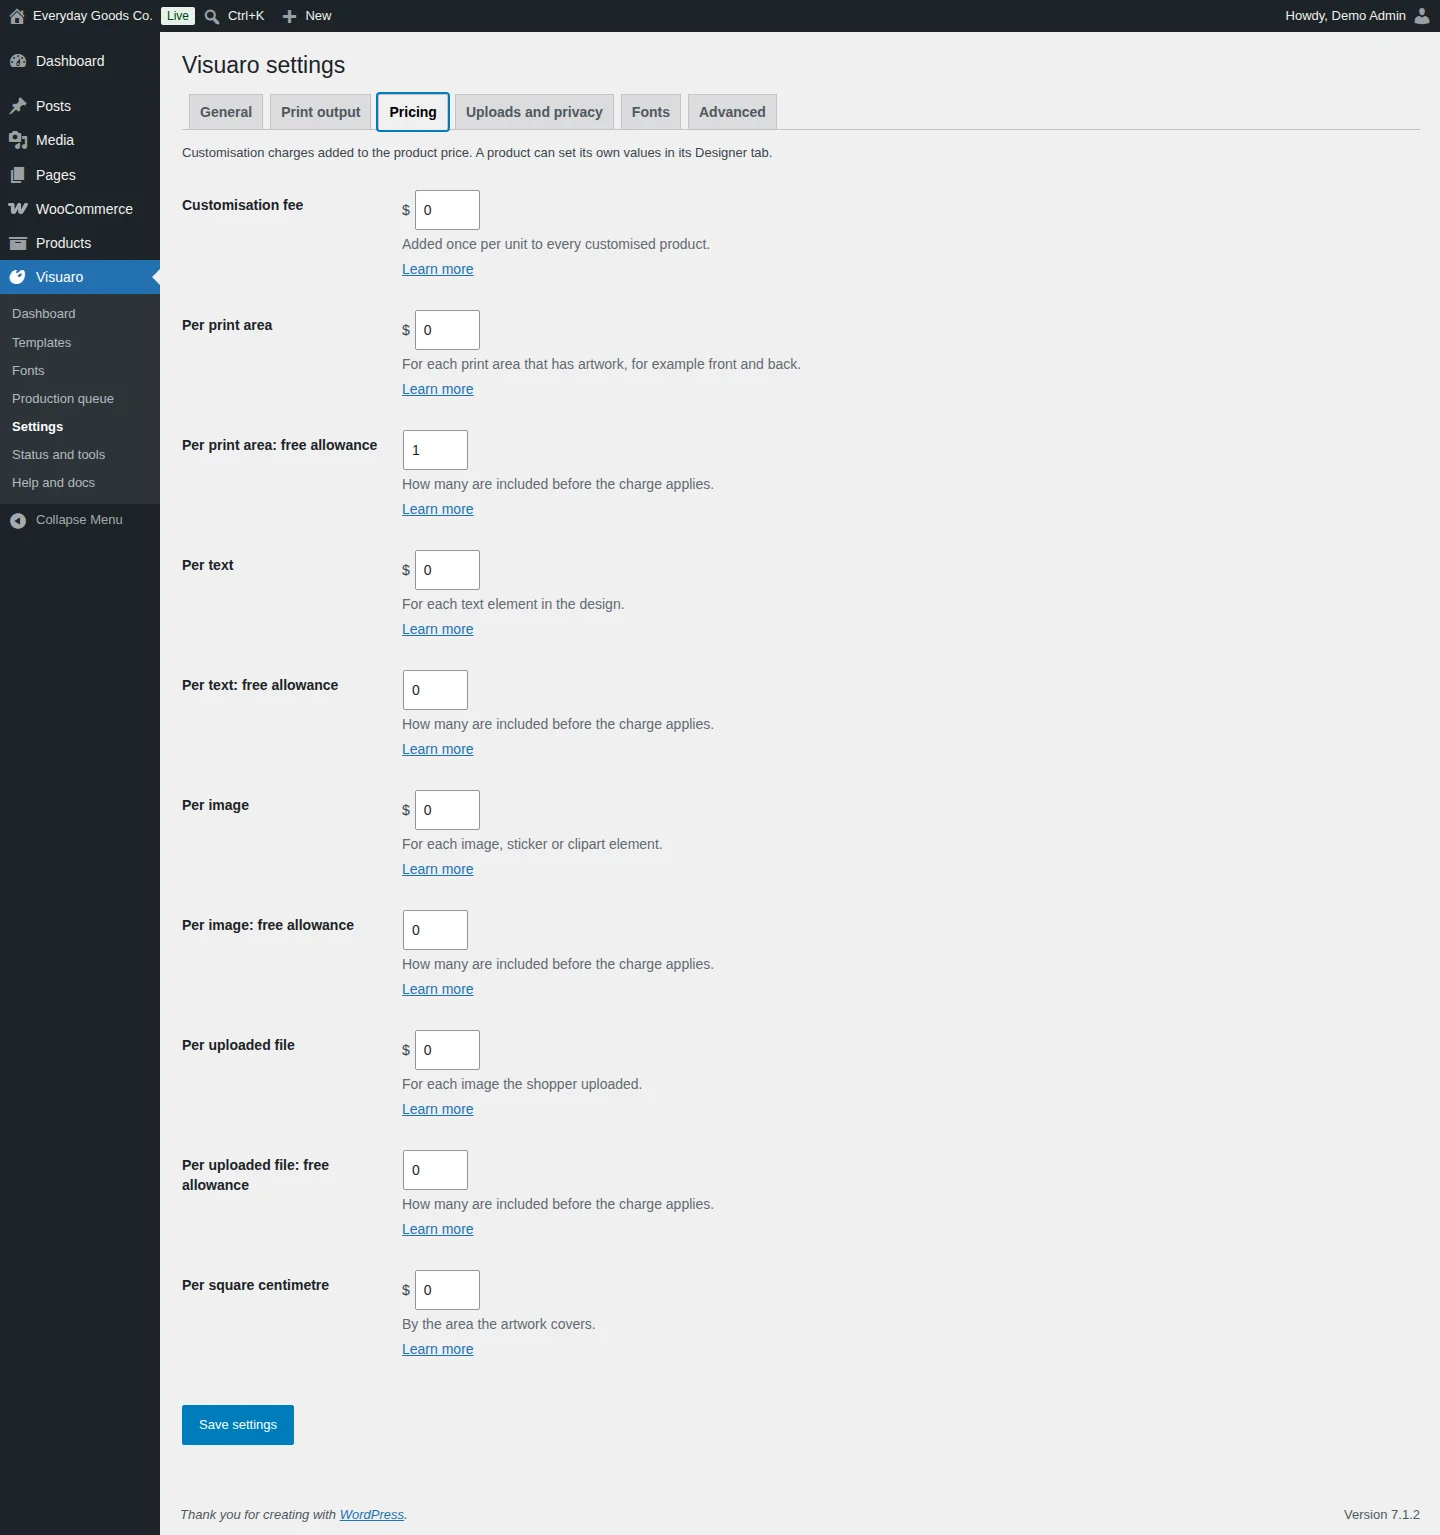
The Pricing tab sets customisation charges that are added to the product price. Amounts are in your store currency. A product can set its own values under Pricing overrides in its Designer tab. The designer shows a live price that updates as the design changes, and the cart shows the design charges.
- Customisation fee: a flat charge added once per unit to every customised product, for example to cover setup. Leave it at 0 to charge only for what the design uses.
- Per print area: for each print area that has artwork, for example front and back. With the default free allowance of 1, you charge only for the second and further areas.
- Per text: for each text element. Useful for engraving or embroidery, where each line costs time.
- Per image: for each image, sticker or clipart element.
- Per uploaded file: for each image the shopper uploaded. Stickers and clipart are not counted as uploads.
- Per square centimetre: by the area the artwork covers, measured from the bounding box of all artwork in each print area. Suits DTF and large format, where ink and film use grow with size.
Each per item charge has a free allowance: how many are included before the charge applies (0 to 100).
Example: with Per print area set to 5 and Per print area: free allowance set to 1, a design printed on front and back adds 5 to the price.
#Settings: Uploads and privacy
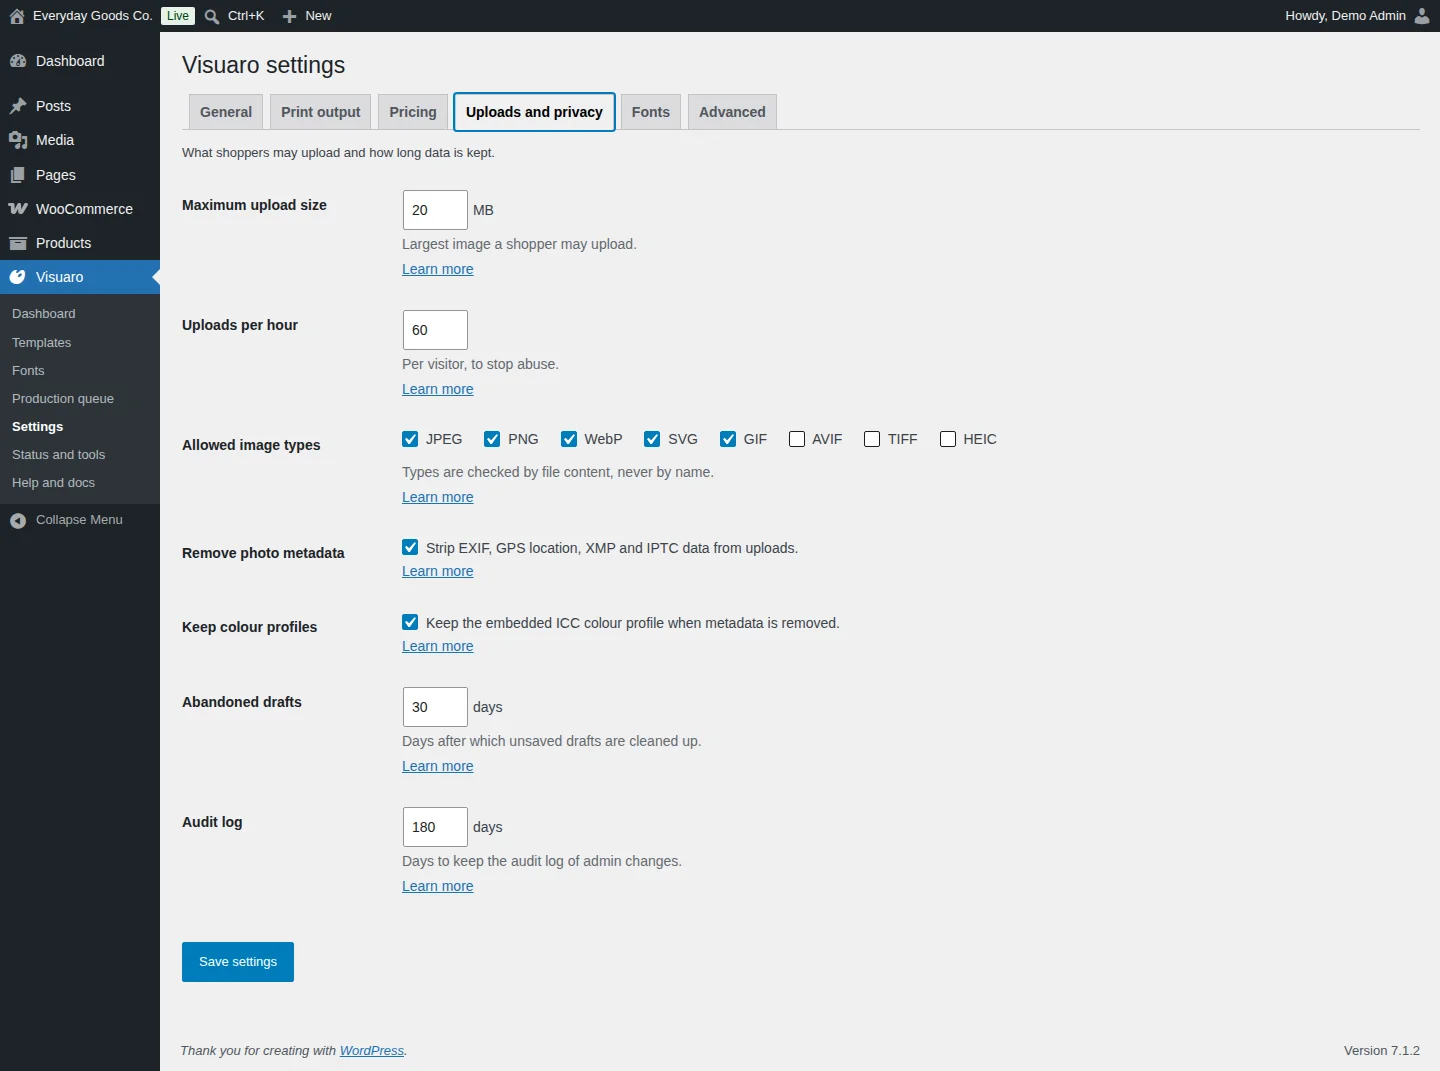
The Uploads and privacy tab sets what shoppers may upload and how long data is kept.
- Maximum upload size: the largest image a shopper may upload, in MB. Your server's own limit also applies; it is shown on Visuaro > Status and tools. Print quality depends on pixel size, not file size, so 20 MB is plenty for most photos.
- Uploads per hour: counted per logged in user, or per guest session and IP address. Shoppers who reach the limit see a message and can continue an hour later.
- Allowed image types: JPEG, PNG, WebP, SVG, GIF, AVIF, TIFF and HEIC. Types are checked by file content, never by name, so a renamed file is rejected. SVG files are rebuilt from a strict allow list, so scripts and external links never survive. Formats your server cannot read are converted to PNG in the shopper's browser before upload.
- Remove photo metadata: strips EXIF, GPS location, XMP and IPTC data from uploads. It protects shoppers and never changes the image itself.
- Keep colour profiles: keeps the embedded ICC colour profile when metadata is removed. Keep it on unless your print shop asks otherwise.
- Abandoned drafts: drafts that were never saved by name, added to the cart or ordered are removed with their uploads after this many days. Ordered designs are never removed.
- Audit log: how many days to keep the record of who changed settings, templates and production statuses.
Designs are included in WordPress personal data export and erasure (Tools > Export Personal Data and Tools > Erase Personal Data).
#Settings: Fonts
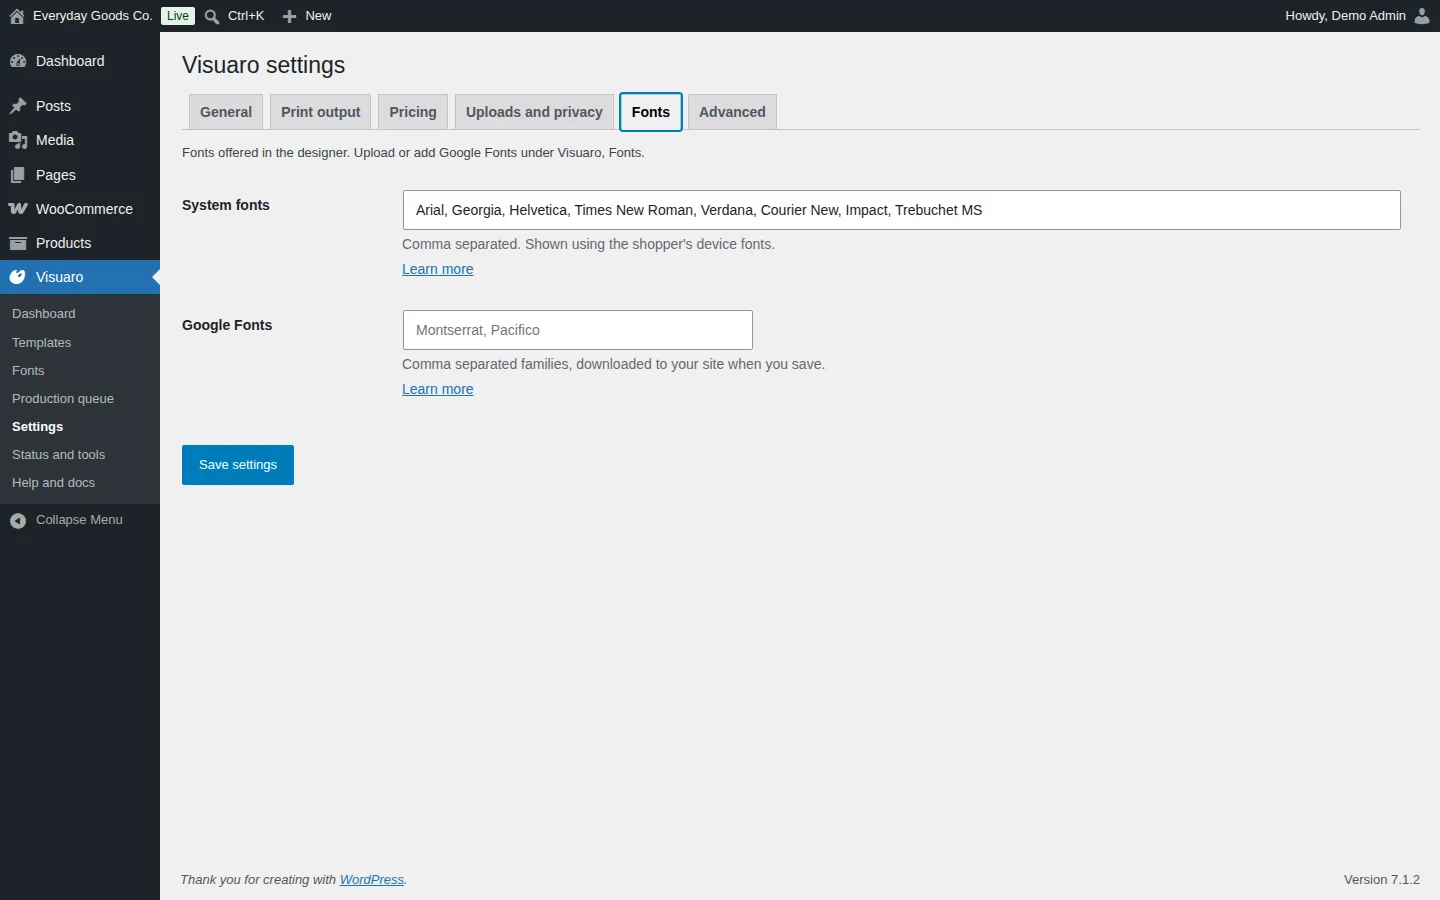
The Fonts tab lists the fonts offered in the designer.
- System fonts: a comma separated list of fonts shown using the shopper's own device fonts. They cost nothing to load but can look slightly different on each device. Print files use a fallback unless you upload the same font as a TrueType file under Visuaro > Fonts.
- Google Fonts: comma separated families, for example
Montserrat, Pacifico. They are downloaded to your site when you click Save settings and then served from your site, so print files embed the exact typeface.
To choose weights or upload your own font files, use Visuaro > Fonts.
#Settings: Advanced
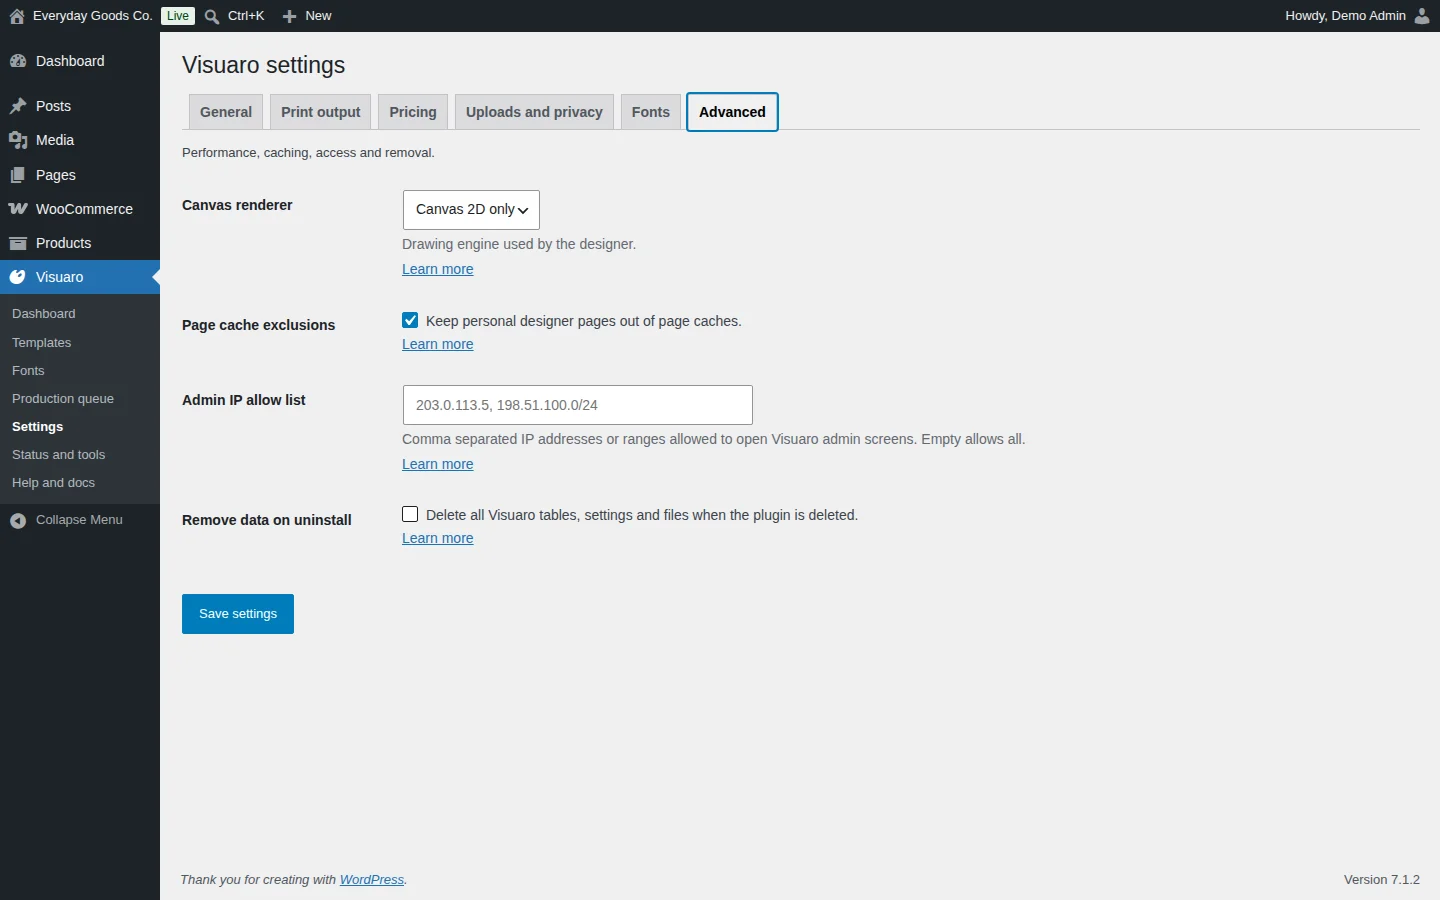
The Advanced tab covers performance, caching, access and removal.
- Canvas renderer: the drawing engine of the designer. Automatic picks WebGPU or WebGL2 where the browser supports them and falls back to Canvas 2D. Choose Canvas 2D only if a shopper's graphics driver shows glitches. Print files are never affected.
- Page cache exclusions: registers exclusions with WP Rocket, LiteSpeed Cache, W3 Total Cache and WP Super Cache, and sends "do not cache" signals to other caches, so one shopper never sees another shopper's design.
- Admin IP allow list: an extra lock for stores with a fixed office address. Enter single addresses (
203.0.113.5) or CIDR ranges (198.51.100.0/24), separated by commas. Leave it empty to allow all. Make sure your own address is in the list before saving. - Remove data on uninstall: when ticked, deleting the plugin from the Plugins screen permanently removes all Visuaro tables, settings, designs, templates, uploads and print files. It is off by default so a reinstall keeps everything. Data is always kept while the other Visuaro edition is still installed.
#Status and tools
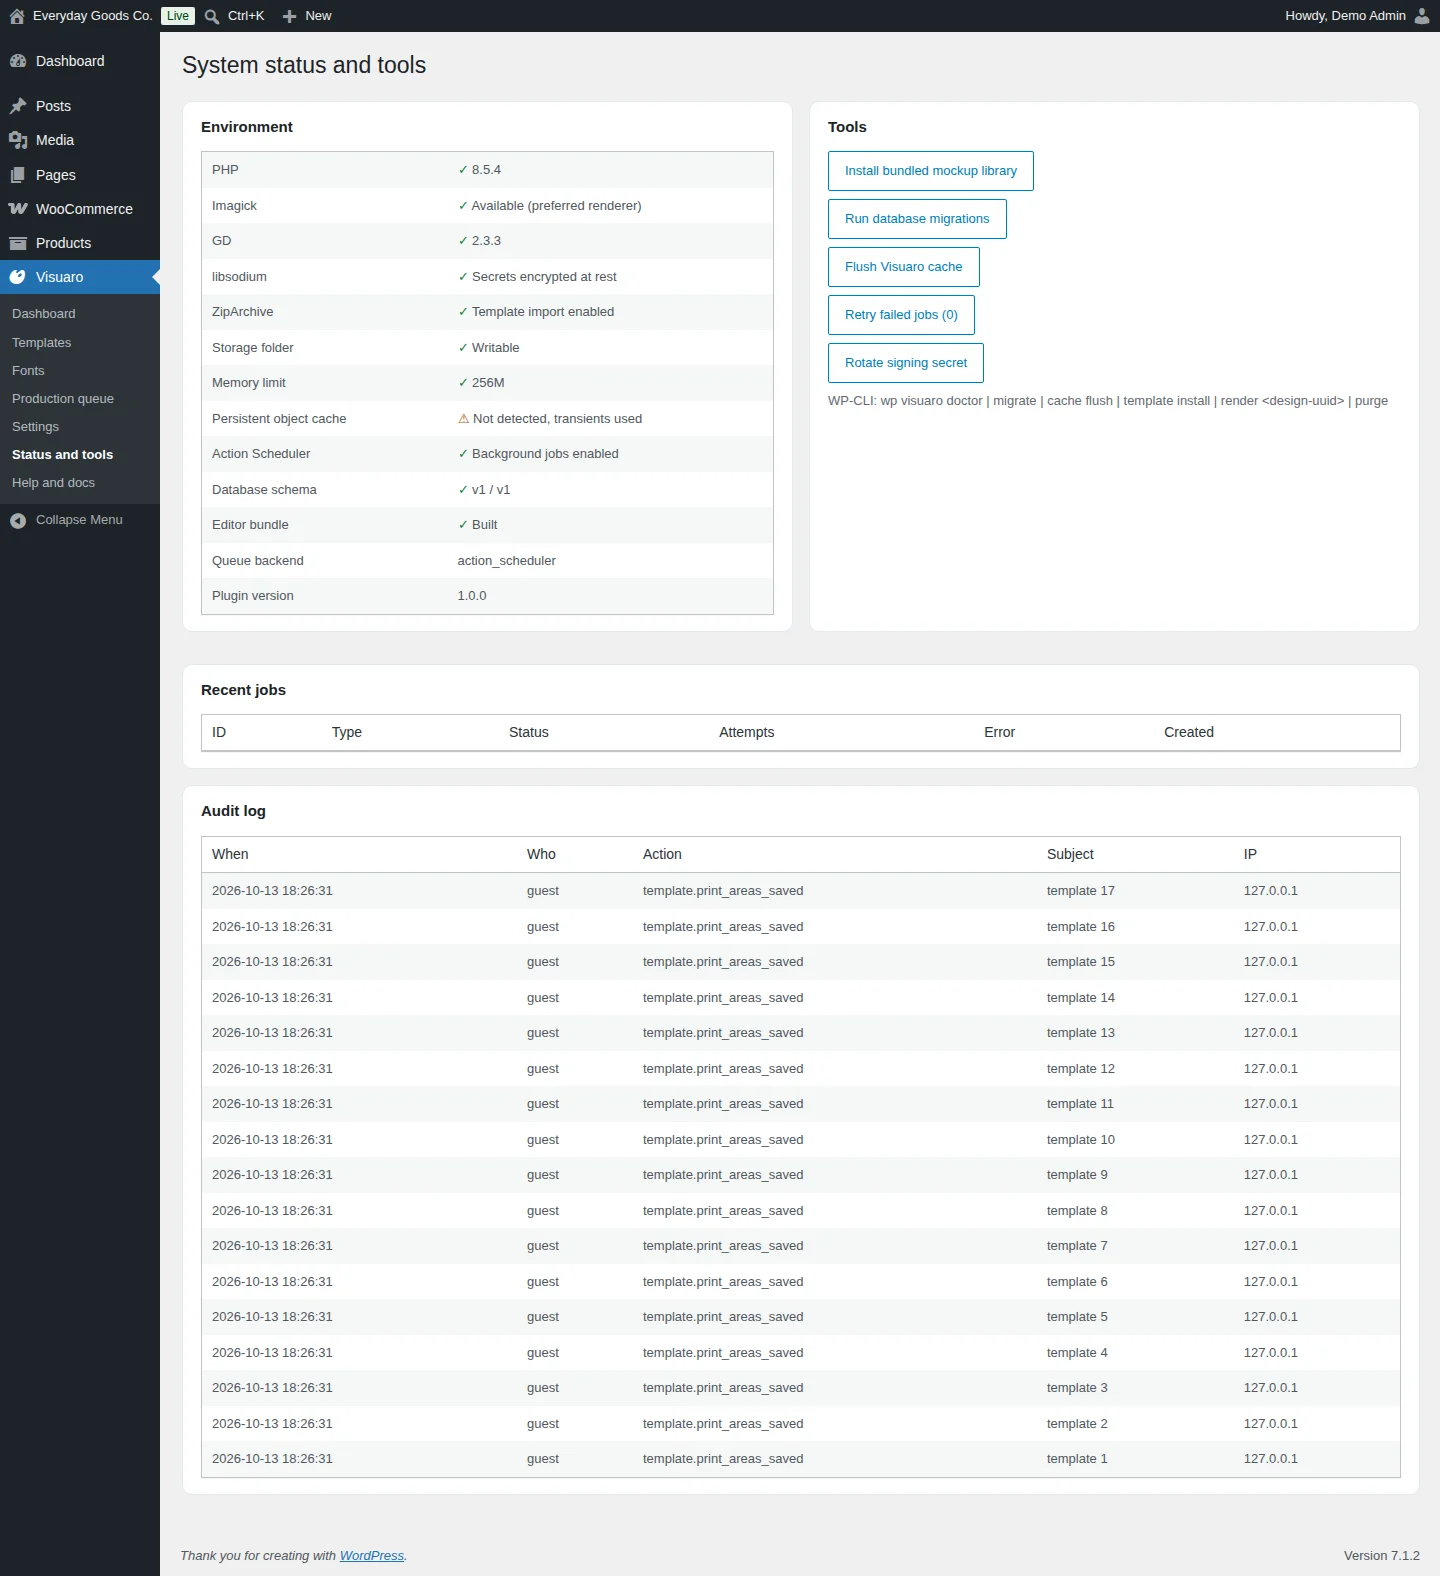
Visuaro > Status and tools shows whether your server has everything Visuaro needs and offers maintenance tools.
Environment checks PHP, Imagick, GD, libsodium, ZipArchive, the storage folder, the memory limit, a persistent object cache, Action Scheduler, the database schema and the editor bundle, and shows the queue backend and plugin version. A green tick means the item is fine. A warning tells you what is missing and what falls back, for example:
- Imagick missing: GD is used instead.
- ZipArchive missing: template ZIP import is disabled.
- No persistent object cache: transients are used.
- Action Scheduler missing: jobs run synchronously.
- Storage folder not writable: uploads, previews and print files cannot be saved.
Tools:
- Install bundled mockup library: adds the bundled templates.
- Run database migrations: updates the Visuaro database tables.
- Flush Visuaro cache: clears the plugin's cached data.
- Retry failed jobs: runs failed background jobs again. The number shows how many failed.
- Rotate signing secret: changes the secret used to sign private download links.
The screen also lists the WP-CLI commands under wp visuaro: doctor, migrate, cache flush, template install, render and purge.
Recent jobs lists background jobs with their Status, Attempts and Error. Audit log shows who changed settings, templates and production statuses, with the action, subject and IP address.
#Help and docs
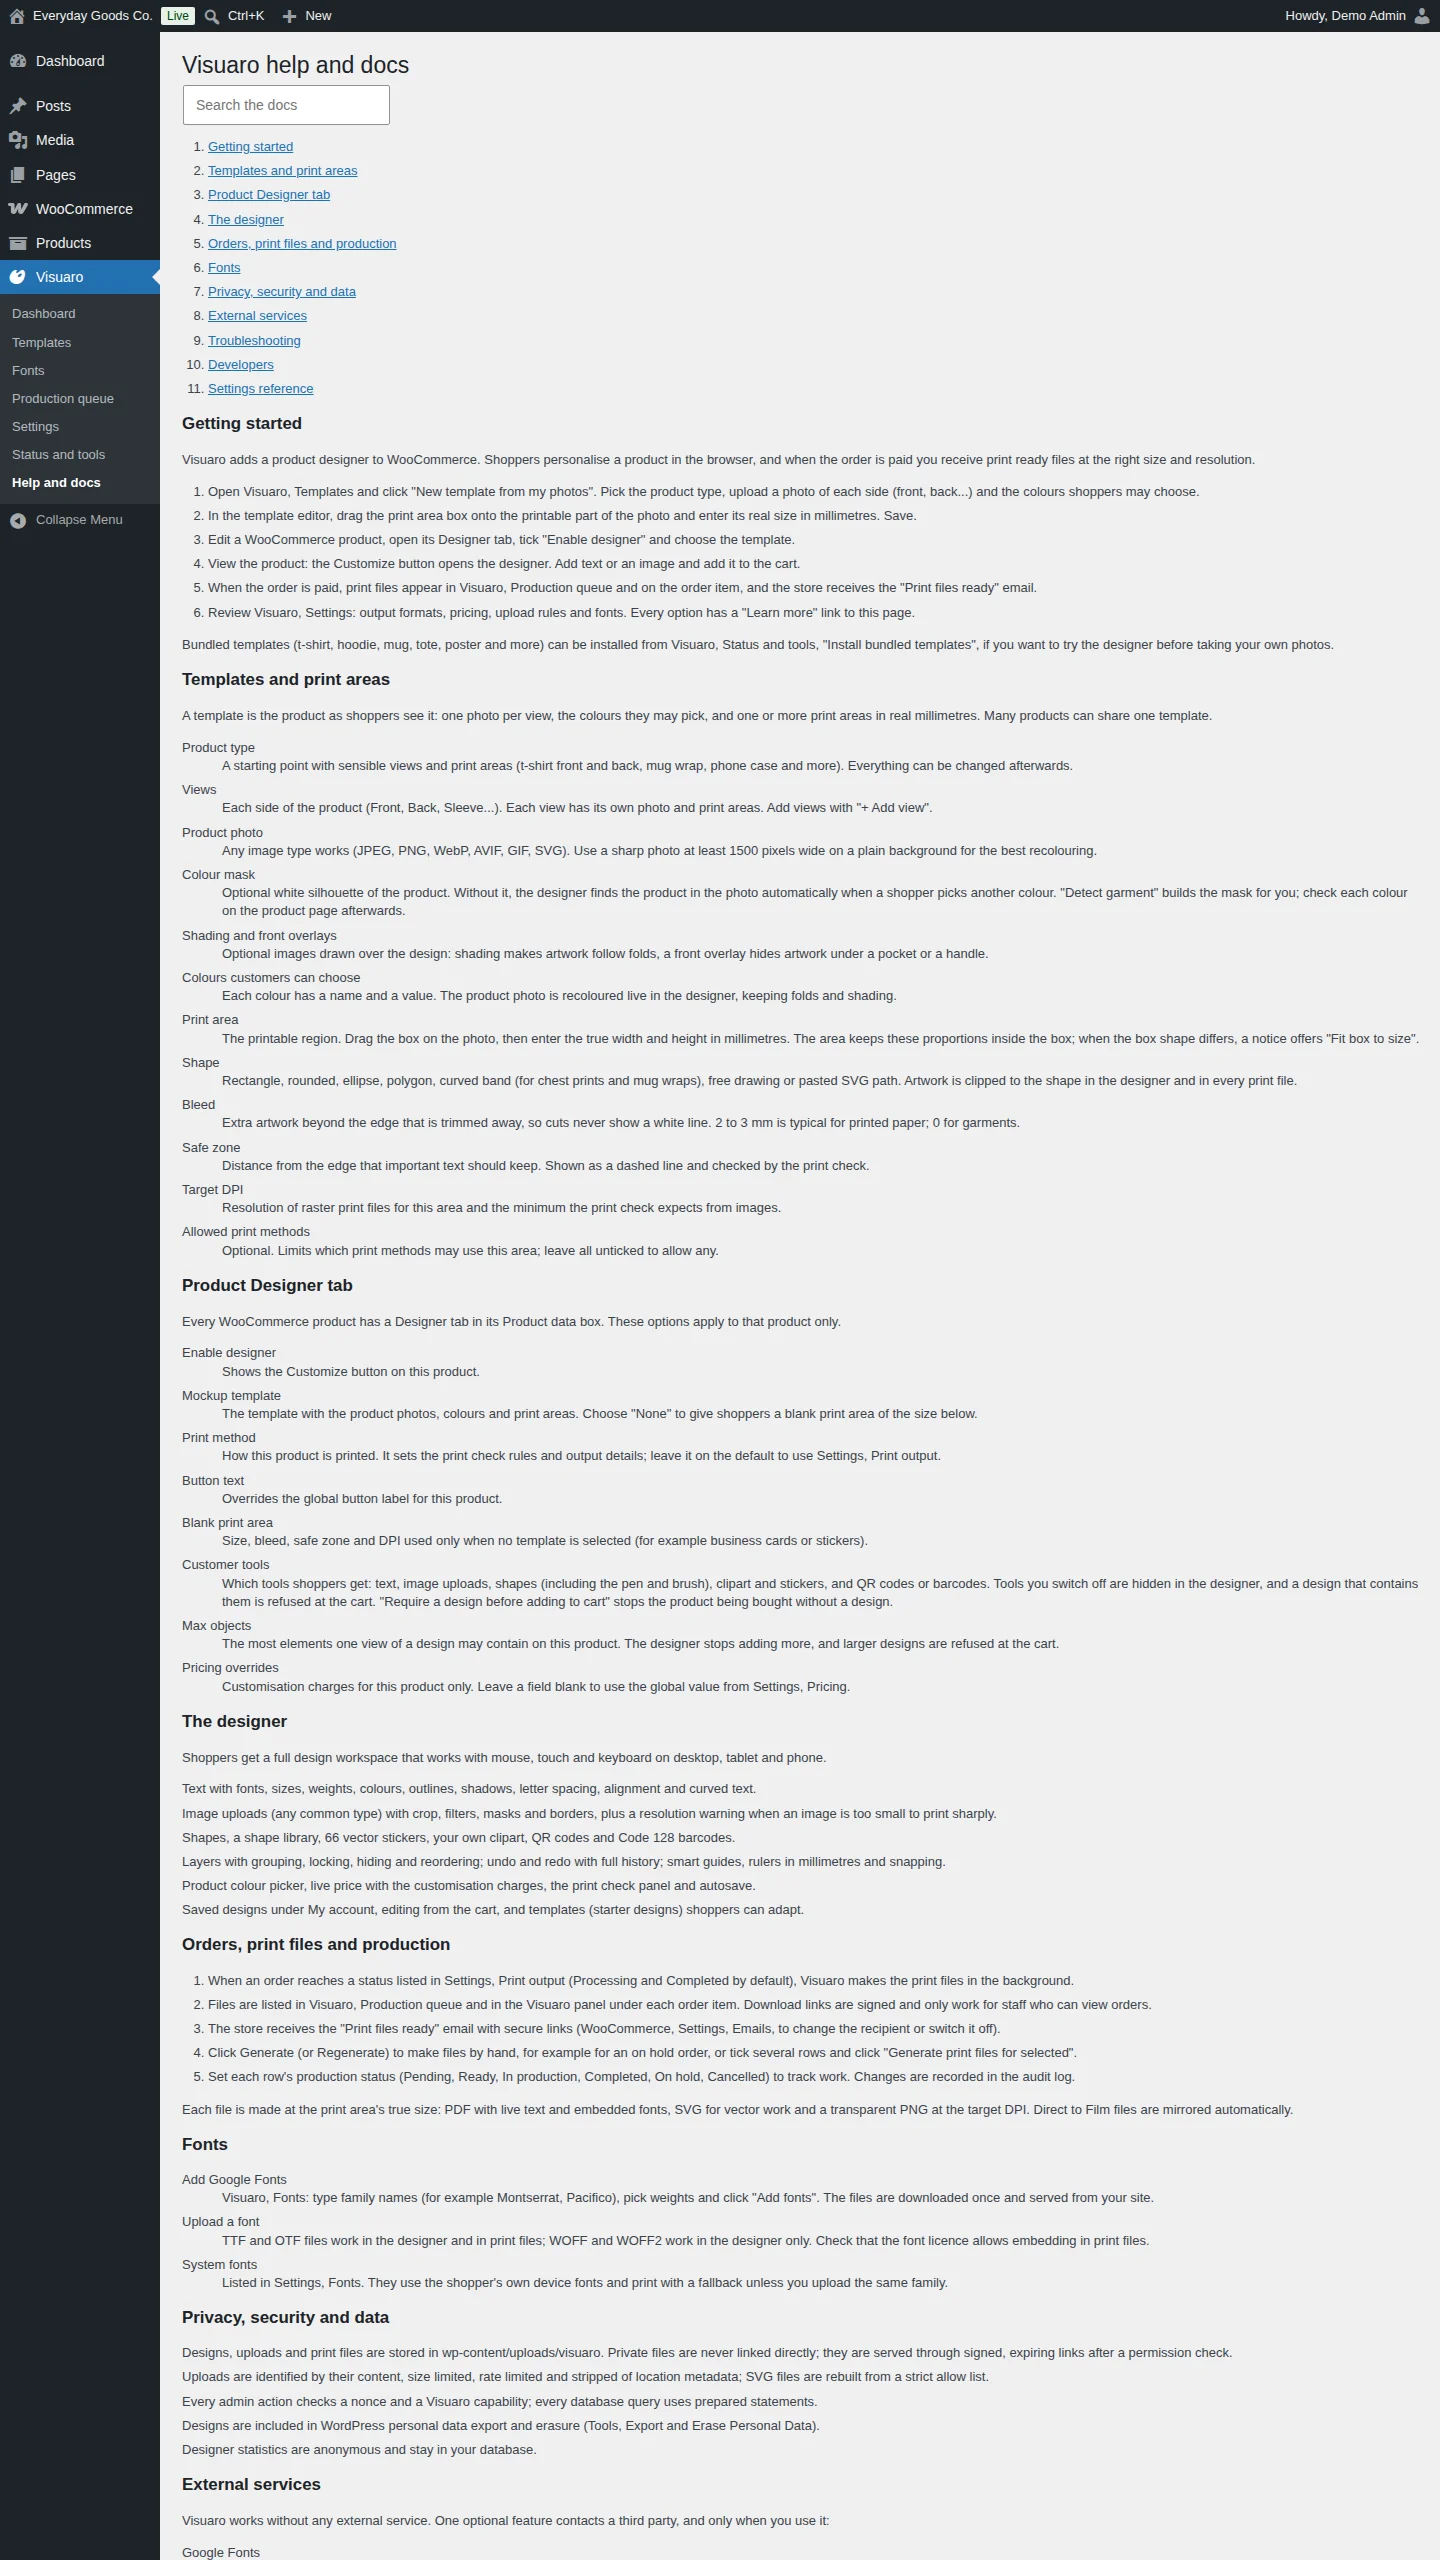
Visuaro > Help and docs is the built in manual. Use Search the documentation to filter it. It covers getting started, templates and print areas, the product Designer tab, the designer, orders and production, fonts, privacy and security, external services, troubleshooting, developer hooks and a full settings reference. Every Learn more link on the settings screen opens the matching entry here.
#Embed the designer on any page
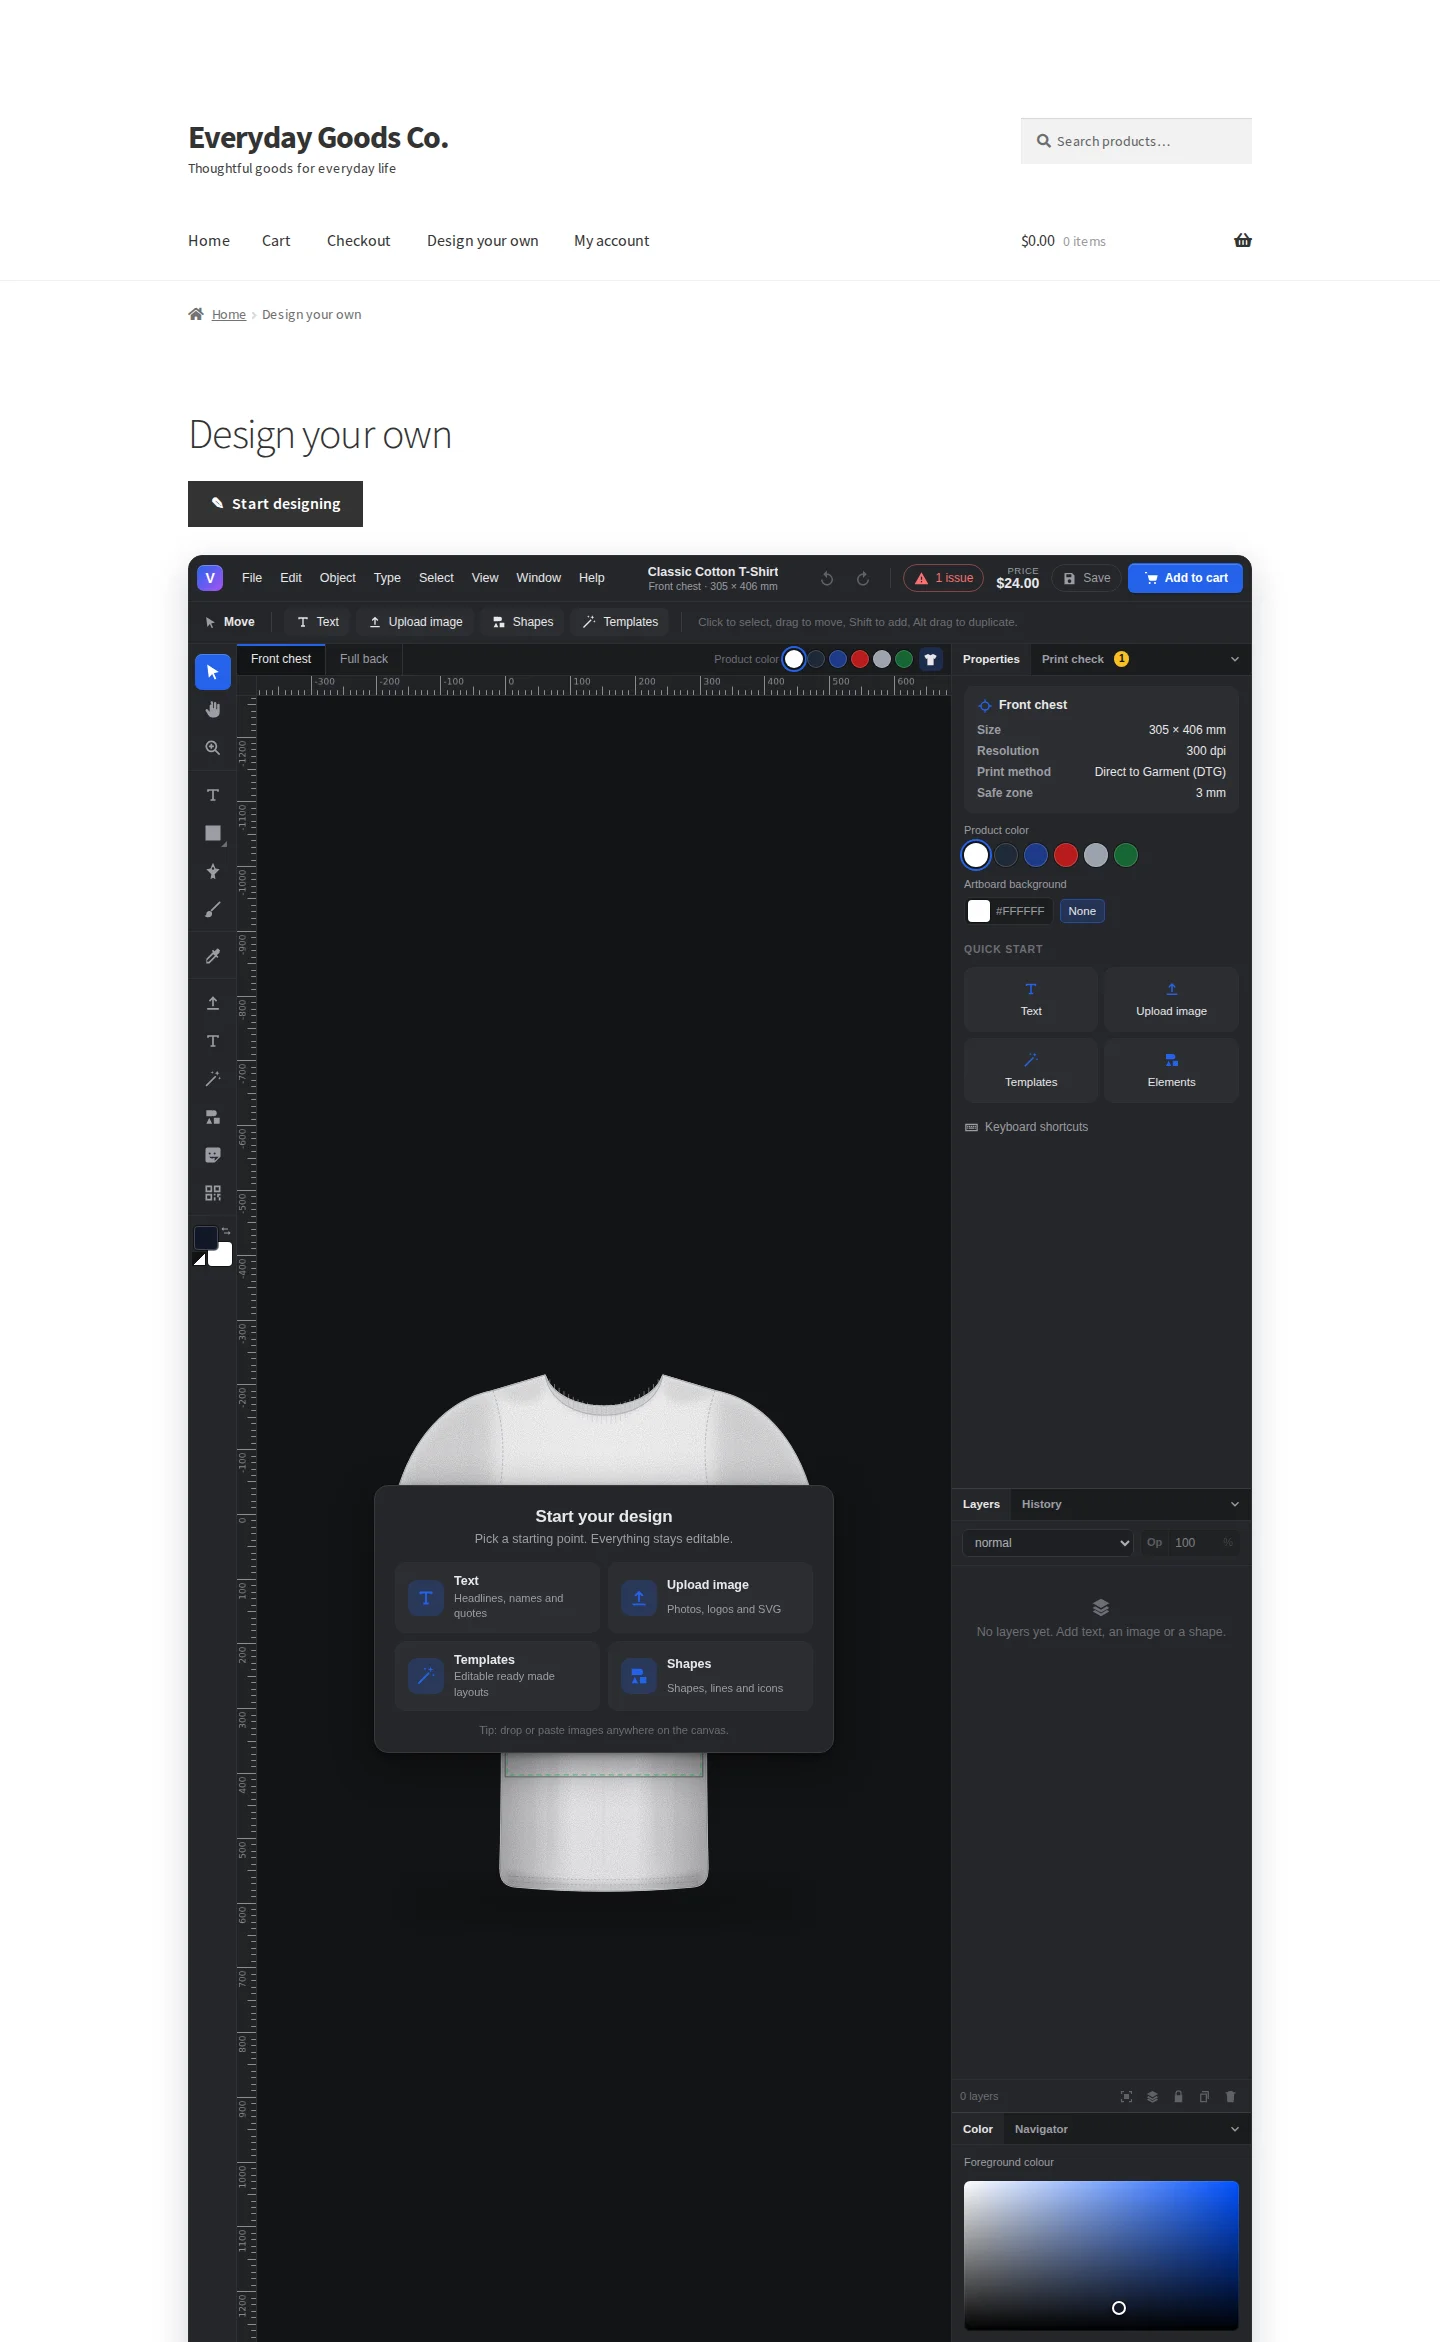
Besides the button on product pages, you can place the designer for a customizable product on any page or post, for example a "Design your own" page.
- Shortcodes:
[visuaro product="123"]or[visuaro_button product="123" label="Design it"]. Both show the designer button for that product.[visuaro_button]is meant for page builders such as Divi and Oxygen and any shortcode module. - Block editor: add the Visuaro Product Designer block and set the product ID and the button label.
- Elementor and Bricks: add the Visuaro Product Designer widget or element and fill in Product ID and Button label.
The product must have Enable designer ticked in its Designer tab. Otherwise nothing is shown. When you leave the label empty, the Button text from Settings > General is used.
Settings reference
Visuaro > Settings > General
| Setting | Type | Default | What it does |
|---|---|---|---|
| Button text | text | Customize |
Label of the button that opens the designer on a product page. A product can override it in its Designer tab. |
| Button position | select | Before add to cart |
Where the button sits on the product page: Before add to cart or After add to cart. |
| Editor mode | select | Modal overlay |
How the designer opens: Modal overlay, Full page (strict CSP) or Inline on the product page. |
| Editor theme | select | Dark |
Colour scheme of the designer: Dark, Light or Follow device. |
| Accent colour | color | #2563eb |
Buttons, selection handles and highlights in the designer. |
| Guest designs | checkbox | on |
Let shoppers who are not logged in design and order. Their designs move to the account when they log in or register. |
| Autosave | number | 10 |
Seconds of inactivity before the design is saved as a draft (0 turns autosave off). Maximum 600. |
| Versions per design | number | 25 |
How many saved versions of each design are kept (3 to 500). Versions that belong to an order are never deleted. |
| Branding | checkbox | off |
Show a small "Powered by Visuaro" note in the designer footer. |
| Designer statistics | checkbox | on |
Count designer opens, saves and add to cart events on this site, for the Dashboard. |
Visuaro > Settings > Print output
| Setting | Type | Default | What it does |
|---|---|---|---|
| Default DPI | number | 300 |
Resolution of new print areas and the target of the print check (36 to 2400). |
| Default print method | select | Direct to Garment (DTG) |
Used by products that do not choose a method in their Designer tab. Sets the print check rules and whether files are mirrored. |
| PDF: vector, live text, embedded fonts | checkbox | on |
Print file formats: make a vector PDF with live text and embedded fonts for every printed view. |
| SVG: vector, for cutters and lasers | checkbox | on |
Print file formats: make an SVG vector file for every printed view. |
| PNG: transparent raster at the print resolution | checkbox | on |
Print file formats: make a transparent PNG at the print area's DPI for every printed view. |
| Pending payment | checkbox | off |
Generate when the order becomes: start print file generation when an order reaches Pending payment. |
| Processing | checkbox | on |
Generate when the order becomes: start print file generation when an order is paid and becomes Processing. |
| On hold | checkbox | off |
Generate when the order becomes: start print file generation for On hold orders, such as unpaid bank transfers. |
| Completed | checkbox | on |
Generate when the order becomes: start print file generation when an order becomes Completed. |
| Cancelled | checkbox | off |
Generate when the order becomes: start print file generation for Cancelled orders. |
| Refunded | checkbox | off |
Generate when the order becomes: start print file generation for Refunded orders. |
| Failed | checkbox | off |
Generate when the order becomes: start print file generation for Failed orders. |
| Draft | checkbox | off |
Generate when the order becomes: start print file generation for Draft orders. |
| Print check | checkbox | on |
Block add to cart while a design has blocking print problems. |
| Attach files to the "Print files ready" email | checkbox | off |
Attach the files as well as the secure download links. Large files may exceed your mail server's attachment limit. |
Visuaro > Settings > Pricing
| Setting | Type | Default | What it does |
|---|---|---|---|
| Customisation fee | number | 0 |
Added once per unit to every customised product, in your store currency. |
| Per print area | number | 0 |
For each print area that has artwork, for example front and back. |
| Per print area: free allowance | number | 1 |
How many print areas are included before the charge applies (0 to 100). |
| Per text | number | 0 |
For each text element in the design. |
| Per text: free allowance | number | 0 |
How many text elements are included before the charge applies (0 to 100). |
| Per image | number | 0 |
For each image, sticker or clipart element. |
| Per image: free allowance | number | 0 |
How many images are included before the charge applies (0 to 100). |
| Per uploaded file | number | 0 |
For each image the shopper uploaded. Stickers and clipart are not counted. |
| Per uploaded file: free allowance | number | 0 |
How many uploads are included before the charge applies (0 to 100). |
| Per square centimetre | number | 0 |
By the area the artwork covers, measured from the bounding box of all artwork in each print area. |
Visuaro > Settings > Uploads and privacy
| Setting | Type | Default | What it does |
|---|---|---|---|
| Maximum upload size | number | 20 |
Largest image a shopper may upload, in MB (1 to 512). The server limit also applies. |
| Uploads per hour | number | 60 |
Per visitor, to stop abuse. Counted per logged in user, or per guest session and IP address. |
| JPEG | checkbox | on |
Allowed image types: accept JPEG uploads. Types are checked by file content, never by name. |
| PNG | checkbox | on |
Allowed image types: accept PNG uploads. |
| WebP | checkbox | on |
Allowed image types: accept WebP uploads. |
| SVG | checkbox | on |
Allowed image types: accept SVG uploads. SVG files are rebuilt from a strict allow list. |
| GIF | checkbox | on |
Allowed image types: accept GIF uploads. |
| AVIF | checkbox | off |
Allowed image types: accept AVIF uploads. |
| TIFF | checkbox | off |
Allowed image types: accept TIFF uploads. |
| HEIC | checkbox | off |
Allowed image types: accept HEIC uploads. |
| Remove photo metadata | checkbox | on |
Strip EXIF, GPS location, XMP and IPTC data from uploads. |
| Keep colour profiles | checkbox | on |
Keep the embedded ICC colour profile when metadata is removed. |
| Abandoned drafts | number | 30 |
Days after which unsaved drafts are cleaned up. Ordered designs are never removed. |
| Audit log | number | 180 |
Days to keep the audit log of admin changes (7 to 3650). |
Visuaro > Settings > Fonts
| Setting | Type | Default | What it does |
|---|---|---|---|
| System fonts | text | Arial, Georgia, Helvetica, Times New Roman, Verdana, Courier New, Impact, Trebuchet MS |
Comma separated. Shown using the shopper's device fonts. Print files use a fallback unless you upload the same font. |
| Google Fonts | text | - | Comma separated families, downloaded to your site when you save, for example Montserrat, Pacifico. |
Visuaro > Settings > Advanced
| Setting | Type | Default | What it does |
|---|---|---|---|
| Canvas renderer | select | Automatic |
Drawing engine used by the designer: Automatic, WebGPU, WebGL2 or Canvas 2D only. Print files are never affected. |
| Page cache exclusions | checkbox | on |
Keep personal designer pages out of page caches. |
| Admin IP allow list | text | - | Comma separated IP addresses or ranges allowed to open Visuaro admin screens. Empty allows all. |
| Remove data on uninstall | checkbox | off |
Delete all Visuaro tables, settings and files when the plugin is deleted. |
WooCommerce > Settings > Emails > Visuaro: print files ready
| Setting | Type | Default | What it does |
|---|---|---|---|
| Recipient(s) | text | - | Comma separated addresses. Defaults to the site admin email address. |
| Enable/Disable | checkbox | on |
Enable this email notification. |
| Subject | text | [{site_title}] Print files ready for order #{order_number} |
Subject line. Leave empty to use the default. |
| Email heading | text | Print files ready |
Heading at the top of the email. Leave empty to use the default. |
| Additional content | textarea | - | Text shown below the main email content. |
| Email type | select | HTML |
Format of the email: Plain text, HTML or Multipart. |
| Cc(s) | text | - | Extra addresses that receive a copy. |
| Bcc(s) | text | - | Extra addresses that receive a blind copy. |
Shortcodes
[visuaro]
Shows the designer button for a customizable product on any page or post. The product must have Enable designer ticked in its Designer tab, otherwise nothing is shown.
[visuaro product="123" label="Start designing"]| Attribute | Default | Description |
|---|---|---|
product | 0 | ID of the WooCommerce product to design. |
label | Text of the button. When empty, the Button text from Settings > General is used. |
[visuaro_button]
The same designer button, meant for page builders such as Divi and Oxygen and any shortcode module.
[visuaro_button product="123" label="Design it"]| Attribute | Default | Description |
|---|---|---|
product | 0 | ID of the WooCommerce product to design. |
label | Text of the button. When empty, the Button text from Settings > General is used. |
On your site
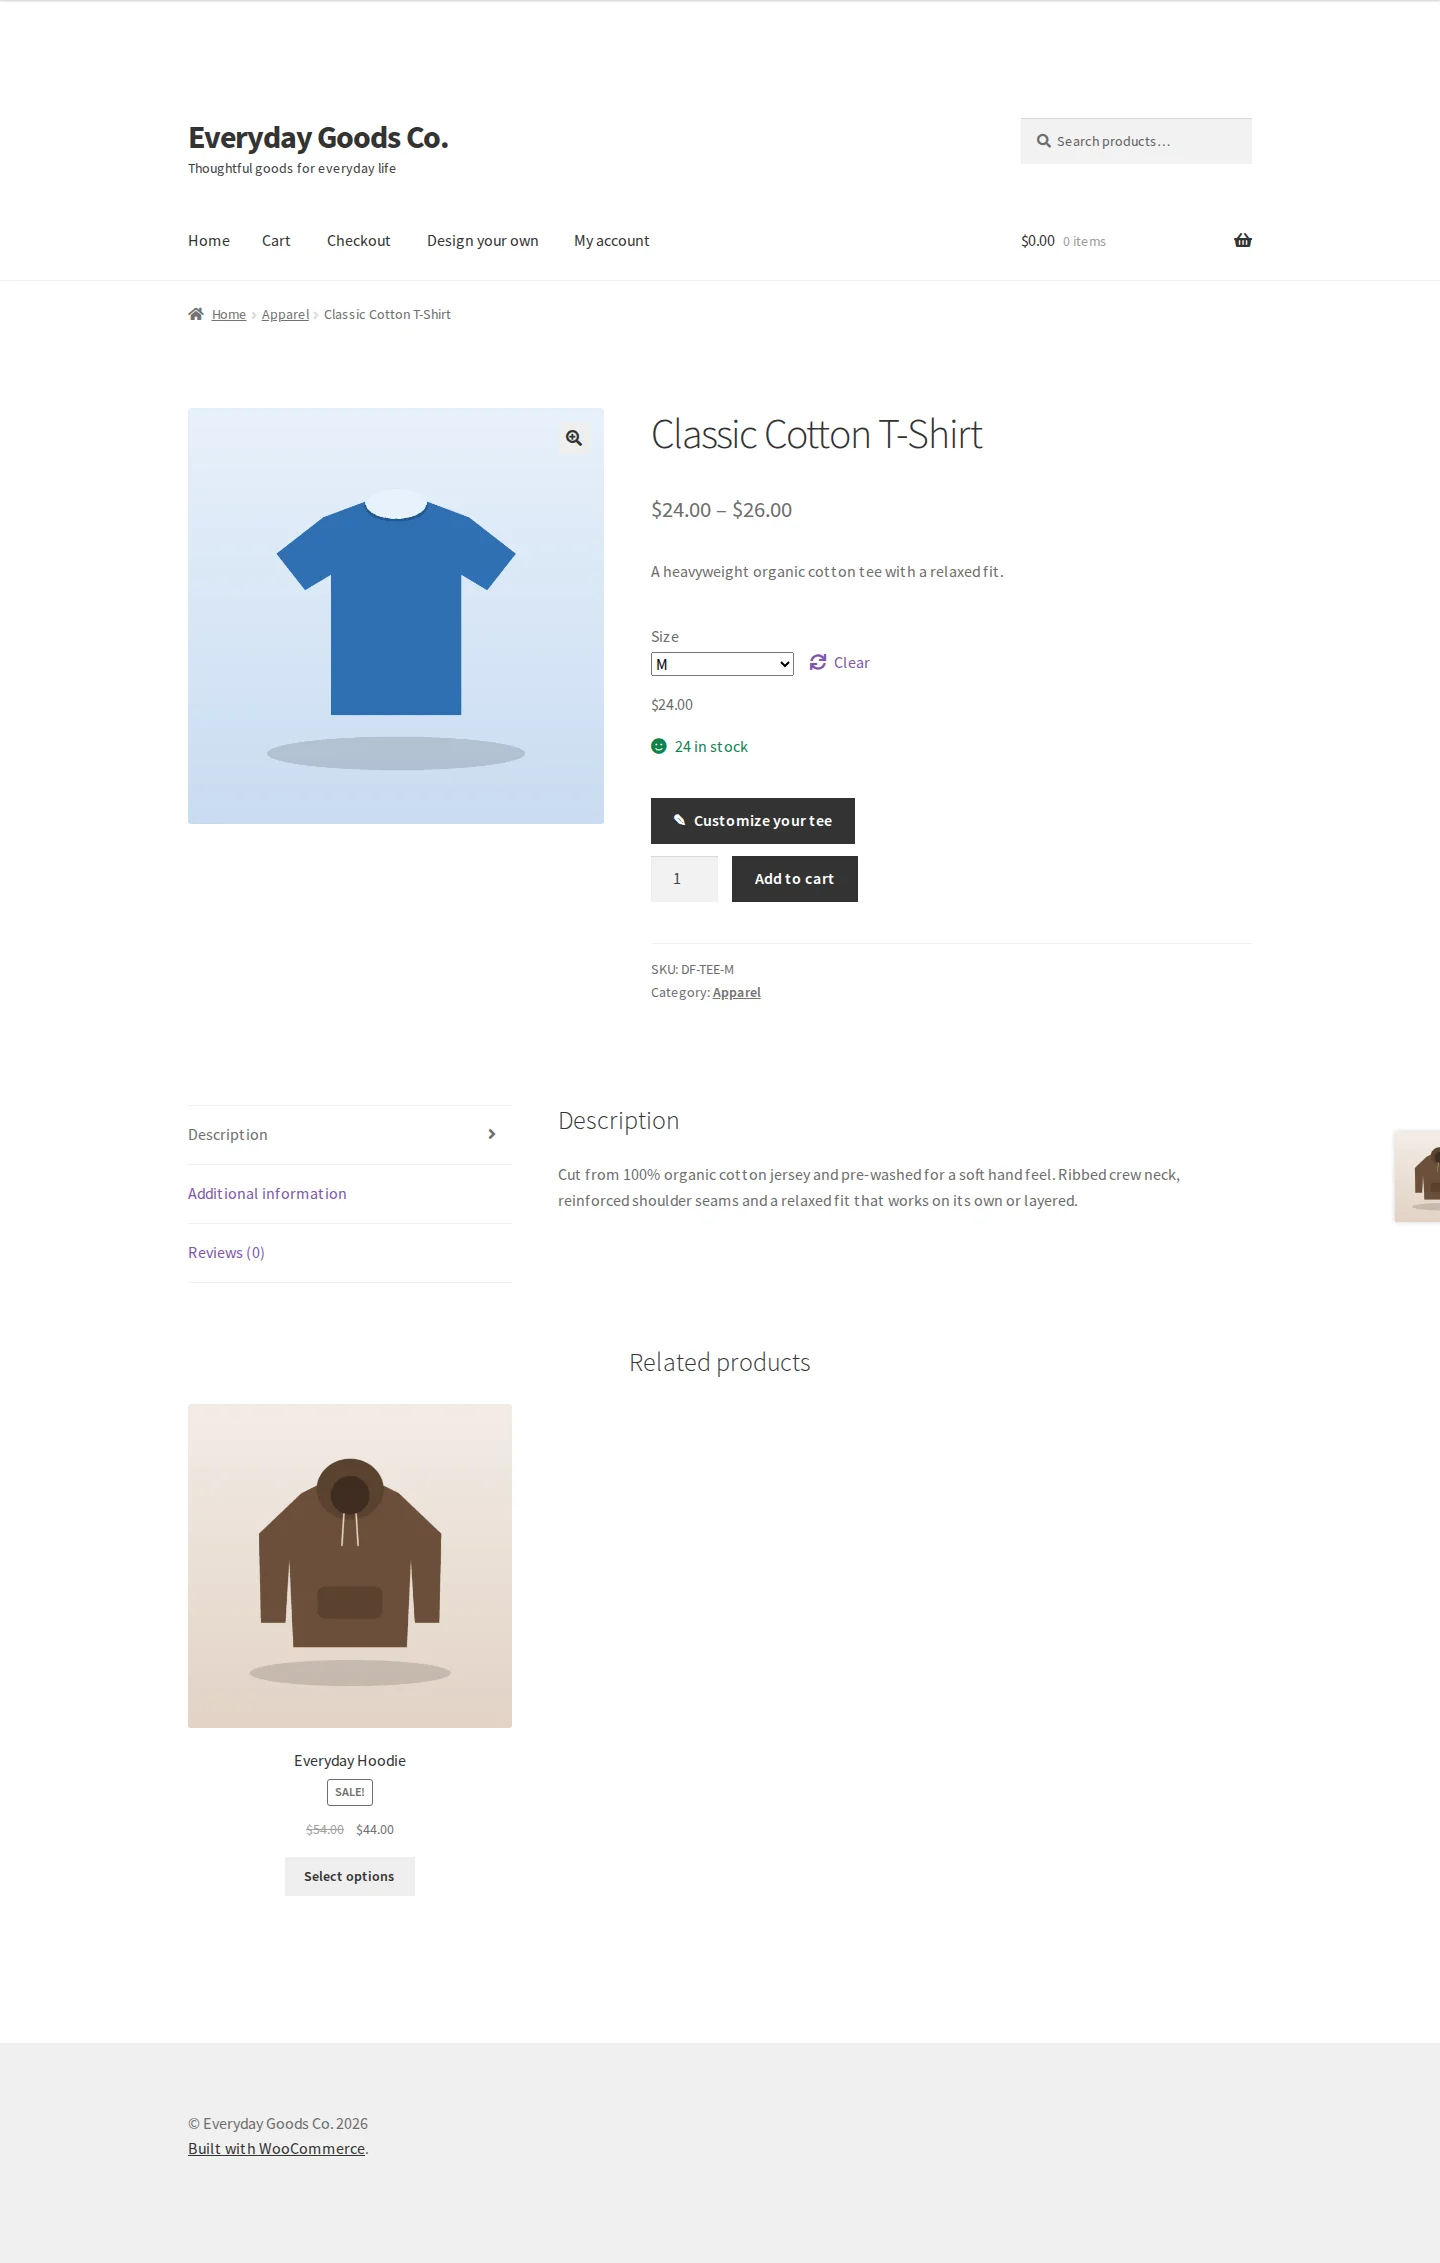
On a product with the designer enabled, shoppers see the designer button next to Add to cart, before or after it depending on Button position. The label comes from Settings > General or from the product's own Button text. On a page with the [visuaro] shortcode, the block or a page builder widget, the button shows wherever you placed it.
The button opens Visuaro Studio, a full design workspace that works with mouse, touch and keyboard on desktop, tablet and phone:
- A menu bar (File, Edit, Object, Type, Select, View, Window, Help), Undo and Redo, the print check indicator, the live Price, Save and Add to cart.
- A Start your design card with Text, Upload image, Templates (editable ready made layouts) and Shapes.
- A toolbar with move, hand, zoom, type, shape, pen, brush and eyedropper tools, plus uploads, text styles, elements, stickers and QR codes.
- Tabs for each print area view (for example front and back) and the product colour picker.
- A Properties panel showing the print area size, resolution, print method and safe zone, and a Print check panel that explains problems in plain language and fixes most of them in one click.
- Layers and History panels, and Color and Navigator panels.
Text supports fonts, sizes, weights, colours, outlines, shadows, letter spacing, alignment and curved text. Uploaded images can be cropped, masked, bordered and adjusted, with a warning when an image is too small to print sharply. Shapes, a shape library, 66 vector stickers, your own clipart, QR codes and Code 128 barcodes are available, along with layers, smart guides, millimetre rulers and snapping.
After Add to cart, the cart shows a thumbnail of the design, a Design line with any customisation charges and an Edit design link. Logged in customers find their designs under My account > Saved designs, where Open reopens a design on its product.
Frequently asked questions
Does it work with variable products?
Yes. The Customize button appears on simple and variable products. The chosen variation is passed to the designer and stored with the design.
Which print file formats are produced?
PDF (vector, live text, embedded fonts, TrimBox and BleedBox), SVG (vector, for cutters and lasers) and PNG (transparent raster at the print area's target DPI). Choose them under Visuaro > Settings > Print output.
When are print files created?
Automatically when an order reaches one of the statuses ticked under Settings > Print output (Processing and Completed by default). You can also generate them for one or many orders from Visuaro > Production queue.
Do I need Imagick on my server?
No. GD is enough. Imagick is used automatically when present, for sharper previews of SVG uploads.
Do product photos have to be transparent PNGs?
No. A plain JPEG works. Product colours recolour the photo itself while keeping its shading, so one photo serves every colour.
Can guests design without an account?
Yes, when Guest designs is ticked under Settings > General. Guests are identified by a signed cookie. When they log in or register, their designs and uploads move to the account.
Can I charge extra for personalisation?
Yes. Under Settings > Pricing you can set a customisation fee and charges per print area, text, image, uploaded file or square centimetre, each with a free allowance. A product can override these values in its Designer tab. Shoppers see the live price in the designer.
Does Visuaro send data to third parties?
No, unless you add Google Fonts. In that case your server downloads the font files once from fonts.googleapis.com and fonts.gstatic.com, sending only the family names you entered. Visitors then load the fonts from your site. See the Google APIs Terms of Service and the Google Privacy Policy.
Does it work with page caching?
Yes. With Page cache exclusions ticked, pages that show a personal design are excluded from WP Rocket, LiteSpeed Cache, W3 Total Cache and WP Super Cache automatically, and other caches receive "do not cache" headers.
Which translation and page builder plugins does it work with?
Visuaro works with WPML, Polylang and TranslatePress, and with Elementor and Bricks, which get a Visuaro Product Designer widget. It also supports HPOS and the Cart and Checkout blocks.
Where do customers find their designs?
Under My account > Saved designs. Each saved design has an Open button that reopens it on its product. Designs in the cart can be changed with the Edit design link.
Is the free plugin limited?
No. The free plugin is complete on its own. Nothing in it is limited, locked or time restricted, and you never need Pro for any of its features to work.
Troubleshooting
- The Customize button does not appear on a product
Edit the product, open the Designer tab, tick Enable designer and choose a template under Mockup template. Then check Visuaro > Status and tools: every Environment item, including Editor bundle, should show a green tick. For shortcodes and blocks, check that the product ID is correct and the product has the designer enabled.
- "Please customize this product before adding it to the cart."
The product has Require a design before adding to cart ticked in its Designer tab, and the shopper tried to buy it without a design. The shopper should click the designer button, create a design and add it to the cart from the designer. Untick the option if the product can also be sold plain.
- "The design has problems that must be fixed before ordering. Open the designer to review them."
The print check found blocking problems, for example an image too low in resolution, artwork outside the printable area, a missing image or text too small to print. The shopper can open the Print check panel in the designer, where most problems can be fixed in one click. To let shoppers order anyway, untick Print check under Settings > Print output.
- "This file type is not allowed by the store."
The uploaded image type is not ticked under Settings > Uploads and privacy > Allowed image types. Tick the type and save. Types are read from the file content, so a renamed file is refused on purpose. Also check Maximum upload size, since your server's own limit applies as well.
- "Please log in to save your design."
Guest designs is unticked under Settings > General, so only logged in shoppers can save. Tick Guest designs and save if guests should be able to design and order.
- "Print file generation ran out of server memory. Raise WP_MAX_MEMORY_LIMIT or lower the print area DPI, then click Generate again."
Very large print areas at high DPI need a lot of server memory. Ask your host to raise the WordPress admin memory limit (512M is comfortable), or lower the Target DPI of the print area in the template editor. Then click Generate on the row in Visuaro > Production queue.
- "The file could not be saved. Check that the uploads folder (wp-content/uploads/visuaro) is writable by the web server."
Visuaro stores designs, uploads and print files in that folder. Status and tools shows the Storage folder check. Ask your host to fix the folder permissions so the web server can write to it, then generate the files again.
- No print files on an order
Files are made only when the order reaches a status ticked under Settings > Print output > Generate when the order becomes. For other orders, such as on hold bank transfers, click Generate in Visuaro > Production queue. If jobs failed, use Retry failed jobs under Visuaro > Status and tools and check the Error column in Recent jobs.
- Text prints in a different font
The font has no TrueType file on the server, so the print file uses a fallback. Add it under Visuaro > Fonts, either as a Google Font or by uploading a TTF or OTF file with the same family name. If Visuaro says "Google Fonts has no family called "...", or it could not be reached.", check the spelling of the family name and that your server can reach Google Fonts.
- "Visuaro admin is restricted to allowlisted IP addresses."
Admin IP allow list under Settings > Advanced does not include your current IP address. Open the Visuaro screens from an address in the list and add your address, or empty the field to allow all addresses. A cached page that shows an old design is a different issue: tick Page cache exclusions on the same tab.
Free vs Pro
Visuaro Free vs Pro
The free plugin already includes the full product designer, mockup templates, customisation charges, PDF, SVG and PNG print files and a production queue. Pro adds AI tools, co-editing, conditional pricing rules, CMYK output, gang sheets, embroidery and cutter files, print vendor dispatch and cloud storage.
22 of 30 features in Free8 more with Pro
| Feature | Free | Pro |
|---|---|---|
| Product designer | ||
| Browser designer with text, uploads, shapes and stickers | Included | Included |
| QR codes and Code 128 barcodes | Included | Included |
| Live mockup recoloured in the chosen product colour | Included | Included |
| Print check that explains and fixes print problems | Included | Included |
| Guest designs and saved designs in My account | Included | Included |
| Setup and admin | ||
| Bundled mockup library and templates from your photos | Included | Included |
| Print areas in millimetres with bleed and safe zone | Included | Included |
| Per product tool choices and object limit | Included | Included |
| Designer embed by shortcode, block, Elementor or Bricks | Included | Included |
| Dashboard with designer opens, saves and add to cart | Included | Included |
| Upload limits, file type checks and metadata removal | Included | Included |
| Pricing | ||
| Customisation fee and per item charges with free allowances | Included | Included |
| Per product pricing overrides | Included | Included |
| Conditional pricing rules by text, colours, area or quantity Fixed charges per print area, text, image, upload or square cm with free allowances, no conditional rules | Limited | Included |
| Print files and production | ||
| PDF, SVG and PNG print files at real size | Included | Included |
| 12 print methods with their own print check rules | Included | Included |
| Production queue with status tracking and bulk generation | Included | Included |
| Print files ready email with secure download links | Included | Included |
| Google Fonts and uploaded fonts embedded in PDFs | Included | Included |
| Print ready CMYK PDF/X-4 with ICC colour profiles Vector PDF with live text and embedded fonts, no CMYK output, ICC output profiles or PDF/X-4 | Limited | Included |
| DTF gang sheets, embroidery and cutter files SVG for cutters and lasers and mirrored DTF PNGs only, no gang sheets, DXF or embroidery files | Limited | Included |
| White underbase and screen print plates per ink | Not included | Included |
| Vendors, storage and integrations | ||
| Send print files to Printful, Printify, Gelato or by email Print files ready email with download links to recipients you choose, no print vendor connections | Limited | Included |
| Send orders to Prodigi, SFTP or a webhook | Not included | Included |
| Cloud storage on S3, R2, Google Cloud or Azure | Not included | Included |
| Webhooks and GA4 or Meta Pixel event forwarding | Not included | Included |
| AI and collaboration | ||
| AI tools: background removal, upscaling and image generation | Not included | Included |
| AI copywriting suggestions in the designer | Not included | Included |
| Co-editing with share links, live cursors and comments | Not included | Included |
| Customer design edits after ordering | Not included | Included |
Upgrade
Upgrade to Visuaro - Product Designer for WooCommerce
Visuaro Pro is a separate plugin for print shops that need more. It includes everything in this free plugin and adds:
- AI tools: background removal, upscaling and image generation
- Co-editing with share links, live cursors and comments
- Conditional pricing rules by text, colours, area or quantity
- Print ready CMYK PDF/X-4 with ICC colour profiles
- DTF gang sheets, embroidery and cutter files
- Send print files to Printful, Printify, Gelato or by email